chest workout plan pdf
A structured chest workout plan PDF serves as a comprehensive guide, targeting the pectoralis major and minor muscles. It enhances strength, definition, and overall chest development while ensuring safety and proper form. This plan is designed for all fitness levels, providing clear exercise routines, sets, and reps to maximize results effectively. Perfect for those seeking a focused approach to building a stronger chest.
Overview of the Importance of Chest Workouts
Chest workouts are essential for building a strong, balanced upper body. They target the pectoralis major and minor muscles, enhancing overall physique and functional strength. A well-structured chest workout plan improves posture, reduces injury risk, and boosts athletic performance. Consistent chest training also contributes to a broader, more defined chest, which many consider aesthetically pleasing. Incorporating compound and isolation exercises ensures comprehensive muscle development. Regular chest workouts promote muscle balance and overall fitness, making them a cornerstone of any effective exercise routine.
Benefits of Using a Structured Chest Workout Plan
A structured chest workout plan ensures targeted muscle development, preventing injuries and boosting efficiency. It helps achieve fitness goals faster by focusing on compound and isolation exercises. Proper form guidance enhances safety, while dynamic stretching and mental preparation improve workout intensity. A well-organized plan promotes consistency, helping users stay motivated and track progress. Whether for beginners or advanced lifters, a structured plan supports balanced muscle growth and overall fitness aims, ensuring effective chest development.
Understanding Chest Anatomy for Effective Workouts
Understanding chest anatomy is essential for effective workouts; It focuses on the pectoralis major and minor muscles, ensuring exercises target these areas properly. This knowledge helps prevent injuries and boosts workout efficiency, making your chest exercises more effective and safer.
Major Chest Muscles: Pectoralis Major and Pectoralis Minor
The pectoralis major is the largest chest muscle, responsible for movements like push-ups and bench presses. It consists of the sternal head (chest area) and clavicular head (upper chest). The pectoralis minor, located beneath the pectoralis major, aids in movements such as forward elevation and shoulder rotation. Understanding these muscles helps in designing workouts that effectively target each area, ensuring balanced development and maximizing workout results. Proper engagement of these muscles is crucial for both strength and aesthetics.
Targeting Different Areas of the Chest
Effective chest workouts target the upper, lower, and middle chest muscles. The upper chest is engaged with incline bench presses, while the lower chest responds well to decline presses. The middle chest is worked with flat bench exercises. By adjusting bench angles and using exercises like dumbbell presses or cable flyes, you can isolate specific areas. This targeted approach ensures balanced development and prevents overtraining. A structured plan helps in focusing on each area effectively, maximizing results and achieving a well-defined chest. Proper form is essential for targeting the right muscles safely.
Best Chest Exercises for Maximum Results
The best chest exercises include bench presses, dips, and chest flyes. These movements target the pectoralis muscles effectively, promoting strength and muscle growth. Consistency yields optimal results.
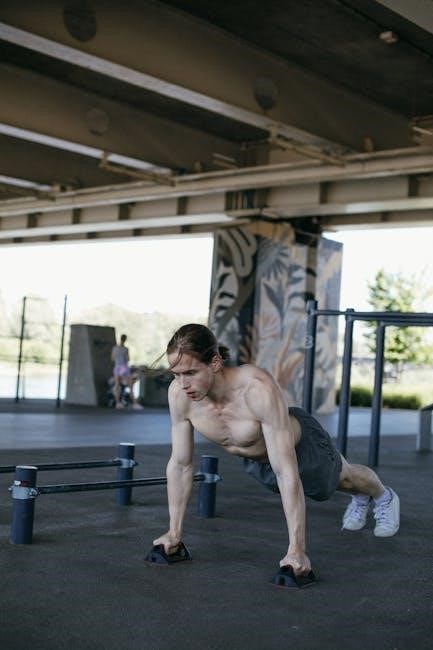
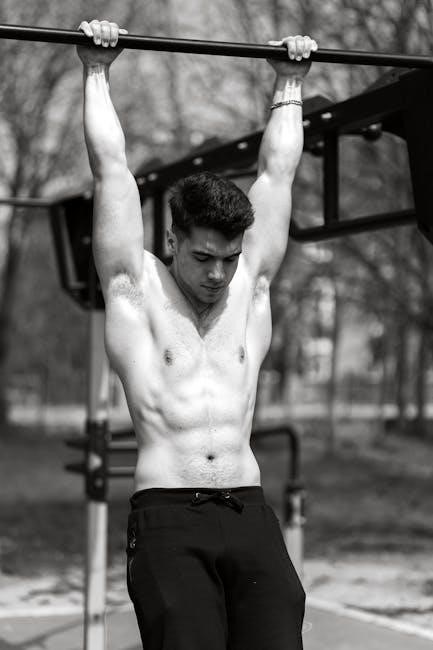
Compound Movements: Bench Press and Dips
Compound movements like the bench press and dips are essential for building chest muscle. The bench press targets the pectoralis major, triceps, and shoulders, while dips engage the lower chest and triceps. These exercises work multiple muscle groups simultaneously, making them highly effective for strength and muscle growth. Proper form is crucial to avoid injury. Variations, such as incline bench presses, can shift focus to different chest areas. Incorporating these movements into your routine ensures a well-rounded chest workout and maximizes progress. Consistency and progressive overload yield the best results.
Isolation Exercises: Chest Flyes and Cable Cross-Overs
Isolation exercises like chest flyes and cable cross-overs focus on targeting specific chest muscles. Chest flyes involve holding weights or cables and moving arms in a wide arc, emphasizing the pectoralis major. Cable cross-overs require pressing cables from a high position to the sides, isolating the chest and promoting balanced development. These exercises allow precise control over the movement, helping to correct muscle imbalances and enhance definition. They are versatile, with adjustable resistance, making them suitable for all fitness levels. Incorporating these isolation movements complements compound exercises for a well-rounded chest workout.
Warm-Up and Preparation for Chest Workouts
A proper warm-up and preparation routine are essential for chest workouts. Dynamic stretching enhances flexibility and prevents injury, while mental preparation ensures focus and intensity during training.
Dynamic Stretching to Prevent Injury
Dynamic stretching is a crucial pre-workout step to prevent chest injuries. It involves active movements like arm circles, chest opens, and torso twists. These exercises improve blood flow and flexibility, preparing the muscles for intense training. Incorporating dynamic stretches ensures optimal range of motion and reduces the risk of strains or pulls. Spend 5-10 minutes on dynamic stretches before starting your chest workout to enhance performance and safeguard your muscles. Consistency in this routine will lead to better workout outcomes and long-term injury prevention.
Mental Preparation for an Intense Workout
Mental preparation is key to maximizing your chest workout. Start by setting clear, achievable goals to stay focused and motivated. Visualization techniques can enhance your mindset, helping you envision success. Practice positive affirmations to build confidence and reduce pre-workout anxiety. Additionally, mindfulness exercises can improve concentration, ensuring you remain present during your training. A strong mental approach not only boosts performance but also helps maintain consistency and drive, making your chest workouts more effective and rewarding in the long run.

Safety Tips for Chest Workouts
Always maintain proper form, avoid lifting heavy weights without support, and use the right equipment to ensure safety and prevent injuries during chest workouts.
Proper Form to Avoid Injuries
Maintaining proper form is crucial during chest workouts to prevent injuries. Always engage your core, avoid arching your back, and ensure controlled movements. For bench presses, grip the bar slightly wider than shoulder-width and lower the weight to your chest slowly. During dips, keep your elbows close to your body and avoid deep descents if they cause discomfort. Use a weight that allows you to complete reps without sacrificing form. Avoid heavy weights without proper support or a spotter. Proper form ensures safety and effectiveness in your chest exercises.
Common Mistakes to Avoid
Common mistakes in chest workouts include using too much weight, neglecting full range of motion, and failing to target all muscle areas. Many lifters arch their backs or flare their elbows, risking injury. Overtraining without adequate rest can hinder growth. Ignoring proper breathing techniques is another error, as exhaling during effort is vital. Additionally, not incorporating variations in exercises can lead to muscle imbalances. Avoiding these mistakes ensures a safe and effective workout, promoting consistent progress and optimal chest development over time.
Sample Chest Workout Routine
A well-structured chest workout plan PDF offers routines like bench presses, incline dumbbell presses, and chest dips, ensuring balanced development and maximum engagement of chest muscles effectively.
Beginner-Friendly Routine
A beginner-friendly chest workout routine focuses on foundational exercises like push-ups, incline bench presses, and chest dips. Start with 3 sets of 8-12 reps for each exercise, ensuring proper form to avoid injury. Incorporate compound movements to build overall chest strength and endurance. Include isolation exercises, such as cable flyes, to target specific muscle groups. Rest for 60-90 seconds between sets and adjust weights as you progress. This routine provides a balanced approach to building a strong chest while minimizing strain on joints and muscles.
Advanced Routine for Muscle Building

An advanced chest workout routine focuses on intensity and variation to maximize muscle growth. Incorporate heavy compound lifts like bench presses and dips, aiming for 4-6 sets of 6-8 reps. Add incline and decline presses to target upper and lower chest muscles. Include advanced techniques such as drop sets, supersets, and partial reps to push past plateaus. Rest periods should be shorter, around 60-90 seconds, to maintain muscle tension. This routine is designed for experienced lifters seeking significant chest development and improved overall upper body strength.
Consistency is key to achieving chest workout goals. Tracking progress and adjusting routines ensures steady muscle growth and strength gains over time for long-term success.
Importance of Regular Chest Workouts
Regular chest workouts are essential for building strength, improving muscle balance, and enhancing overall physique. Consistent training helps develop the pectoralis major and minor muscles, boosting posture and athletic performance. It also promotes muscle growth and definition, contributing to a balanced upper body. Incorporating compound movements like bench presses and dips ensures comprehensive chest development. Over time, regular workouts improve muscle endurance and overall fitness, making daily activities easier. Staying committed to a structured chest workout plan ensures long-term progress and a stronger, healthier body.
Tracking Progress for Better Results
Tracking progress is crucial for achieving fitness goals. Regularly logging workouts, measuring muscle growth, and monitoring strength improvements helps maintain motivation. Use progress photos, videos, or a fitness journal to visualize changes. Celebrate small victories to stay motivated and adjust routines as needed. Consistent tracking ensures accountability, helping you stay on course with your chest workout plan. Over time, this practice leads to noticeable improvements in muscle definition and overall chest development, ensuring long-term success and a well-defined physique.