
requirement of a manual water pump
A manual water pump requires a durable pump mechanism, a water source, suction pipe, check valve, handle, and discharge hose for proper functionality and water extraction.
1.1 Definition and Purpose
A manual water pump is a device operated by human effort to extract water from a source. Its primary purpose is to provide a reliable, eco-friendly solution for accessing water in remote or off-grid settings. By moving a handle or lever, it creates suction to draw water, making it ideal for wells, irrigation, or emergency situations.
1.2 Historical Context and Evolution
Manual water pumps trace their origins to ancient civilizations, with early versions using simple mechanisms to lift water. Over centuries, designs evolved, incorporating levers, pistons, and valves. By the 17th century, more efficient models emerged, and by the 19th century, the development of the sucker rod pump revolutionized water extraction, making manual pumps indispensable for rural and emergency water supply needs.

Types of Manual Water Pumps
Manual water pumps are categorized into hand-operated, foot-operated, and lever-operated models, each designed for specific water extraction needs and offering unique operational advantages.
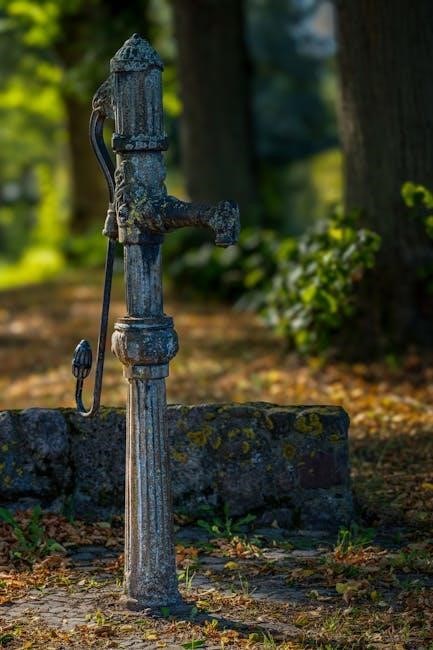
2.1 Hand Operated Pumps
Hand-operated pumps are portable, easy to use, and require minimal setup. They feature a simple handle mechanism that converts manual effort into water extraction. Ideal for small-scale needs, these pumps are commonly used in homes, gardens, and remote areas. Their compact design and reliability make them a practical choice for accessing water from shallow sources without electricity, ensuring consistent performance.
2.2 Foot Operated Pumps
Foot-operated pumps use a pedal mechanism to power water extraction, offering hands-free operation. They require a sturdy pedal, piston, and cylinder setup for efficient pumping. Ideal for larger water demands, these pumps are commonly used in households and farms. Their design ensures consistent water flow, making them suitable for shallow wells or storage tanks, providing reliable access to water without electricity.
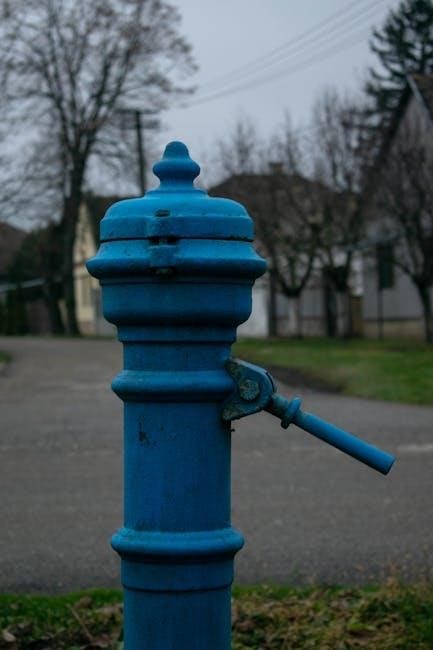
2.3 Lever Operated Pumps
Lever-operated pumps use a handle or lever to create suction and force water through a discharge pipe. They require a robust lever, piston, and check valve system for efficient operation. These pumps are ideal for shallow wells or small-scale water needs, offering simplicity and reliability. Their design allows for easy maintenance and is often used in rural or off-grid settings where electricity is unavailable.
Installation Requirements
Manual water pumps require a suitable location with access to a water source, proper alignment, and a stable base; Ensure the area is level and clear.
3.1 Components Needed for Installation
A manual water pump requires essential components like a durable pump mechanism, suction pipe, check valve, handle, and discharge hose. Additional tools include a drill, wrench, and fittings. Ensure all parts are compatible and suitable for the water source and intended use. Proper installation materials like seals and gaskets are crucial for preventing leaks.
3.2 Ideal Locations for Manual Water Pumps
Manual water pumps are ideal for rural areas, campsites, and emergency water supply systems. They are commonly used in gardens, small farms, and off-grid locations. Ensure the pump is installed on a stable, flat surface near the water source. Proper drainage and protection from elements are crucial. Regular maintenance ensures longevity and efficient water extraction.
Maintenance and Care
Regular lubrication of moving parts prevents wear and tear. Inspect for rust or damage, clean the pump regularly, and ensure all components are securely tightened for optimal performance.
4.1 Frequency of Maintenance
Regular maintenance ensures optimal performance. Daily checks for leaks or blockages are essential. Clean the pump weekly to prevent contamination. Lubricate moving parts monthly to reduce friction. Inspect valves and pipes quarterly for wear. Perform a full inspection annually, replacing worn components to maintain efficiency and longevity of the manual water pump system.
4.2 DIY Tips for Pump Maintenance
Regular DIY maintenance can extend the pump’s lifespan. Inspect all connections for tightness and leaks. Lubricate moving parts to reduce friction and wear. Clean the pump regularly to prevent sediment buildup. Replace worn or damaged seals and gaskets promptly; Always follow the manufacturer’s guidelines for maintenance procedures to ensure safety and optimal performance.
Advantages of Manual Water Pumps
Manual water pumps are reliable, cost-effective, and eco-friendly, providing water without electricity. They are ideal for off-grid settings, promoting self-sufficiency and reducing long-term energy costs.
5.1 Reliability in Off-Grid Settings
Manual water pumps are highly reliable in off-grid settings, functioning without electricity. Their simple design ensures consistent water supply, making them ideal for remote areas with limited resources. Portability and durability further enhance their usability in challenging environments, providing a sustainable solution for water access.
5.2 Cost-Effectiveness
Manual water pumps are a cost-effective solution for water extraction, offering low initial and maintenance costs. They eliminate the need for electricity, reducing long-term expenses. Their durability and simplicity ensure extended lifespan, making them a practical investment for both urban and rural settings. This affordability makes manual pumps an ideal choice for budget-conscious individuals and communities.
Challenges and Limitations
Manual water pumps require physical effort, limiting their efficiency for large-scale water needs. They also depend on user operation, reducing reliability in high-demand scenarios.
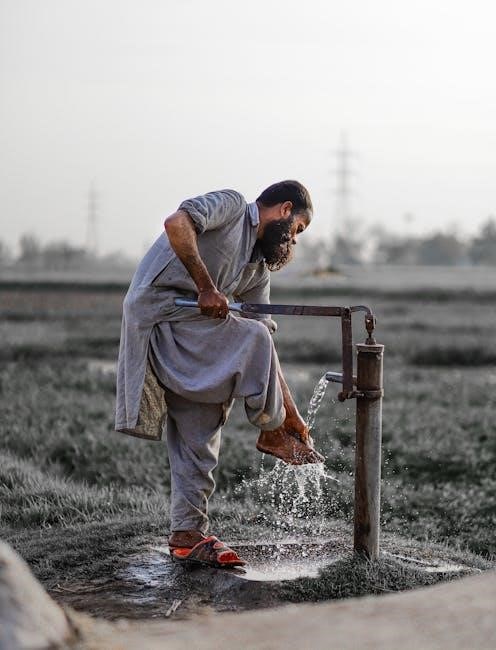
6.1 Physical Effort Required
Manual water pumps require significant physical effort, as users must repeatedly operate the handle or foot pedal to extract water. This continuous motion can be tiring, especially for extended periods or in high-demand situations. The physical labor involved makes these pumps less suitable for individuals with limited strength or mobility, highlighting a key limitation in their practical application.
6.2 Limited Water Output
Manual water pumps often have limited water output, making them less efficient for high-demand scenarios. Their slower extraction rate can be a drawback in emergencies or areas requiring substantial water supply. This limitation makes them less practical for large-scale use, emphasizing the need to consider water requirements when choosing a pump. Understanding this helps users make an informed decision.
Safety Considerations
Proper handling and training are essential for safe operation. Regular maintenance ensures all components function correctly, minimizing risks of accidents and ensuring reliable performance over time.
7.1 Proper Handling Techniques
Proper handling involves regular inspection of pump components, ensuring a firm grip on the handle, and maintaining proper posture to avoid strain. Operators should follow manufacturer guidelines, use correct leverage, and monitor water flow to prevent overexertion or equipment damage. Proper techniques ensure efficient operation and minimize wear and tear on the pump mechanism over time.
7.2 Preventing Accidents
Preventing accidents involves regular maintenance checks, ensuring all components are secure, and using proper handling techniques. Keep the area clear of obstacles to avoid tripping. Always follow manufacturer guidelines for operation and maintenance. Regular inspection of pipes and valves can prevent leaks or bursts, ensuring safe and reliable water extraction. Proper safety measures minimize risks and ensure longevity of the pump.
Cost and Budgeting
Manual water pumps require an initial investment for purchase and installation. Long-term savings are achieved through reduced energy costs and minimal maintenance expenses, ensuring cost-effectiveness.
8.1 Initial Investment
The initial cost of a manual water pump includes the pump mechanism, suction pipe, and discharge hose. Additional expenses may involve labor for installation and permits. Prices vary based on materials, with stainless steel or PVC options offering durability. Budgeting should also account for potential site preparation and inspection fees to ensure proper setup and compliance with local regulations.
8.2 Long-Term Savings
Manual water pumps offer significant long-term savings by eliminating electricity costs, reducing maintenance needs, and lasting for decades with proper care. Their energy-efficient design ensures low operational expenses, while durable materials minimize replacement costs. Additionally, they promote water conservation, further reducing resource consumption and long-term financial burdens, making them a cost-effective solution for sustainable water access.
Environmental Impact
Manual water pumps are eco-friendly, requiring no electricity, thus reducing carbon emissions and promoting sustainable water access. They encourage water conservation, making them a green solution for resource management.
9.1 Eco-Friendly Nature
Manual water pumps are inherently eco-friendly, as they operate without electricity, reducing carbon emissions and promoting sustainable water access. They rely solely on human effort, making them a green solution for water extraction. By minimizing energy consumption, these pumps support water conservation and reduce environmental impact, aligning with eco-conscious practices for a more sustainable future.
9.2 Sustainability Benefits
Manual water pumps offer significant sustainability benefits, including reduced energy consumption and reliance on non-renewable resources. They promote water conservation by encouraging efficient use and reduce long-term maintenance needs. Their simple design ensures durability, minimizing waste and the environmental impact of frequent replacements. This makes them a reliable, eco-conscious solution for sustainable water management and resource preservation.
- Reduces carbon footprint due to zero electricity use.
- Encourages water conservation through manual operation.
- Durable construction minimizes waste and replacements.
These pumps align perfectly with sustainable living practices, ensuring water access while preserving the environment.
Troubleshooting Common Issues
Manual water pumps may face issues like low water flow or handle resistance. Troubleshooting involves checking suction pipes, priming, and inspecting for worn parts. Regular lubrication and maintenance can prevent these issues, ensuring efficient water extraction.
10.1 Identifying Faults
Identifying faults in manual water pumps involves checking for common issues like low water flow, handle resistance, or leakage. Inspect suction pipes for blockages, ensure the pump is properly primed, and check for worn-out seals or valves. Regular maintenance and visual inspections can help detect problems early, preventing complete system failure and ensuring reliable water extraction.
10.2 Repair and Replacement
Repairing or replacing parts of a manual water pump involves diagnosing the issue and addressing it promptly. Replace worn-out seals, valves, or handles with original equipment manufacturer (OEM) parts. Clear blockages in suction pipes and ensure proper alignment of moving components. If the pump is beyond repair, consider replacing it entirely to maintain efficiency and reliability in water extraction.
Future Trends and Innovations
Future manual water pumps may integrate smart technology for monitoring water levels and flow rates, offering eco-friendly designs and energy-efficient solutions to enhance sustainability and performance.
11.1 Integration with Technology
Manual water pumps are evolving with smart technology, integrating sensors for real-time water level monitoring and IoT connectivity for remote control. Eco-friendly designs and energy-efficient mechanisms are being developed to enhance performance while reducing environmental impact, ensuring sustainable water access in various settings.
11.2 Improvements in Design
Modern manual water pumps feature ergonomic handles, adjustable pumping speeds, and lightweight, durable materials for enhanced usability. Advanced designs incorporate smart sensors for monitoring water flow and pressure. Innovations like modular components and corrosion-resistant coatings improve longevity. These improvements ensure efficiency, reliability, and reduced maintenance, making manual pumps more user-friendly and adaptable to various environments and needs.
Manual water pumps are reliable, cost-effective solutions ideal for off-grid settings. They provide sustainable water access and are environmentally friendly, making them essential for remote and emergency needs.
12.1 Summary of Key Points
A manual water pump is a vital tool for water extraction, requiring essential components like a durable mechanism, suction pipe, check valve, and discharge hose. It ensures reliable water access in off-grid settings, offering cost-effectiveness and eco-friendly operation. Ideal for remote and emergency use, it provides sustainable solutions while minimizing environmental impact, making it a practical choice for various water needs.
12.2 Final Recommendations
Investing in a high-quality manual water pump ensures long-term reliability and efficiency. Regular maintenance and proper installation are crucial for optimal performance. Consider energy efficiency and eco-friendly designs to minimize environmental impact. Assess water needs to choose the right pump size and type, ensuring cost-effectiveness and sustainability for both residential and off-grid applications.