PDF

an introduction to cladograms and trees answer key pdf

Cladograms are tree-like diagrams illustrating evolutionary relationships among organisms based on shared derived traits․ They are essential in evolutionary biology for visualizing genetic connections and educational purposes․

1․1․ Definition and Purpose

A cladogram is a tree-like diagram that represents evolutionary relationships among organisms based on shared derived traits․ These diagrams are rooted in phylogeny, the study of evolutionary history, and are used to visualize how species diverge from common ancestors․ The primary purpose of a cladogram is to illustrate genetic connections and identify groups of organisms that share specific characteristics․ It serves as a tool for understanding evolutionary relationships, aiding intaxonomy, and educating students about biodiversity and evolution․ Cladograms are essential in both research and educational settings for simplifying complex evolutionary data․

1․2․ Importance in Evolutionary Biology

Cladograms are vital tools in evolutionary biology as they visually represent evolutionary relationships and genetic connections among organisms․ By illustrating shared derived traits, they help scientists trace the divergence of species from common ancestors․ This makes cladograms indispensable for understanding evolutionary history, comparative anatomy, and genetic studies․ They also aid in identifying patterns of speciation and adaptation․ Furthermore, cladograms facilitate education by simplifying complex evolutionary concepts, making them accessible to students and researchers alike․ Their ability to organize biodiversity and track evolutionary changes underscores their significance in advancing biological knowledge and research․

1․3․ Brief History and Development

The concept of cladograms originated in the 19th century with early evolutionary ideas, notably inspired by Charles Darwin’s work․ The term “cladistics” emerged in the 1960s, formalizing the method of grouping organisms by shared derived traits․ Over time, cladograms evolved from simple diagrams to complex, computationally generated trees․ Advances in molecular biology and phylogenetic analysis have refined their construction, enabling precise depictions of evolutionary relationships․ Today, cladograms are integral to systematics, taxonomy, and evolutionary research, reflecting centuries of scientific progress in understanding biodiversity and genetic connections․

Structure and Components of Cladograms

Cladograms consist of nodes and branches, representing evolutionary divergences․ Nodes indicate common ancestors, while branches show relationships․ Shared derived traits determine groupings, forming a hierarchical structure․

2․1․ Nodes and Branches

Nodes in cladograms represent common ancestors or divergence points, while branches depict evolutionary relationships․ Each node connects branches, showing how species diverge․ Shared derived traits determine the structure, with branches indicating genetic connections․ The arrangement reflects hierarchical relationships, aiding in visualizing evolutionary pathways․ Nodes and branches together form the backbone of cladograms, making them essential for understanding phylogenetic connections and ancestral relationships among organisms․ This structure allows biologists to trace evolutionary history and identify shared characteristics․ The clarity of nodes and branches makes cladograms a powerful tool in systematic biology and education․

2․2․ Root and Tips

The root of a cladogram represents the most ancient common ancestor, anchoring the tree․ Tips are the endpoints, typically representing individual species or taxa․ The root is often placed at the bottom, with branches extending upward to the tips․ This structure visually organizes evolutionary relationships, showing how species diverge over time․ The placement of tips reflects genetic proximity, with closely related species appearing near each other․ The root and tips collectively provide a clear framework for interpreting evolutionary history and tracing lineage․ This hierarchical arrangement is fundamental to cladogram interpretation in biology and taxonomy․

2․3․ Shared Derived Traits

Shared derived traits, or synapomorphies, are unique characteristics shared by a group of organisms and their common ancestor․ These traits are crucial for constructing cladograms, as they define clades (distinct groups)․ For example, hair in mammals or feathers in birds are shared derived traits․ They distinguish one clade from another, indicating evolutionary relationships․ The presence of these traits helps determine how closely related species are, forming branches in the cladogram․ Shared derived traits are fundamental in phylogenetic analysis, as they reveal patterns of divergence and common ancestry among organisms․ They are essential for accurate tree construction and interpretation․

Reading and Interpreting Cladograms

Reading cladograms involves analyzing evolutionary relationships, focusing on shared derived traits and branch points․ This helps identify common ancestors and determine how closely species are related․

3․1․ Understanding Evolutionary Relationships

Cladograms visually represent evolutionary relationships by grouping organisms based on shared derived traits, showing how species diverge from common ancestors․ Each branch indicates a evolutionary split, while nodes mark points of shared characteristics․ This structure helps reconstruct evolutionary histories, making complex relationships more accessible for analysis and education․ By examining the tree, one can trace how traits evolve and identify patterns of diversification among organisms․ This method is fundamental in biology for understanding biodiversity and the connections between different species over time․

3․2․ Identifying Common Ancestors

Cladograms help identify common ancestors by examining shared derived traits at branching points․ Nodes represent points where species diverge from a shared ancestor, with branches indicating evolutionary paths․ The closer two species are to a common node, the more recently they shared an ancestor․ This hierarchical structure allows researchers to trace evolutionary lineages and pinpoint the most recent common ancestor for any group․ By analyzing these relationships, scientists can reconstruct the evolutionary history of organisms and understand how traits have evolved over time․

3․3․ Determining Closely Related Species

Cladograms reveal closely related species by their proximity on the tree․ Species sharing more derived traits are placed closer together, indicating a recent common ancestor․ The number of shared traits determines their relatedness, with fewer differences suggesting closer ties․ By analyzing branch points and shared characteristics, researchers can identify sister taxa and reconstruct evolutionary pathways․ This method helps clarify relationships, making it easier to understand how species diverged over time․ The structure of the cladogram provides a visual guide to trace these connections accurately․

Cladograms vs․ Phylogenetic Trees

Cladograms and phylogenetic trees both depict evolutionary relationships but differ in complexity․ Cladograms focus on shared traits; phylogenetic trees often include data like branch lengths․

4․1․ Similarities and Differences

Cladograms and phylogenetic trees share the goal of depicting evolutionary relationships but differ in detail․ Both are tree-like diagrams showing how species diverge, but cladograms focus on shared derived traits without implying time scales․ Phylogenetic trees often include branch lengths, representing genetic distance or time since divergence․ While cladograms are typically dichotomous, phylogenetic trees can have polytomies․ Cladograms are simpler, emphasizing trait-based relationships, whereas phylogenetic trees provide more data, such as molecular sequences or fossil records․ Despite these differences, both tools are essential for understanding evolutionary connections and are sometimes used interchangeably in educational contexts․

4․2․ When to Use Each

Cladograms are ideal for visually representing evolutionary relationships based on shared traits, making them perfect for educational purposes and introductory studies․ They simplify complex relationships without implying time scales․ Phylogenetic trees, however, are better suited for detailed analyses, such as molecular studies or historical reconstructions, as they incorporate branch lengths and genetic distances․ Use cladograms when focusing on trait-based connections, and phylogenetic trees when precise timing or genetic data is essential․ The choice depends on the study’s goals, with cladograms offering clarity for foundational concepts and trees providing depth for advanced research․

Constructing a Cladogram

Cladograms are built by analyzing shared traits, arranging species into groups, and creating branches that reflect evolutionary relationships․ Data collection and rooting are essential steps․

5․1․ Data Collection and Analysis

Constructing a cladogram begins with gathering data on shared traits, such as morphology, genetics, or fossils․ Researchers analyze these traits to identify patterns and relationships․ Statistical methods, like maximum parsimony, are used to determine the most likely evolutionary connections․ The data is then organized to reflect shared derived characteristics, ensuring accuracy in representing evolutionary relationships․ This step is crucial for building a reliable cladogram, as it forms the foundation for the tree’s structure and branching patterns․

5․2․ Building the Tree

Building the tree involves organizing the data into a hierarchical structure that reflects evolutionary relationships․ Shared derived traits are used to group organisms, forming internal nodes․ Branches represent evolutionary pathways, with lengths sometimes indicating divergence time․ The tree is constructed from root to tips, ensuring accuracy in representing genetic connections․ Methods like maximum parsimony or likelihood guide the structure․ The final tree visually depicts species relationships, aiding in understanding evolutionary history and connections․ Accuracy is critical to ensure the tree reflects true phylogenetic relationships․

5․3․ Rooting the Tree

Rooting the tree involves designating a specific node as the common ancestor, providing a clear evolutionary starting point․ This is typically done using an outgroup—a species or group known to be outside the studied clade․ The outgroup helps identify the root, ensuring the tree reflects accurate evolutionary relationships․ Rooting is crucial for understanding the direction of trait divergence and the timing of evolutionary events․ Incorrect rooting can mislead interpretations of evolutionary pathways, emphasizing the need for careful analysis․ This step ensures the tree accurately represents evolutionary history and connections․

Applications of Cladograms in Biology

Cladograms are vital in systematics, taxonomy, comparative anatomy, genetics, biogeography, and ecology, aiding in understanding evolutionary relationships, species classification, and trait distribution across diverse biological disciplines․

6․1․ Systematics and Taxonomy

Cladograms are instrumental in systematics and taxonomy, aiding in the classification of organisms based on shared derived traits․ By visually representing evolutionary relationships, they help resolve disputes in species groupings and clarify taxonomic hierarchies․ This tool is essential for organizing biodiversity, as it provides a clear framework for understanding how organisms are related and how traits have evolved over time․ Cladograms also assist in reconstructing evolutionary histories, making them a cornerstone in modern systematic biology and taxonomy․

They enable researchers to identify patterns of divergence and convergence, informing the development of robust classification systems․ This application is vital for maintaining accurate and consistent biological nomenclature․

6․2․ Comparative Anatomy and Genetics

Cladograms are invaluable in comparative anatomy and genetics, as they map evolutionary relationships through shared traits․ By analyzing anatomical structures and genetic sequences, scientists can trace how traits evolved across species․ This helps identify homologous features and reconstruct evolutionary pathways․ Genetic data, such as DNA sequences, often supports anatomical observations, providing a robust framework for understanding evolutionary changes․

These tools also reveal patterns of divergence and convergence, aiding in the study of how different species adapt to their environments․ Molecular phylogenetics further enhances this by linking genetic variations to evolutionary timelines․

6․3․ Biogeography and Ecology

Cladograms play a crucial role in biogeography by mapping the geographic distribution of species through evolutionary time․ They help trace how species dispersed and colonized new regions, linking their evolutionary history to environmental changes․ In ecology, cladograms reveal how species adapt to ecological niches and interact within ecosystems․ By analyzing shared traits, scientists can infer how species evolved in response to environmental pressures․ This integration of phylogeny and geography aids in understanding biodiversity patterns and conservation priorities, making cladograms a powerful tool in ecological and biogeographical studies․

Common Misconceptions About Cladograms

A common misconception is that cladograms represent linear evolutionary progressions, when they actually depict branching relationships based on shared derived traits․

7;1․ Assumptions and Limitations

Cladograms rely on the assumption that shared derived traits indicate common ancestry, but they may not account for convergence or reversals․ Limited fossil records can lead to incomplete relationships, and assumptions about trait evolution may introduce bias․ Additionally, cladograms simplify complex evolutionary histories, potentially overlooking nuanced divergence events․ These limitations highlight the need for careful interpretation and integration of multiple data sources to ensure accuracy in phylogenetic reconstructions․

7․2․ Avoiding Interpretation Errors

To avoid misinterpreting cladograms, it’s crucial to understand their structure and assumptions․ Common errors include assuming branch lengths represent time or evolutionary rates, which they often do not․ Nodes represent shared traits, not time points, and terminal branches signify extant species․ Misidentifying sister taxa or overlooking shared derived traits can lead to incorrect evolutionary conclusions․ Users should focus on relative positions and shared characteristics rather than absolute distances․ Cross-verifying with additional data, like genetic or fossil evidence, helps minimize errors and ensures accurate evolutionary inferences from cladograms․

Advanced Topics in Cladogram Analysis

Advanced topics in cladogram analysis include molecular phylogenetics, Bayesian methods, and Maximum Likelihood approaches, enhancing the accuracy of evolutionary relationship determination․

8․1․ Molecular Phylogenetics

Molecular phylogenetics uses genetic data to construct cladograms, providing precise evolutionary relationships․ DNA and protein sequences are analyzed to infer shared ancestry and divergence times․ This method enhances accuracy by focusing on genetic markers like mitochondrial genes or nuclear DNA․ Advanced computational techniques, such as Bayesian inference and Maximum Likelihood, are employed to process large datasets․ Molecular phylogenetics has revolutionized the field, enabling researchers to resolve complex evolutionary histories and identify cryptic species․ It integrates with traditional morphology-based approaches, offering a comprehensive understanding of biodiversity and evolutionary processes․

8․2․ Bayesian and Maximum Likelihood Methods

Bayesian and Maximum Likelihood methods are statistical approaches used in molecular phylogenetics to infer evolutionary relationships․ Bayesian methods incorporate prior probabilities and Markov chain Monte Carlo simulations to estimate posterior probabilities of tree topologies․ Maximum Likelihood, conversely, identifies the tree that maximizes the likelihood of observing the data under a specific evolutionary model․ Both methods are widely used for reconstructing phylogenetic trees from DNA or protein sequences․ They provide robust frameworks for testing hypotheses and quantifying uncertainty in evolutionary inferences, making them essential tools in modern phylogenetic analysis and tree reconstruction․

Cladograms in Educational Settings

Cladograms are valuable tools in education, helping students visualize evolutionary relationships and understand phylogeny․ They simplify complex concepts, fostering critical thinking and scientific literacy through interactive activities․

9․1․ Teaching Evolutionary Concepts

Cladograms are powerful tools for teaching evolutionary concepts, as they visually represent relationships between organisms․ By analyzing shared derived traits, students can grasp phylogeny and divergence events․ These diagrams simplify complex evolutionary processes, making them accessible to learners․ They encourage critical thinking about common ancestry and species divergence․ Interactive activities, such as constructing cladograms, deepen understanding of evolutionary principles․ This approach aligns with educational standards, fostering scientific literacy and inquiry-based learning․ Cladograms also help students connect genetics, anatomy, and ecology, providing a holistic view of life’s diversity and evolutionary history․

9․2․ Student Activities and Worksheets

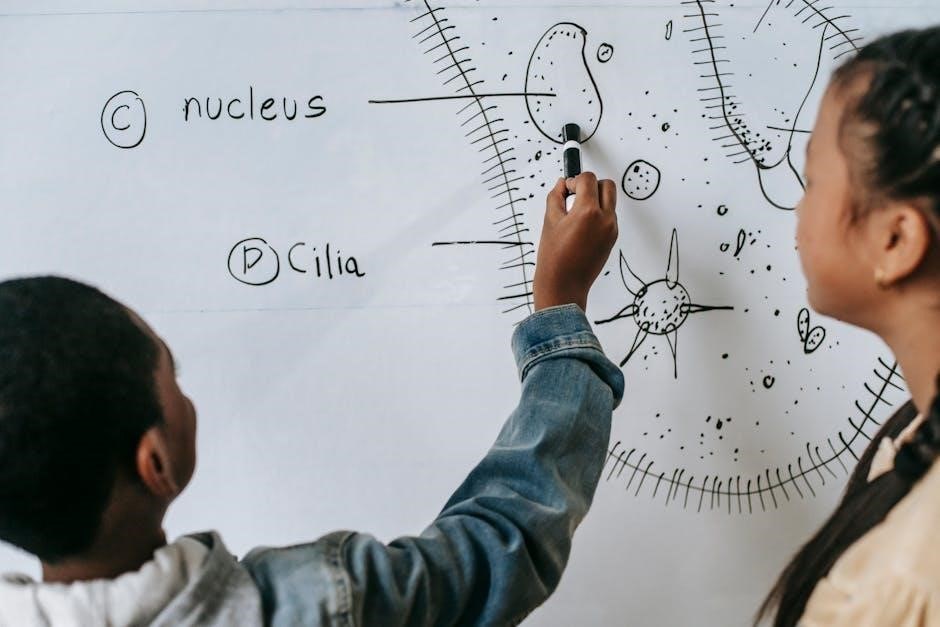
Engaging student activities and worksheets are essential for mastering cladogram analysis․ These resources include constructing cladograms from character tables, identifying shared traits, and answering questions based on diagrams․ Worksheets often feature labeled and unlabeled trees for practice, ensuring students understand evolutionary relationships․ Activities like matching traits to branches or coloring diagrams enhance visual learning․ Quizzes and case studies further reinforce concepts․ Answer keys provide immediate feedback, helping students assess their understanding․ Interactive exercises, such as creating cladograms in groups, foster collaboration and critical thinking, making complex evolutionary concepts more accessible and engaging for learners of all levels․

Answer Key for Cladogram Analysis

The answer key provides sample questions and solutions, helping users verify their understanding of cladogram interpretation․ It clarifies common misconceptions and strengthens analytical skills through practical examples․

10․1․ Sample Questions and Solutions

Sample questions and solutions guide users in analyzing cladograms, addressing common queries about evolutionary relationships․ For instance, “Which species shares the most recent common ancestor with species A?” The solution explains how to trace shared traits․ Another question asks, “What derived trait defines the clade containing species B and C?” The answer highlights the unique characteristic․ These exercises help clarify misunderstandings and improve interpretation skills, ensuring accurate conclusions about phylogenetic connections․

10․2․ Common Student Mistakes

Students often misinterpret cladograms by assuming branch lengths represent time, leading to incorrect evolutionary timelines․ Many confuse shared derived traits with convergent evolution․ Others mistakenly identify the root as the most evolved species rather than the common ancestor․ Some overlook the importance of node positions, misjudging which species are more closely related․ Additionally, students may fail to recognize that cladograms do not always show extinct species, leading to incomplete evolutionary pictures․ Addressing these errors enhances understanding and improves accurate phylogenetic interpretations․

Cladograms remain vital tools in evolutionary biology, offering insights into species relationships․ Advances in molecular techniques and computational methods promise to enhance their accuracy and applicability in future research․

11․1․ The Role of Cladograms in Modern Biology

Cladograms are indispensable tools in modern biology, serving as visual representations of evolutionary relationships․ They are widely used in systematics, genetics, and biogeography to organize species based on shared traits․ By illustrating phylogenetic connections, cladograms aid in understanding biodiversity and tracing evolutionary pathways․ Their application extends to molecular phylogenetics, where genetic data refine tree structures․ Additionally, cladograms are integral in comparative anatomy and ecology, helping scientists explore adaptations and environmental interactions․ Their versatility makes them essential for both research and education, providing a clear framework for interpreting complex evolutionary data and fostering deeper insights into life’s diversity․

11․2․ Emerging Trends in Phylogenetic Research

Phylogenetic research is advancing rapidly, with emerging trends focusing on integrating molecular data and computational methods․ Bayesian inference and maximum likelihood techniques are becoming standard for constructing robust cladograms․ Advances in genomics and next-generation sequencing enable high-resolution analyses of evolutionary relationships․ Additionally, the incorporation of biogeographical and temporal data provides deeper insights into species diversification․ Machine learning algorithms are also being explored to handle large datasets efficiently․ These trends enhance the accuracy and complexity of phylogenetic trees, offering new perspectives on evolutionary history and biodiversity․ Such innovations underscore the dynamic and evolving nature of cladogram-based research in modern biology․

PDF

fillable pdf character sheet 5e

Fillable PDF character sheets for D&D 5e streamline character creation and management‚ allowing players to input details like name‚ class‚ and equipment efficiently․ They enhance organization and accessibility‚ making it easier to track stats‚ spells‚ and backstory in a digital format․ These sheets are particularly popular for their convenience and customization options‚ catering to both new and experienced players․

Key Features of Fillable PDFs

Fillable PDFs offer digital tools for efficient character management‚ including interactive fields‚ auto-calculation‚ and customizable sections for stats‚ spells‚ and equipment‚ enhancing gameplay organization․

2․1 Overview of Included Sections

Fillable PDFs for D&D 5e typically include comprehensive sections for character details‚ such as name‚ class‚ race‚ and background․ Ability scores‚ skills‚ and equipment are prominently featured‚ with dedicated areas for spells‚ features‚ and traits․ Backstory‚ appearance‚ and personality sections allow for narrative depth‚ while fields for allies‚ enemies‚ and treasure streamline organization․ Many sheets also include notes pages for campaign-specific details․ These sections ensure all character information is centralized and easily accessible‚ making it simple to reference during gameplay․

2․2 Interactive Elements: Dropdowns and Checkboxes

Fillable PDFs for D&D 5e often include interactive elements like dropdowns and checkboxes to enhance usability․ Dropdowns allow quick selection of options such as race‚ class‚ or background‚ while checkboxes simplify skill and equipment choices․ These elements reduce manual input and minimize errors․ For example‚ selecting a race might automatically populate ability score modifiers․ Checkboxes for skills or tools help track proficiencies without manual entry․ These features streamline character creation and maintenance‚ ensuring a seamless experience for players and Dungeon Masters alike․ They are particularly useful for new players unfamiliar with the game’s mechanics․

2․3 Auto-Calculation Features

Fillable PDFs for D&D 5e often include auto-calculation features that simplify complex computations․ These features automatically determine ability score modifiers‚ skill bonuses‚ and attack/damage calculations based on inputted values․ For instance‚ entering ability scores instantly updates related modifiers‚ saving time and reducing errors․ Similarly‚ equipment selections can trigger automatic adjustments to armor class or initiative․ These calculations ensure accuracy and efficiency‚ allowing players to focus on character development rather than manual math․ Auto-calculation is especially beneficial during character creation and leveling up‚ making the process smoother and more enjoyable for both new and experienced players․

Where to Find Fillable PDFs

Fillable PDFs for D&D 5e can be found through official sources like Wizards of the Coast and community platforms such as Reddit and D&D Beyond․

3․1 Official Sources from Wizards of the Coast

Wizards of the Coast provides official fillable PDF character sheets for D&D 5e‚ available on their website․ These sheets are designed to be user-friendly‚ offering structured sections for character stats‚ equipment‚ and backstory․ The official PDFs are well-formatted and compatible with both digital and physical play․ Players can easily input and save their character details‚ making them a reliable choice for both new and experienced players․ These official sheets are regularly updated and offer a professional design‚ ensuring compatibility with the latest 5e rules and expansions․

3․2 Community and Third-Party Websites

Community and third-party websites offer a wide variety of fillable PDF character sheets for D&D 5e‚ often created by passionate fans and designers․ Platforms like Reddit‚ D&D Beyond‚ and DriveThruRPG host numerous custom sheets‚ many of which are free or low-cost․ These sheets frequently include unique designs‚ custom graphics‚ and additional features tailored to specific playstyles․ Fans also share their own creations‚ fostering a collaborative community․ While not officially endorsed‚ these sheets are popular for their diversity and creativity‚ offering players more options to personalize their characters․ They often include innovative layouts and features not found in official versions․

How to Create Your Own Fillable PDF

To create a fillable PDF character sheet‚ start by designing the layout using software like Adobe Acrobat or free alternatives․ Add text boxes and checkboxes for data entry‚ ensuring fields are labeled clearly․ Implement auto-calculation features for stats like ability scores․ Test the PDF with fellow players to identify and fix any issues․ Iterate on feedback to refine functionality and appearance․ Finally‚ share your custom sheet with the D&D community‚ ensuring compliance with copyright rules if using official content․

4․1 Tools and Software Needed

Creating fillable PDFs requires specialized tools․ Adobe Acrobat Pro is the industry standard‚ offering robust form-creation and editing features․ For budget-friendly options‚ PDFescape and LibreOffice Draw provide basic form-building capabilities․ Online platforms like Google Docs‚ paired with add-ons‚ can help design initial layouts․ Tools like Formstack or JotForm are excellent for creating interactive forms‚ which can then be exported as PDFs․ Open-source alternatives such as PDFMod or Master PDF Editor also support form creation‚ though with fewer advanced features․ Choose the tool that aligns with your design complexity and budget to craft a functional and visually appealing fillable character sheet․

4․2 Design and Development Process

Designing a fillable PDF begins with planning the layout and structure based on D&D 5e character sheet requirements․ Use design tools like Adobe Acrobat or PDFescape to create form fields for character details such as name‚ class‚ and ability scores․ Add interactive elements like dropdowns for race and class selections․ Ensure proper spacing and organization to enhance usability․ Test the PDF by filling it out to identify and fix any issues․ Refine the design based on feedback‚ ensuring compatibility across devices․ Finally‚ save and distribute the PDF‚ making it easy for players to use and customize for their characters․

Advantages of Using Fillable PDFs

Fillable PDFs streamline character creation and management‚ offering efficiency‚ organization‚ and accessibility․ They simplify data entry‚ reduce errors‚ and enhance collaboration‚ making D&D 5e gameplay more enjoyable․

5․1 Efficiency in Character Creation

Fillable PDFs significantly streamline the character creation process‚ allowing players to input details swiftly and efficiently․ With predefined fields and auto-calculation features‚ players can focus on crafting their character’s backstory and abilities rather than tedious manual calculations․ The ability to save and revisit the sheet ensures no progress is lost․ This digital approach reduces errors and saves time‚ making it ideal for both new and experienced players․ The organized layout and interactive elements further enhance the overall efficiency‚ ensuring a smoother and more enjoyable character creation experience for everyone involved in the game․

5․2 Enhanced Organization and Accessibility

Fillable PDF character sheets offer unparalleled organization by keeping all character details in one place‚ reducing clutter and making information easily searchable․ Digital storage ensures accessibility across devices‚ perfect for remote games or on-the-go planning․ The ability to quickly locate stats‚ spells‚ and backstory eliminates the chaos of paper sheets․ Auto-save features and cloud storage further enhance convenience‚ ensuring your character’s data is secure and readily available․ This level of organization and accessibility simplifies gameplay‚ allowing players to focus on storytelling and strategy rather than managing paperwork․

5․3 Facilitating Collaboration

Fillable PDF character sheets enhance collaboration by allowing easy sharing and real-time editing among players and DMs․ Digital formats enable seamless file distribution via email or cloud storage‚ ensuring everyone has the latest version․ Players can independently update their characters‚ reducing the need for in-person meetings․ Additionally‚ shared access facilitates coordination for party dynamics‚ such as dividing treasure or planning strategies․ This digital collaboration streamlines communication and keeps the group aligned‚ making it easier to manage complex campaigns and maintain a cohesive story․ It also empowers DMs to review and adjust characters efficiently‚ fostering a more organized and connected gaming experience․

Popular Tools for Editing and Creating Fillable PDFs

Adobe Acrobat‚ PDFescape‚ and Google Docs are popular tools for creating and editing fillable PDFs‚ offering features like form design‚ text editing‚ and collaboration capabilities․

6․1 Adobe Acrobat

Adobe Acrobat is a powerful tool for creating and editing fillable PDFs‚ offering robust features for form design‚ text editing‚ and interactive elements․ Its user-friendly interface allows for easy creation of form fields‚ checkboxes‚ and dropdowns‚ essential for D&D character sheets․ Acrobat also supports advanced features like conditional logic and calculations‚ enabling auto-filling of stats and skill bonuses․ The ability to save and share forms securely makes it a top choice for both creators and players․ While it requires a subscription‚ Acrobat’s versatility and compatibility across platforms make it a premier option for professional-quality fillable PDFs․

6․2 PDFescape and Other Free Tools

PDFescape is a popular free tool for creating and editing fillable PDFs‚ offering basic yet effective features for designing character sheets․ It allows users to add form fields‚ checkboxes‚ and text boxes‚ making it ideal for D&D 5e character creation․ While it lacks advanced features like auto-calculation‚ its simplicity and accessibility make it a great option for those on a budget․ Other free tools like Smallpdf and PDFarranger also provide limited but useful functionality for editing and customizing PDFs․ These tools are perfect for casual users who need basic fillable forms without the cost of professional software․

6․3 Google Docs and Script Plugins

Google Docs and script plugins offer versatile tools for creating and managing fillable PDF character sheets for D&D 5e․ Google Docs allows users to design and share character sheets collaboratively‚ while script plugins like Autocrat and formRanger enhance functionality․ These tools can automate tasks such as stat calculations and inventory tracking‚ streamlining character creation․ They also enable real-time collaboration‚ making it easier for players and DMs to work together․ While not as robust as professional software‚ Google Docs and its plugins provide a cost-effective and accessible solution for creating and editing fillable PDFs‚ ideal for both casual and experienced players․

Challenges in Using Fillable PDFs

Fillable PDFs for D&D 5e can face compatibility issues across devices and software․ Layout restrictions may limit design flexibility‚ and some features might not function as intended․

7․1 Technical Requirements and Compatibility

Fillable PDFs for D&D 5e require specific software‚ like Adobe Acrobat‚ to function properly․ Compatibility issues arise across devices and platforms‚ potentially causing formatting errors․ Some interactive elements may not work universally‚ and complex layouts can slow performance․ Ensuring your PDF reader supports form filling is essential․ Additionally‚ file size and security settings can impact usability․ To avoid issues‚ use compatible tools and test the PDF across devices before use․

7․2 Layout and Design Limitations

Fillable PDFs for D&D 5e often face layout and design constraints‚ as complex designs can lead to misalignment or performance issues․ Some templates may not adapt well to different screen sizes‚ affecting readability․ Additionally‚ excessive interactive elements can clutter the interface‚ making navigation difficult․ Designing custom layouts requires advanced tools‚ and modifications to existing templates can be challenging․ These limitations highlight the importance of balancing functionality with aesthetics to ensure usability and efficiency for players and Dungeon Masters alike․

7․3 Copyright and Legal Considerations

Fillable PDF character sheets for D&D 5e must navigate copyright and legal issues‚ as official materials are protected by Wizards of the Coast․ Using or modifying official content requires adherence to their terms of use․ Fan-made and third-party sheets may infringe on intellectual property rights if distributed without proper authorization․ Ensure any custom or fillable PDFs comply with copyright laws or obtain necessary permissions to avoid legal repercussions․

Customization Options for Your Character Sheet

Enhance your character sheet with custom graphics‚ themes‚ and layouts to personalize your D&D 5e experience․ Modify fields to suit your playstyle and aesthetic preferences․

8․1 Adding Custom Graphics and Themes

Enhance your fillable PDF character sheet with custom graphics and themes to reflect your character’s unique identity․ Players can add personal artwork‚ class-specific designs‚ or official D&D 5e illustrations․ Themes range from medieval fantasy to modern aesthetics‚ allowing for a tailored visual experience․ Custom graphics can include character portraits‚ intricate borders‚ or emblematic symbols‚ making each sheet visually distinct․ Tools like Adobe Acrobat or free editors enable easy integration of images and fonts‚ ensuring compatibility with form-fillable fields․ This feature empowers creativity‚ transforming a functional tool into a personalized keepsake for your D&D 5e adventures․

8․2 Modifying Fields and Layouts

Modify fields and layouts in your fillable PDF character sheet to tailor it to your needs․ Add‚ remove‚ or rename fields to suit your character’s unique requirements․ Adjust layouts to improve readability or aesthetics‚ ensuring essential information is prominently displayed․ Use tools like Adobe Acrobat or PDFescape to edit form fields and rearrange sections․ This customization allows for a more personalized and organized character sheet‚ enhancing usability during gameplay․ Players and DMs can adapt the design to focus on key attributes‚ spells‚ or equipment‚ making the sheet both functional and visually appealing for D&D 5e campaigns․

Community Contributions and Resources

The D&D community offers extensive resources‚ including fan-made fillable PDFs‚ translations‚ and innovative designs․ Players and creators share customizable sheets‚ ensuring accessibility and fostering collaboration worldwide․

9․1 Fan-Made Sheets and Innovations

Fan-made fillable PDFs for D&D 5e have revolutionized character creation‚ offering unique designs and functionalities․ Created by enthusiasts‚ these sheets often include customizable layouts‚ intricate artwork‚ and specialized sections for specific playstyles․ Innovations such as dynamic auto-calculation‚ embedded spell databases‚ and conditional formatting enhance usability․ Many creators share their work for free‚ fostering a vibrant community․ These sheets cater to diverse preferences‚ from minimalistic designs to elaborate themes․ By incorporating player feedback‚ fan-made sheets continuously evolve‚ providing tailored solutions that official sheets may not offer․ This collaborative spirit enriches the D&D experience‚ making character management both efficient and enjoyable․

9․2 Translations and Multilingual Support

Fillable PDF character sheets for D&D 5e are now available in multiple languages‚ thanks to community efforts and official translations․ Players worldwide can access sheets in languages like Russian‚ Spanish‚ and French‚ ensuring accessibility․ These translations maintain the original structure and functionality‚ including fillable fields and auto-calculation features․ Multilingual support fosters inclusivity‚ allowing international players to enjoy the game seamlessly․ Many fan-made translations are meticulously crafted to preserve game mechanics and clarity․ This global accessibility has strengthened the D&D community‚ making the game more diverse and interconnected than ever before․

9․3 Crowdsourcing and Feedback Integration

Crowdsourcing has played a vital role in refining fillable PDF character sheets for D&D 5e․ Communities on platforms like Reddit and Telegram collaborate to create and improve these sheets‚ ensuring they meet player needs․ Feedback is actively collected through surveys and forums‚ allowing developers to address bugs and enhance functionality․ This iterative process fosters a sense of ownership among players‚ as their input directly shapes the tools they use․ Many creators share their designs openly‚ encouraging further collaboration and innovation․ This transparent approach ensures that fillable PDFs remain adaptable and user-friendly‚ catering to the diverse needs of the D&D community worldwide․

Comparison with Other Character Sheet Methods

Fillable PDFs offer a balance between the tangibility of physical sheets and the versatility of digital tools‚ providing an efficient‚ customizable‚ and accessible method for D&D 5e character management․

10․1 Physical Character Sheets

Physical character sheets provide a tactile experience‚ offering a traditional method for tracking stats‚ skills‚ and backstory․ While they lack the auto-calculation and digital convenience of fillable PDFs‚ many players enjoy the personalization and nostalgic feel of handwritten notes․ However‚ physical sheets can become cluttered and harder to update‚ requiring manual recalculation of ability scores and skill levels․ Despite these limitations‚ they remain a popular choice for players who prefer a more hands-on approach to character management in D&D 5e․

10․2 Digital Tools and Online Platforms

Digital tools and online platforms like D&D Beyond and Roll20 offer advanced character management‚ enabling real-time collaboration and automated rules․ These platforms integrate official content‚ providing a seamless experience for players․ Unlike fillable PDFs‚ they often include features like spell tracking‚ encounter builders‚ and dynamic updates․ Tools like Google Docs with script plugins also allow for custom character sheets‚ fostering creativity and accessibility․ These platforms enhance gameplay efficiency and organization‚ making them a popular choice for modern D&D players seeking a more integrated and interactive approach to character management․

Fillable PDF character sheets for D&D 5e have revolutionized character creation and management‚ offering unparalleled efficiency and customization․ As technology evolves‚ these sheets are likely to integrate more advanced features like AI-driven auto-fill options and enhanced mobile compatibility․ Community contributions and official updates will continue to expand their functionality‚ ensuring they remain a cornerstone of digital D&D play․ The future promises even greater innovation‚ making these tools indispensable for players seeking a seamless and dynamic character management experience․

Instructions

yocan verve instructions

The Yocan Verve is a versatile cartridge vaporizer designed for seamless vaping experiences. Its lightweight design and draw-activated functionality make it user-friendly, while adjustable voltage settings cater to diverse preferences.

1.1 Overview of the Yocan Verve

The Yocan Verve is a sleek, portable cartridge vaporizer designed for ease of use and versatility. It features a draw-activated mechanism, eliminating the need for manual controls. With three voltage settings—2.6V, 3.2V, and 3.8V—it offers tailored experiences for smooth flavor, balanced performance, and dense vapor production. The device supports 510-thread cartridges, making it compatible with a wide range of options. Its compact design and smart features, such as pre-heat functionality, make it ideal for both novice and experienced users seeking a hassle-free vaping experience.

1.2 Key Features of the Yocan Verve

The Yocan Verve boasts a range of standout features, including its draw-activated design, which simplifies operation for users. It offers three adjustable voltage settings—2.6V, 3.2V, and 3.8V—allowing users to customize their vaping experience. The device also includes a pre-heat mode, activated by inhaling twice, ensuring consistent vapor quality. With USB-C charging, it provides quick and convenient power-up. The Verve supports 510-thread cartridges, making it compatible with a variety of options. Its lightweight, portable design and smart features make it an ideal choice for those seeking a user-friendly and efficient vaping device.

Safety Precautions

Always handle the Yocan Verve with care, avoiding extreme temperatures and moisture. Ensure proper charging using the provided USB-C cable and follow all safety guidelines to prevent damage or injury.

2.1 General Safety Guidelines

When using the Yocan Verve, ensure the device is kept away from direct sunlight and moisture. Avoid dropping or exposing it to extreme temperatures, as this may damage the components. Always use the provided USB-C cable for charging to prevent battery issues. Keep the device out of reach of children and pets. Regularly inspect the cartridge and connections for any signs of wear or damage. Follow proper usage guidelines to maintain optimal performance and safety. Cleaning the device periodically is also recommended to prevent residue buildup.

2.2 Battery Safety Tips

Use the original USB-C cable for charging to avoid damaging the Yocan Verve’s battery. Avoid overcharging, as it may reduce battery life. Keep the device away from extreme heat or flammable materials. If the battery indicator flashes red, it signals low power; recharge promptly. Store the device in a cool, dry place when not in use. Never expose the battery to water or moisture, as this can cause permanent damage. Ensure the battery is fully charged before extended use. Always monitor battery levels to prevent over-discharge, which can affect performance. Following these tips ensures optimal battery health and longevity.

Charging the Yocan Verve

Connect the Yocan Verve to a USB-C charger using the provided cable. Plug into a compatible wall adapter and charge until the indicator turns green, ensuring full power.

3.1 How to Charge the Battery

To charge the Yocan Verve, locate the USB-C port at the bottom of the device. Use the provided USB-C cable to connect it to a compatible charger or wall adapter. Plug the cable into a power source and ensure it is securely connected. The charging process typically begins automatically. The device may display a red light during charging, which will change to green once fully charged. Avoid overcharging to maintain battery health and longevity. Always use the original cable for optimal charging performance.

3.2 Charging Time and Indicators

The Yocan Verve typically takes around 2 hours to fully charge. During charging, the device will display a red light. Once the battery is fully charged, the light will change to green. Ensure the device is charged on a stable surface away from flammable materials. Avoid overcharging, as it can reduce battery longevity. The charging indicators provide clear feedback, allowing you to monitor the progress efficiently. Always use the original USB-C cable for optimal charging performance and safety.

Activating the Device

The Yocan Verve is draw-activated for effortless use. Alternatively, activate it manually with five quick inhales, indicated by a green light blinking five times.

4.1 Draw-Activated Functionality

The Yocan Verve features a draw-activated mechanism, allowing users to start vaping by simply inhaling through the mouthpiece. This eliminates the need for manual activation, making it incredibly convenient and intuitive. The device automatically detects the draw and begins heating the cartridge. This feature ensures a seamless and efficient vaping experience. It’s perfect for those who prefer simplicity and ease of use without additional buttons or controls. The draw-activated functionality enhances portability and discretion, making the Yocan Verve ideal for on-the-go use. This hands-free operation is a standout feature among similar devices.

4.2 Manual Activation Process

To manually activate the Yocan Verve, users can take five consecutive puffs within three seconds. This triggers the device, indicated by a green light blinking slowly five times. Once activated, the Verve is ready for use; The manual activation process offers users control over their vaping sessions, especially when draw-activation isn’t preferred. This feature is convenient for those who want to pre-heat or customize their experience. The Verve’s manual mode is straightforward, ensuring ease of use while maintaining the device’s portability and efficiency. It’s a versatile option for both novice and experienced vapers. Always ensure the battery is charged for optimal performance.

Voltage Adjustment

The Yocan Verve features adjustable voltage settings, offering 2.6V for smooth vapor, 3.2V for balanced performance, and 3.8V for dense clouds, catering to diverse vaping preferences efficiently.

5.1 Understanding Voltage Settings

Voltage settings on the Yocan Verve are designed to optimize your vaping experience. The device offers three distinct voltage levels: 2.6V, 3.2V, and 3.8V. These settings allow users to customize their sessions based on personal preference. Lower voltage (2.6V) delivers smoother, flavorful vapor, ideal for those who prioritize taste. Medium voltage (3.2V) provides a balanced experience, combining flavor and vapor production. Higher voltage (3.8V) produces denser clouds, appealing to users seeking more robust vapor. Adjusting these settings is straightforward, ensuring a tailored experience for every user.

5.2 Adjusting Voltage for Different Experiences

The Yocan Verve allows users to adjust voltage for tailored vaping experiences. Press the power button three times to cycle through the voltage levels: 2.6V (white light) for smooth, flavorful vapor, 3.2V (blue light) for balanced performance, and 3.8V (green light) for dense vapor clouds. This feature ensures customization, whether you prefer rich flavor or thick clouds. Experiment with different settings to find your ideal vaping experience, enhancing both satisfaction and enjoyment. The intuitive voltage adjustment makes it easy to switch settings on the go, providing flexibility for any vaping preference.

Cartridge Compatibility

The Yocan Verve is designed to work seamlessly with 510-thread cartridges, ensuring compatibility with a wide range of oil and extract cartridges for versatile vaping experiences.

6.1 Compatible Cartridge Types

The Yocan Verve supports a variety of 510-thread cartridges, including standard oil cartridges and extract-specific options. It works seamlessly with 0;5mL to 1.0mL capacity cartridges, ensuring compatibility with most brands. The device is optimized for cartridges with a resistance range of 1.0Ω to 3.0Ω, providing consistent performance. Whether using ceramic or quartz coil cartridges, the Verve delivers smooth and flavorful vapor. This versatility makes it a popular choice among vapers seeking flexibility in their vaping setup.

6.2 How to Attach and Remove Cartridges

To attach a cartridge, screw it clockwise onto the Yocan Verve’s 510-thread connection until secure. Avoid over-tightening to prevent damage. For removal, unscrew the cartridge counterclockwise. Ensure the cartridge is cool before handling. Regularly check the connection for residue and clean as needed to maintain proper functionality. This simple process ensures a seamless vaping experience with the Yocan Verve.

Pre-Heat Function

The Yocan Verve features a pre-heat function that enhances vapor quality. Activate it by inhaling twice. This ensures consistent heating and flavor preservation, improving efficiency.

7.1 Activating the Pre-Heat Mode

Activating the pre-heat mode on the Yocan Verve is straightforward. Simply take two consecutive short draws within a few seconds. The device will begin heating, indicated by a subtle change in LED light or a gentle vibration, depending on the model. This feature ensures your cartridge reaches the optimal temperature for the best vapor production. Once activated, the pre-heat mode will run for a short duration, preparing your device for a smooth and flavorful experience. This function is especially useful for thicker oils or colder environments.

7.2 Benefits of Pre-Heating

Pre-heating the Yocan Verve ensures a consistent and optimal vaping experience. It helps to evenly warm the cartridge’s contents, preventing cold spots and maximizing flavor extraction. This feature is particularly beneficial for thicker oils or concentrates, as it ensures a smooth draw without clogging. Additionally, pre-heating can enhance vapor quality by preparing the coil for immediate use, reducing the risk of a harsh or underwhelming first hit; Regular use of the pre-heat function can also extend the life of your cartridge by maintaining consistent heating patterns and preventing strain on the device.

Usage Tips

Optimize your Yocan Verve experience by using short, steady draws for consistent vapor. Adjust voltage settings to suit your material and preference for flavor or clouds.

8.1 Optimizing Vapor Quality

For the best vapor quality with your Yocan Verve, ensure your cartridge is properly attached and filled with high-quality material. Use the pre-heat function before vaping to evenly warm the coil, enhancing flavor and vapor production. Experiment with different voltage settings—2.6V for smooth flavor, 3.2V for balance, and 3.8V for dense clouds. Keep your draws steady and moderate in length to avoid overheating. Regularly clean the device to maintain airflow and prevent residue buildup, ensuring a consistent and enjoyable vaping experience.

8.2 Conserving Battery Life

To extend the battery life of your Yocan Verve, avoid extreme temperatures and overcharging. Use the lower voltage settings when possible, as higher voltages drain the battery faster. Turn off the device when not in use by taking five quick puffs or waiting for the auto-shutoff. Clean the connections regularly to prevent resistance issues. Charge the battery when the red light indicates low power, but avoid letting it drain completely. Use the pre-heat function wisely to avoid unnecessary battery usage. Store the device in a cool, dry place to preserve battery health over time.

Maintenance and Cleaning

Regularly clean the Yocan Verve with a soft cloth to remove residue. Store it in a protective case to prevent damage and ensure longevity.

9.1 Cleaning the Device

Regular cleaning is essential for maintaining the Yocan Verve’s performance. Use a soft cloth to wipe down the exterior and mouthpiece, removing any residue or debris. For tougher stains, lightly dampen the cloth with water or isopropyl alcohol. Avoid submerging the device in liquid to prevent damage. Clean the cartridge connection area with a cotton swab dipped in alcohol to ensure proper conductivity. Allow all parts to dry completely before reassembling or using the device. This routine helps prevent residue buildup and ensures consistent vapor quality.

9.2 Maintaining Cartridge Efficiency

To maintain cartridge efficiency, ensure a secure connection by gently tightening the cartridge to the battery. Avoid over-tightening, as this may damage the threads. Store cartridges upright in a cool, dry place to prevent leakage. Before first use, prime the cartridge by taking a few short puffs without inhaling to saturate the coil. Regularly check for any residue at the connection point and clean it with a cotton swab. Proper maintenance ensures consistent vapor production and extends the lifespan of both the cartridge and the device.

Troubleshooting Common Issues

Check battery level by viewing LED light colors. Ensure cartridge is securely connected. Clean device regularly to prevent residue buildup. Resolve charging issues by using compatible cables.

10.1 Fixing Flashing Lights

Flashing lights on the Yocan Verve indicate specific issues. A red light flashing 10 times signals low battery—recharge immediately. Green lights blinking slowly may denote successful activation or pre-heat mode. If lights flash erratically, check connections or reset the device by turning it off and on. Ensure the cartridge is properly attached to avoid loose connections causing malfunctions. If the issue persists, consult the user manual or contact customer support for further assistance. Regular maintenance can prevent such issues from arising frequently.

10.2 Resolving Charging Problems

To resolve charging issues with the Yocan Verve, first ensure the USB-C cable is securely connected to both the device and the charger. Check for any debris in the charging port and clean it gently with a soft brush. If the battery doesn’t charge, try using a different USB-C cable or wall adapter. Avoid using fast chargers, as they may cause compatibility issues. If the problem persists, reset the device by turning it off and on or refer to the troubleshooting section in the user manual for further guidance.

Warranty Information

The Yocan Verve is backed by a limited warranty covering manufacturing defects. Contact customer service for claims or visit the official website for detailed warranty terms.

11.1 Warranty Coverage Details

The Yocan Verve warranty covers defects in materials and workmanship for one year from purchase. It includes repairs or replacements for faulty batteries and electronic components. Coverage extends to manufacturing issues but excludes user damage or improper use. For details, visit the official Yocan website or contact their customer support team.

11.2 How to Claim Warranty

To claim warranty for the Yocan Verve, register your product on the official Yocan website within 30 days of purchase. Provide proof of purchase and a detailed description of the issue. Contact Yocan customer support via email or phone for assistance. If approved, return the defective device to the designated address. Repairs or replacements will be processed within 7-10 business days. Warranty claims are valid only for manufacturing defects, excluding user-induced damage or misuse.

PDF

special education teacher resume pdf

A well-crafted special education teacher resume highlights expertise in supporting diverse learning needs, showcasing traditional education methods and specialized skills to stand out to school administrators․

1․1 Definition and Purpose

A special education teacher resume is a tailored document showcasing expertise in supporting students with diverse learning needs․ Its purpose is to highlight relevant skills, certifications, and experiences, demonstrating a candidate’s ability to create inclusive and effective learning environments․ By emphasizing specialized training and hands-on experience, the resume serves as a critical tool for educators to stand out in a competitive job market and align with the specific needs of schools and students․

1․2 Importance of a Well-Structured Resume

A well-structured resume is essential for special education teachers to present their qualifications clearly and professionally․ It ensures that hiring managers can quickly identify relevant skills, certifications, and experiences․ A structured format enhances readability, making it easier to highlight expertise in supporting students with diverse needs․ Additionally, a well-organized resume demonstrates attention to detail and professionalism, which are critical qualities for educators․ It also helps in optimizing for Applicant Tracking Systems (ATS), increasing the likelihood of standing out in a competitive job market․

1․3 Key Elements to Include

A special education teacher resume should include key elements such as academic background, certifications, professional experience, and specific skills․ Highlighting teaching experience, especially with diverse student groups, is crucial․ Certifications like special education endorsements and licenses should be prominently displayed․ Including skills such as classroom management, behavior modification, and communication abilities demonstrates expertise․ Professional development and any relevant workshops or training should also be mentioned to show commitment to the field․ These elements collectively create a comprehensive and compelling resume tailored to special education roles․

Professional Objective

A professional objective statement for a special education teacher resume should align your skills with the employer’s goals, highlighting dedication to supporting students with diverse learning needs․

2․1 Tailoring the Objective Statement

Tailoring your objective statement ensures it aligns with the job description, emphasizing your unique qualifications and passion for special education․ Highlight specific skills like behavior management or IEP development to demonstrate relevance․ Use language from the job posting to show how your experience meets their needs․ This customization makes your resume more compelling to hiring managers, proving you’re the ideal candidate for their special education role․ Keep it concise, focused, and impactful․

2․2 Highlighting Special Education Skills

Highlighting special education skills is crucial to showcase your expertise in supporting diverse learners․ Emphasize abilities like IEP development, behavior management, and adaptive teaching strategies․ Include technical skills such as using educational tools like IEP software or communication apps․ Stress interpersonal skills for collaborating with parents and professionals․ Demonstrate problem-solving and adaptability in classroom settings․ By tailoring your skills section to the job, you prove your readiness to meet the unique needs of special education students effectively․

2․3 Examples of Compelling Objective Statements

A strong objective statement tailored to the job description is essential․ For example, “Dedicated special education teacher seeking to leverage expertise in IEP development and behavior management to support diverse learning needs․” Another example: “Passionate educator committed to creating inclusive learning environments, with a focus on adaptive strategies and collaboration with parents and professionals․” These statements highlight specific skills and align with the school’s goals, making the candidate stand out․ Tailor the objective to reflect the job requirements and emphasize your unique qualifications․

Education and Certifications

Highlight your academic background in special education, including degrees like a Bachelor’s or Master’s in Special Education․ List certifications such as Special Education Certification or ESL endorsement․

3․1 Academic Background in Special Education

Start by listing your highest degree, such as a Bachelor’s or Master’s in Special Education, including the university name and graduation year․ Mention any minors or concentrations that align with special education, like Early Childhood Education or Autism Studies․ Highlight any honors or awards received during your academic journey․ Including relevant coursework, such as Behavioral Interventions or Assistive Technology, demonstrates your preparedness for the role․ This section establishes your foundational qualifications for teaching students with diverse needs․

3․2 Relevant Certifications and Licenses

Include specialized certifications like Special Education Certification and teaching licenses, ensuring they align with the job requirements․ List any state-specific credentials, such as Ed․S․ endorsements, and note expiration dates to show currency․ Certifications in Applied Behavior Analysis (ABA) or Autism Spectrum Disorders can strengthen your application․ Mention any professional development programs or workshops completed to enhance your expertise in special education․ This section validates your authority to teach and work with students who have unique needs․

3․3 Professional Development and Workshops

Highlight participation in professional development programs, such as workshops on assistive technology or behavioral interventions․ Mention specific courses or conferences attended, like Autism Spectrum Disorders training or Positive Behavioral Interventions and Supports (PBIS)․ Include certifications earned, such as Google for Education or Multicultural Education․ Detail how these experiences enhance your teaching strategies and adaptability in the classroom, demonstrating your commitment to ongoing learning and professional growth in special education․

Professional Experience

Detail roles as a special education teacher, emphasizing hands-on experience with diverse student needs and collaborative efforts with educators to create inclusive learning environments effectively․

4․1 Teaching Experience in Special Education

Highlight specific roles and achievements in teaching students with diverse learning needs․ Mention years of experience and the range of disabilities supported․ Include examples of implementing individualized education programs (IEPs) and adapting teaching strategies to meet student needs․ Showcase success in creating inclusive classrooms and improving student outcomes․ Emphasize any leadership roles or mentorship provided to colleagues․ Quantify achievements, such as percentage improvements in student performance or successful IEP implementations․ Demonstrating hands-on experience and measurable results strengthens your resume․

4․2 Supporting Students with Diverse Needs

Emphasize your ability to cater to students with varying disabilities and learning challenges․ Highlight experience in creating personalized learning plans and using assistive technologies․ Mention strategies like differentiated instruction and positive behavior support to address individual needs․ Include examples of collaborating with speech therapists, counselors, and parents to ensure holistic support․ Showcase your adaptability in modifying curricula and your commitment to fostering an inclusive learning environment․ Demonstrate how you monitor progress and tailor interventions to meet unique student requirements effectively․

4․3 Collaboration with Other Educators and Professionals

Highlight your ability to work effectively with speech therapists, counselors, and other educators to develop and implement Individualized Education Programs (IEPs)․ Emphasize collaboration with parents to ensure consistent support for students․ Mention participation in multidisciplinary teams to assess student needs and design appropriate interventions․ Showcase your ability to communicate effectively and maintain open lines of dialogue with all stakeholders․ Include examples of teamwork that led to improved student outcomes, demonstrating your commitment to a collaborative approach․

Skills Section

The skills section should include core teaching abilities, classroom management techniques, communication skills, and technical proficiency in educational tools, ensuring a comprehensive showcase of your expertise․

5․1 Core Teaching Skills

Core teaching skills for a special education teacher include lesson planning, instructional strategies, and the ability to adapt curriculum for diverse learners․ Highlighting these skills demonstrates your capability to create engaging and effective learning environments tailored to individual student needs․ Emphasize your expertise in developing IEPs and implementing evidence-based practices to showcase your dedication to student success and growth․ These skills are essential for meeting the unique challenges of special education and ensuring all students receive a meaningful education․

5․2 Classroom Management Techniques

Effective classroom management techniques are crucial for special education teachers to maintain a structured and supportive learning environment․ Highlighting strategies like positive reinforcement, behavior intervention plans, and clear communication demonstrates your ability to manage diverse student needs․ Showcase your skills in creating visual schedules, using sensory tools, and implementing restorative practices to ensure a calm and productive classroom․ These techniques not only promote academic success but also foster social and emotional growth among students with varying abilities․

5․3 Communication and Interpersonal Skills

Strong communication and interpersonal skills are essential for special education teachers to collaborate with students, parents, and professionals․ Highlight abilities like active listening, empathy, and conflict resolution to demonstrate your effectiveness in building relationships․ Showcase your capacity to communicate complex ideas clearly and adapt your approach to diverse audiences․ Emphasize teamwork, emotional intelligence, and cultural sensitivity to illustrate how you foster inclusive and supportive learning environments․ These skills are critical for ensuring student success and maintaining strong partnerships with families and educators․

5․4 Technical Skills for Educational Tools

Proficiency in educational technology is vital for special education teachers to enhance teaching and student engagement․ Highlight skills such as using Google Classroom, Microsoft Office, and IEP management software to create and manage personalized learning plans․ Familiarity with assistive technologies, like text-to-speech tools, and Learning Management Systems (LMS) demonstrates adaptability․ Showcase ability to integrate technology for progress tracking, communication, and resource development․ Emphasize how these tools streamline tasks and improve overall teaching efficiency, making you a valuable asset in modern educational settings․

5․5 Adaptability and Problem-Solving Abilities

Adaptability and problem-solving skills are essential for special education teachers, as they often face unique challenges with diverse student needs․ Demonstrate your ability to adjust lesson plans and strategies to accommodate individual learning styles․ Highlight examples of resolving behavioral or academic challenges creatively․ Showcase flexibility in collaborating with other educators and professionals to develop effective solutions․ Emphasize how your resourcefulness and quick thinking contribute to a supportive and inclusive learning environment, ensuring each student’s success and well-being․

Resume Format and Structure

A clear, organized resume format is crucial for special education teachers․ Use a clean layout with defined sections to ensure readability and professional presentation, enhancing your candidacy․

6․1 Choosing the Right Format

Choosing the right format for your special education teacher resume is essential to make a strong impression․ Opt for a clean and professional layout that highlights your qualifications․ A chronological format is ideal for experienced teachers, while a functional format suits those with gaps or less experience․ Ensure the design is ATS-friendly, with clear headings and bullet points․ Avoid overly creative designs that may distract from your skills and experience․ Use a standard font and consistent spacing for a polished look that recruiters will appreciate․

6․2 Organizing Sections for Clarity

Organizing sections in your special education teacher resume is crucial for clarity and readability․ Start with your contact information, followed by a professional objective or summary․ Next, highlight your education and certifications, ensuring they are prominently displayed․ Professional experience should be listed in reverse chronological order, with bullet points detailing key responsibilities and achievements․ Skills, certifications, and additional sections like professional affiliations or volunteer work should follow․ Use clear headings and bullet points to make your resume easy to navigate, ensuring recruiters can quickly identify your qualifications․

6․3 Optimizing for Applicant Tracking Systems (ATS)

To ensure your special education teacher resume passes through ATS, use relevant keywords from the job description and maintain a clean, consistent format․ Avoid overly decorative designs or unusual fonts, as ATS may struggle to parse them․ Include certifications and licenses in a dedicated section, and use standard headings like “Education” and “Professional Experience․” Incorporate action verbs and quantify achievements where possible․ Ensure all sections are well-organized and free of errors to improve your resume’s compatibility with ATS systems․

Including Additional Sections

Add sections like professional affiliations, awards, and volunteer work to showcase your dedication and leadership in special education, enhancing your resume’s appeal to employers․

7․1 Professional Affiliations

Listing professional affiliations, such as membership in the Council for Exceptional Children or the National Education Association, demonstrates your commitment to staying updated on special education best practices and research․ These organizations provide valuable resources, training, and networking opportunities, which can be highlighted to show your dedication to professional growth and collaboration within the field․ Including these affiliations can make your resume more appealing to employers seeking educators who are actively engaged in the special education community․

7․2 Awards and Recognitions

Including awards and recognitions in your resume, such as “Teacher of the Year” or awards from professional organizations, highlights your exceptional contributions to special education․ These accolades demonstrate your dedication, innovation, and impact on students’ lives․ Mentioning specific awards, like those from the Council for Exceptional Children, can strengthen your credibility and show employers that your work has been acknowledged and valued within the education community․ This section should be concise but impactful, showcasing achievements that set you apart․

7․3 Volunteer Work and Community Involvement

Highlighting volunteer work and community involvement demonstrates your commitment to special education beyond the classroom․ Mentioning roles such as mentoring special needs youth, organizing inclusive events, or advocating for educational resources can showcase your passion and dedication․ These activities not only enrich your resume but also illustrate your ability to connect with the community and create supportive environments for students with diverse needs, making you a well-rounded candidate for special education roles․

Writing Tips and Best Practices

Use action verbs and keywords to emphasize your special education expertise, ensuring your resume aligns with ATS requirements for a competitive edge in job applications․

8․1 Using Action Verbs and Keywords

Incorporate strong action verbs like “designed,” “implemented,” and “facilitated” to showcase your teaching experiences․ Keywords such as “IEP development,” “behavioral support,” and “differentiated instruction” align your resume with ATS systems and highlight your expertise in special education․ This ensures your resume stands out to hiring managers and demonstrates your ability to meet the specific needs of students with diverse learning requirements․

8․2 Quantifying Achievements

Highlighting quantifiable achievements strengthens your special education teacher resume․ For example, mention the percentage of students who met or exceeded IEP goals under your instruction․ Specify the number of students you supported or the reduction in behavioral incidents due to your strategies․ Use data like “improved reading scores by 30% in one academic year” to demonstrate measurable impact․ This approach shows clear results and underscores your effectiveness in fostering student growth and development․

8․3 Tailoring the Resume to the Job Description

Tailoring your special education teacher resume to the job description ensures alignment with the employer’s needs․ Identify key phrases and requirements in the job posting and incorporate them into your resume․ Emphasize relevant experience, skills, and achievements that match the position․ Customize sections like “Professional Experience” and “Skills” to reflect the specific demands of the role․ This targeted approach increases the likelihood of passing through ATS systems and catching the hiring manager’s attention, showcasing your suitability for the position effectively․

Common Mistakes to Avoid

Avoid overloading your resume with irrelevant details, lacking specificity in achievements, and ignoring ATS requirements․ Ensure clarity, conciseness, and relevance to the special education role․

9․1 Overloading Information

Overloading your resume with excessive details can make it less effective․ Avoid including irrelevant job duties, outdated information, or unnecessary sections․ Focus on concise, ATS-friendly formatting․ Highlight only the most relevant experience, skills, and certifications․ Use bullet points for clarity and ensure the resume stays within one to two pages․ Remove redundant phrases and prioritize quantifiable achievements․ This ensures hiring managers can quickly identify your qualifications without sifting through unnecessary content․

9․2 Lack of Specificity

Avoid vague descriptions in your resume, as they fail to demonstrate your expertise․ Instead of using generic terms like “worked with students,” specify the type of support provided, such as “developed IEPs for 10 students with autism” or “implemented behavior intervention plans․” Quantify achievements, like “improved reading scores by 30% for special needs students․” Specific examples showcase your impact and skills, making your resume more compelling to hiring managers seeking qualified special education teachers․

9․3 Ignoring ATS Requirements

Many applicants overlook the importance of optimizing their resumes for Applicant Tracking Systems (ATS)․ To avoid this, use keywords from the job description, ensure proper formatting, and avoid special characters or graphics․ Use standard fonts like Arial or Calibri and save your resume as a PDF or Word document․ Properly label sections and avoid overly creative designs․ By adhering to these guidelines, your resume will pass ATS screenings and reach hiring managers, increasing your chances of landing an interview for a special education teacher position․

A well-crafted special education teacher resume, tailored to the job description and optimized for ATS, effectively highlights teaching expertise and dedication to supporting diverse learning needs․

10․1 Summary of Key Points

A well-crafted special education teacher resume emphasizes expertise in supporting diverse learning needs, showcasing traditional education methods and specialized skills to impress school administrators․

Key points include tailoring the resume to the job description, highlighting certifications, professional experience, and skills like behavior management and problem-solving, while ensuring ATS-friendly formatting for visibility․

10․2 Final Tips for Creating a Standout Resume

To create a standout special education teacher resume, use action verbs and quantify achievements to demonstrate impact․ Ensure ATS compatibility by using clear formatting and relevant keywords․ Tailor your resume to the job description, emphasizing certifications, experience, and skills like behavior management and problem-solving․ Proofread thoroughly to avoid errors and ensure clarity․ Highlight adaptability, interpersonal skills, and a commitment to student success to make a lasting impression on hiring administrators․

Guide

nursing guide

A comprehensive guide empowering nursing students and professionals with essential knowledge‚ covering key concepts‚ best practices‚ and invaluable resources to excel in the nursing field.

1.1. Overview of Nursing as a Profession

Nursing is a dynamic and rewarding profession focused on patient care‚ advocacy‚ and health promotion. It requires compassion‚ critical thinking‚ and adaptability. Nurses play a vital role in healthcare‚ addressing physical‚ emotional‚ and social needs. The profession spans diverse settings‚ from hospitals to community care. Evidence-based practices and continuous learning are central to nursing excellence. Patient safety‚ dignity‚ and comfort are core priorities. Nursing also involves collaboration with healthcare teams to deliver holistic care. This guide provides insights and tools to navigate the nursing profession effectively‚ ensuring high-quality patient outcomes and professional growth.

1.2. Importance of a Nursing Guide

A nursing guide is an essential resource for students and professionals‚ offering structured knowledge and practical insights. It bridges theory and practice‚ ensuring a solid foundation for patient care. By providing evidence-based guidelines‚ it enhances critical thinking and problem-solving skills. A guide also serves as a quick reference for complex topics‚ aiding in decision-making. It supports career progression by addressing diverse nursing scenarios‚ from clinical skills to professional development. Utilizing a guide fosters confidence‚ competence‚ and adherence to best practices‚ ultimately improving patient outcomes and job satisfaction.

1.3. Key Concepts in Nursing Practice

Key concepts in nursing practice include patient safety‚ evidence-based care‚ and effective communication. Assessment and care planning are fundamental‚ ensuring personalized interventions. Safe patient handling and mobility practices prevent injuries. Critical thinking and ethical decision-making guide nurses in complex situations. Cultural competence and empathy enhance patient-centered care. Continuous learning and professional development are essential for staying updated on best practices. These concepts form the backbone of nursing‚ promoting high-quality care and positive patient outcomes across all healthcare settings.

Nursing School Study Guides

Nursing school study guides provide essential resources to simplify learning and boost retention‚ helping students and professionals excel in their nursing education and career.

2.1. Best Nursing School Study Guides

The best nursing school study guides simplify complex topics‚ boost retention‚ and prepare students for success. Trusted bundles like The Complete Nursing School Bundle break down difficult content into digestible sections. These guides often include expert tips‚ interactive features‚ and practice questions to enhance learning. Some‚ like SimpleNursing Interactive Study Guides‚ use QR codes for additional resources. They cover foundational concepts‚ clinical skills‚ and exam prep‚ making them indispensable tools for aspiring nurses aiming to excel in their education and career.

2.2. SimpleNursing Interactive Study Guides

SimpleNursing Interactive Study Guides are a groundbreaking resource for nursing students. Packed with QR codes linking to video tutorials‚ practice questions‚ and interactive modules‚ these guides transform studying into an engaging experience. They cover a wide range of topics‚ from pharmacology to medical-surgical nursing‚ ensuring comprehensive understanding. By catering to different learning styles‚ they help students grasp complex concepts effortlessly. Their innovative approach has made them a favorite among nursing learners‚ enhancing retention and confidence. Accessible anytime‚ they provide 24/7 support‚ making them an indispensable tool for success.

2.3. Master Nursing School: The Ultimate Study Guide

Master Nursing School: The Ultimate Study Guide is a meticulously curated‚ 400-page resource designed to empower nursing students. Packed with expert tips‚ practice questions‚ and strategies to tackle challenging topics‚ this guide simplifies complex concepts. It covers essential subjects like pharmacology‚ anatomy‚ and patient care‚ ensuring a strong foundation. Perfect for both current students and aspiring nurses‚ it offers a comprehensive approach to mastering nursing skills. With its clear structure and practical insights‚ this guide is an invaluable tool for achieving success in nursing education and beyond.

2.4. The Complete Nursing School Bundle

The Complete Nursing School Bundle is a trusted resource for over 300‚000 nursing students‚ breaking down complex topics into easy-to-understand content. It includes NCLEX-RN prep materials‚ study guides‚ and tools for mastering pharmacology‚ anatomy‚ and patient care. Designed to support students from basics to advanced concepts‚ this bundle offers a structured approach to learning. With its comprehensive coverage and practical insights‚ it helps nursing students build a strong foundation and excel in their studies‚ making it an essential tool for nursing education.

Recommended Nursing Books

Top books include “Notes on Nursing” by Florence Nightingale‚ “The Shift: One Nurse‚ Twelve Hours‚” and “Nursing: Scope and Standards of Practice‚” offering insights and guidance for nursing students and professionals‚ covering historical perspectives‚ practical advice‚ and inspiring stories to enhance knowledge and skillsets in patient care and professional development.

3.1. Top Books for Nursing Students

Top books for nursing students include “Notes on Nursing” by Florence Nightingale‚ “The Shift: One Nurse‚ Twelve Hours‚” and “Nursing: Scope and Standards of Practice.” These books provide historical insights‚ practical advice for navigating nursing school‚ and inspiring stories to enhance knowledge and skillsets. They cover foundational concepts‚ patient care strategies‚ and professional development‚ making them essential resources for both aspiring and experienced nurses. These texts are trusted by over 300‚000 nursing students and professionals‚ offering a comprehensive guide to excelling in the nursing field.

3.2. Notes on Nursing by Florence Nightingale

Notes on Nursing: What It Is‚ and What It Is Not by Florence Nightingale is a foundational text that outlines the core principles of nursing. First published in 1859‚ it remains a timeless guide‚ emphasizing the importance of observation‚ environment‚ and patient-centered care. Nightingale’s insights into hygiene‚ compassion‚ and professionalism have shaped modern nursing practices. This book is a must-read for nursing students and professionals‚ offering practical wisdom and philosophical underpinnings that continue to inspire and inform the nursing profession today.

3.3. The Shift: One Nurse‚ Twelve Hours

The Shift: One Nurse‚ Twelve Hours by Theresa Brown offers a compelling glimpse into the daily life of a nurse. This book chronicles a 12-hour shift‚ detailing the challenges‚ emotions‚ and triumphs faced by healthcare professionals. Brown‚ an oncology nurse‚ shares stories of patient care‚ teamwork‚ and the emotional toll of the job. It provides insight into the realities of nursing‚ making it a relatable and inspiring read for both aspiring and seasoned nurses‚ as well as anyone interested in understanding the healthcare system.

3.4. Nursing: Scope and Standards of Practice

Nursing: Scope and Standards of Practice is a foundational resource that outlines the professional responsibilities and ethical guidelines for nurses. It provides evidence-based recommendations for delivering high-quality patient care‚ emphasizing safety‚ assessment‚ and care planning. This book serves as a vital reference for both nursing students and experienced professionals‚ ensuring alignment with industry standards and best practices. It is a cornerstone for understanding the scope of nursing practice and upholding the highest standards of care in various healthcare settings.

Best Practices in Nursing Care

Best practices in nursing care emphasize patient safety‚ evidence-based guidelines‚ and compassionate delivery. They ensure high-quality care through effective assessment‚ planning‚ and consistent adherence to professional standards.

4.1. Patient Safety in Nursing Practice

Patient safety is the foundation of nursing care‚ ensuring the well-being of individuals during treatment. Nurses play a critical role in identifying risks‚ preventing errors‚ and promoting safe environments. Effective strategies include proper medication administration‚ infection control‚ and clear communication. Regular training and adherence to evidence-based guidelines enhance safety outcomes. By prioritizing patient safety‚ nurses build trust and deliver high-quality care‚ minimizing harm and improving health outcomes. This commitment is essential for maintaining professional standards and fostering a culture of safety in healthcare settings.

4.2. Evidence-Based Nursing Guidelines

Evidence-based nursing guidelines integrate the best available research‚ clinical expertise‚ and patient preferences to inform practice decisions. These guidelines are systematically developed to address specific clinical questions‚ ensuring care is both effective and safe. Nurses rely on these guidelines to stay updated on current practices‚ minimize variability‚ and improve patient outcomes. Regular updates ensure relevance‚ while standardized protocols reduce errors. By following evidence-based guidelines‚ nurses deliver care that is grounded in science‚ enhancing quality and consistency across healthcare settings. This approach is vital for advancing professional nursing standards and patient care excellence.

4.3. Assessment and Care Planning

Assessment and care planning are foundational steps in nursing practice‚ ensuring personalized and effective patient care. Nurses conduct comprehensive assessments to identify health needs‚ preferences‚ and risks. This data informs the development of individualized care plans‚ outlining clear goals and interventions. Regular monitoring and adjustments ensure plans remain relevant and effective. Effective care planning promotes better patient outcomes‚ enhances safety‚ and improves satisfaction. It also fosters collaboration among healthcare teams‚ ensuring coordinated and holistic care delivery. This process is essential for delivering high-quality‚ patient-centered nursing care in all settings.

4.4. Safe Patient Handling and Mobility

Safe patient handling and mobility are critical to preventing injuries and promoting patient dignity. Nurses use assistive devices and proper techniques to minimize strain during transfers and repositioning. Regular training ensures adherence to evidence-based guidelines‚ reducing risks for both patients and healthcare workers. Proper mobility strategies also enhance patient comfort and recovery outcomes. This approach aligns with best practices in patient safety and quality care‚ ensuring a safe environment for all. Effective handling techniques are essential for maintaining high standards of nursing practice and patient well-being.

Nursing Resources and Tools

Essential tools include NCLEX-RN prep books‚ nursing diagnosis handbooks‚ and drug guides. Podcasts and online resources enhance learning‚ while portable references support nursing education and clinical practice.

5.1. Best Nursing Podcasts

Discover the best nursing podcasts that offer insights into clinical practice‚ industry trends‚ and inspiring stories. These podcasts are designed to enhance your nursing knowledge and skills‚ featuring expert interviews‚ real-life experiences‚ and evidence-based tips. Popular choices include The Nurse Podcast and Nursing Now‚ which cover topics from patient care to professional development. Whether you’re a student or an experienced nurse‚ these podcasts provide engaging and accessible learning on the go‚ helping you stay updated and informed in the ever-evolving nursing field.

5.2. NCLEX-RN Prep Books

NCLEX-RN prep books are essential for nursing students preparing for the licensing exam. Trusted resources like the Saunders NCLEX-RN Exam Prep and FA Davis Success books provide comprehensive reviews‚ practice questions‚ and test-taking strategies. These guides help students master critical concepts‚ identify weak areas‚ and build confidence. With detailed explanations and simulated exams‚ they are indispensable tools for achieving success on the NCLEX-RN‚ ensuring readiness for the challenges of nursing practice.

5.3. Nursing Diagnosis and Drug Handbooks

Nursing diagnosis and drug handbooks are indispensable tools for nurses‚ providing detailed guidance on accurate diagnoses‚ appropriate medications‚ and evidence-based interventions. These resources‚ such as the Portable RN: The All-in-One Nursing Reference‚ offer comprehensive drug databases‚ dosage calculations‚ and patient care plans. They empower nurses to make informed decisions‚ ensuring safe and effective care. Regular updates keep the information current‚ making these handbooks essential for both students and practicing professionals to stay aligned with best practices in patient care.

5.4. Portable RN: The All-in-One Nursing Reference

The Portable RN: The All-in-One Nursing Reference is a go-to resource for nurses‚ offering instant access to critical information. This guide covers essential duties‚ drug references‚ and clinical procedures‚ making it a trusted companion for both students and professionals. Its comprehensive format ensures quick navigation‚ while its detailed content addresses diverse patient care scenarios. Regular updates keep the information current‚ ensuring nurses remain well-informed and equipped to deliver high-quality care. This reference is a must-have for anyone seeking a reliable‚ all-encompassing nursing tool.

Professional Development for Nurses

Continuing education‚ inspiring stories‚ and advancing equity strengthen the nursing profession‚ fostering growth and excellence among nursing professionals for improved patient care and leadership.

6.1. Continuing Education for Nurses

Continuing education is vital for nurses to stay updated on best practices‚ advancements‚ and evidence-based guidelines. It ensures they maintain high standards of patient care and professional competence. Through workshops‚ online courses‚ and conferences‚ nurses can expand their skill sets and adapt to evolving healthcare needs. Many resources‚ like NCLEX-RN prep books and online study guides‚ support lifelong learning. Investing in continuing education not only enhances individual careers but also contributes to better health outcomes and a stronger nursing profession overall.

6.2. Inspiring Stories for Nursing Professionals

Inspiring stories from nursing professionals offer motivation and insight into the challenges and triumphs of the field. These accounts highlight resilience‚ compassion‚ and dedication‚ providing emotional support and practical wisdom. Books like The Shift: One Nurse‚ Twelve Hours and Journey to Equity share real-life experiences‚ fostering empathy and understanding. Such narratives remind nurses of the profound impact they have on patients’ lives‚ encouraging them to stay committed to their calling and strive for excellence in their daily practice.

6.3. Journey to Equity: Strengthening Nursing Profession

Journey to Equity: Strengthening the Nursing Profession focuses on advancing equity in healthcare‚ addressing systemic disparities‚ and fostering inclusive practices. This guide provides strategies to create equitable work environments‚ promote diversity‚ and enhance patient outcomes. By addressing biases and improving cultural competence‚ it empowers nurses to advocate for change. The book emphasizes collaboration and leadership‚ inspiring nurses to drive meaningful progress in healthcare equity‚ ultimately strengthening the profession and improving care for all patients.

Nursing Specialty Guides

Nursing specialty guides offer tailored insights into specific fields‚ equipping nurses with specialized knowledge and practical skills for critical care‚ pediatrics‚ gerontology‚ and oncology‚ enhancing patient outcomes.

7.1. Critical Care Nursing

Critical care nursing involves caring for patients with life-threatening conditions in high-intensity settings. Nurses must possess advanced skills in monitoring‚ interpreting data‚ and managing complex therapies. They often work with ventilators‚ dialysis‚ and other advanced technologies. Critical care nurses require strong clinical judgment‚ quick decision-making‚ and the ability to stay calm under pressure. Emotional resilience and empathy are crucial‚ as they support patients and families during challenging times. Specialized training and certifications‚ such as CCRN‚ are highly recommended for this demanding yet rewarding field.

7.2. Pediatric Nursing

Pediatric nursing focuses on the care of infants‚ children‚ and adolescents‚ addressing their unique physical‚ emotional‚ and developmental needs. Nurses in this specialty require strong communication skills to interact with young patients and their families. They provide preventive care‚ such as vaccinations‚ and manage acute and chronic conditions like asthma or diabetes. Pediatric nurses must stay updated on child development stages and cultural considerations. The role demands patience‚ empathy‚ and the ability to make complex medical information understandable for both children and parents‚ ensuring comprehensive and compassionate care.

7.3. Gerontological Nursing

Gerontological nursing specializes in caring for older adults‚ focusing on promoting health‚ managing chronic conditions‚ and enhancing quality of life. Nurses in this field address age-related changes‚ such as mobility issues and cognitive decline. They emphasize preventive care‚ palliative support‚ and the importance of a safe‚ supportive environment. Gerontological nurses must also consider the emotional and psychological needs of elderly patients‚ fostering independence and dignity. This specialty requires a deep understanding of aging processes and a commitment to improving care for seniors in various settings‚ from hospitals to long-term care facilities.

7.4. Oncology Nursing

Oncology nursing focuses on caring for patients with cancer‚ from diagnosis through treatment and palliative care. Nurses administer chemotherapy‚ manage symptoms‚ and provide emotional support. They work in hospitals‚ clinics‚ and palliative care settings‚ ensuring comprehensive care. Oncology nurses must stay updated on cancer therapies and treatments‚ offering compassionate‚ patient-centered care. Their role is crucial in helping patients navigate the physical and emotional challenges of cancer‚ emphasizing hope‚ dignity‚ and quality of life throughout the journey.

Technology in Nursing

Technology transforms nursing by enhancing patient care‚ streamlining workflows‚ and improving education. Tools like digital platforms and QR codes in study guides boost efficiency and knowledge retention.

8.1. Digital Tools for Nursing Students

Digital tools revolutionize nursing education‚ offering interactive study guides‚ online prep resources‚ and mobile apps. These tools provide accessible learning‚ enhance retention‚ and simplify complex concepts. QR codes in study guides link to video tutorials‚ while platforms like Barron’s Test Prep offer comprehensive review materials and practice tests. Digital tools empower students to learn efficiently‚ anytime and anywhere‚ ensuring they are well-prepared for exams and real-world challenges in nursing.

8.2. QR Codes in Study Guides

QR codes in study guides are transforming nursing education by linking students to interactive content. These codes connect learners to video tutorials‚ practice questions‚ and additional resources‚ enhancing understanding and engagement. They bridge traditional study materials with digital learning‚ offering instant access to supplementary tools. QR codes enable self-paced learning‚ making complex topics more manageable. Their integration into study guides has become a popular and effective method‚ praised for its convenience and ability to enrich the learning experience for nursing students.

8.3. Online Study Prep Resources

Online study prep resources offer nursing students flexible and accessible learning tools. Platforms provide interactive modules‚ practice exams‚ and video tutorials‚ catering to diverse learning styles. These resources are accessible 24/7‚ allowing students to study at their own pace. They often include NCLEX-RN prep materials‚ case studies‚ and clinical scenarios‚ helping students build confidence and competence. Many resources are mobile-friendly‚ enabling learning on-the-go. These digital tools enhance traditional study methods‚ making them indispensable for modern nursing education and exam preparation.

This nursing guide provides a comprehensive roadmap for success‚ offering invaluable insights and resources to support nurses in their education‚ practice‚ and professional growth.

9.1. Final Thoughts on Nursing Guide

9.2. Encouragement for Aspiring Nurses

Embarking on a nursing career is a noble and rewarding journey. Aspiring nurses‚ remember that your dedication will profoundly impact lives. Stay resilient‚ embrace lifelong learning‚ and lean on the wealth of resources available‚ from study guides to inspiring stories. Surround yourself with supportive communities and mentors who champion your growth. Trust in your passion and the foundational knowledge this guide provides. You are the future of healthcare‚ and your contributions will make a lasting difference in the lives of countless patients and families.

Instructions

instruction manual harley rear wheel assembly diagram

The Harley rear wheel assembly is a critical component, essential for both functionality and safety. Understanding its structure and components is vital for proper maintenance and repairs.

1.1 Importance of Proper Assembly and Maintenance

Proper assembly and maintenance of the Harley rear wheel are crucial for ensuring safety, performance, and longevity. Improper installation or neglect can lead to wobbling, reduced braking efficiency, or even structural failure. Regular cleaning and lubrication of components like spokes, bearings, and hubs are essential to prevent corrosion and wear. Adhering to the diagram and manufacturer guidelines ensures optimal functionality and rider safety, making maintenance a priority for every Harley owner.

1.2 Overview of the Rear Wheel Assembly Components

The Harley rear wheel assembly comprises several key components, including the rim, spokes, hub, bearings, sprocket, brake caliper, and tire. The rim provides structural support, while spokes connect it to the hub, ensuring durability. Bearings within the hub facilitate smooth rotation, and the sprocket engages with the drive belt. The brake caliper and rotor are integral for stopping power. Each part must be properly aligned and secured to ensure optimal performance and safety.

Understanding the Rear Wheel Assembly Diagram

The rear wheel assembly diagram provides a detailed visual guide, illustrating components like the hub, spokes, rim, bearings, and sprocket. It aids in identifying parts and their relationships, essential for maintenance and repairs.

2.1 Key Components Illustrated in the Diagram

The diagram highlights essential parts such as the hub, which houses the bearings, the rim that holds the tire, and the spokes that connect the hub to the rim. Additionally, it showcases the sprocket for power transmission, the brake caliper for stopping power, and the tire for traction. These components are intricately detailed to ensure clarity and ease of identification during maintenance or repairs.

2;2 How to Interpret the Exploded View Diagram

The exploded view diagram provides a detailed visual breakdown of the rear wheel assembly, showcasing how components like the hub, spokes, rim, and bearings fit together. It illustrates the assembly sequence, making it easier to understand disassembly and reassembly processes. By referencing the diagram, users can identify each part’s location and relationship to others, ensuring proper alignment and torque specifications during maintenance or repairs.

Tools and Materials Required

Essential tools include a torque wrench, impact gun, pliers, punches, and socket sets. Materials needed are lubricants, cleaning agents, and protective coatings for optimal assembly and maintenance.

3.1 Essential Tools for Assembly and Disassembly

The process requires specific tools like a torque wrench, impact gun, socket set, and pliers. A wheel chock and jack are necessary for safe lifting. Use punches and drifts for bearing removal. Ensure all tools are compatible with Harley-Davidson specifications to avoid damage. Proper lubrication tools and cleaning supplies are also essential. Having the right tools ensures efficient disassembly and assembly, preventing damage and ensuring safety throughout the process.

3.2 Recommended Materials for Lubrication and Protection

Use Harley-Davidson-approved lubricants for bearings and moving parts to ensure durability. Apply rust-inhibiting coatings to protect metal components. Clean chrome surfaces with specialized Harley-Davidson wheel cleaners and brushes. Regularly grease axle and bearing assemblies to prevent wear. Silicone-based sprays can protect rubber and plastic parts from cracking. Always follow manufacturer guidelines for lubrication and protection to maintain the integrity and longevity of the rear wheel assembly components.

Pre-Assembly Preparation

Ensure a clean, well-lit workspace and wear appropriate safety gear. Inspect all components for damage or wear. Organize tools and materials for efficient assembly.

4.1 Safety Precautions and Workspace Setup

Always wear protective gear, including gloves and safety glasses. Ensure the motorcycle is on a stable stand with the brake engaged to prevent movement. Clear the workspace of clutter and flammable materials. Use jack stands for added stability when lifting. Proper ventilation is essential, especially when using chemicals. Keep a fire extinguisher nearby. Ensure all tools are within reach to avoid distractions during assembly.

4.2 Inspecting the Components for Damage or Wear

Inspect all components for visible damage, rust, or excessive wear. Check bearings for smooth operation and any signs of play. Examine spokes for tension and damage, ensuring none are loose or bent. Inspect the rim for dents or warping and the tire for uneven wear or cracks. Clean the hub thoroughly and verify its alignment. Use a torque wrench to ensure proper tightening of bolts and nuts. Refer to the diagram for correct part identification and ensure all components are free from debris.

Step-by-Step Disassembly Process

Begin by removing the rear wheel from the motorcycle, then disassemble the components, such as the tire, rim, spokes, and hub, using appropriate tools and diagrams.

5.1 Removing the Rear Wheel from the Motorcycle

Begin by safely lifting the motorcycle using a jack or stand to access the rear wheel; Remove the axle nut and washer, then gently pull the wheel straight back. Ensure the bike is stabilized to prevent accidents. Use a wrench to loosen any additional bolts or components securing the wheel. Carefully lower the wheel to the ground, taking note of its weight. This step requires precision and caution to avoid damage or injury.

5.2 Disassembling the Wheel Components (Tire, Rim, Spokes, Hub)

Start by removing the tire from the rim using tire levers, ensuring not to damage the inner tube. Next, detach the spokes from the hub, carefully organizing them for reassembly. Remove the hub from the rim, taking note of the bearings and spacers. Use a hub puller if necessary, avoiding excessive force. Finally, separate all components, labeling each for easy identification during reassembly.

Assembly Process

Rebuild the hub with new bearings, ensuring proper grease application. Reattach spokes, tightening evenly. Mount the tire, aligning it perfectly with the rim for a secure fit.

6.1 Rebuilding the Hub and Bearing Assembly

Rebuilding the hub requires precision to ensure proper functionality. Start by thoroughly cleaning the hub and inspecting for wear. Replace worn or damaged bearings, applying a high-quality grease like Harley-Davidson’s Wheel Bearing Grease. Reassemble the hub, making sure the bearings are securely seated and aligned. Tighten all components according to the torque specifications provided in the service manual. Proper lubrication and alignment are crucial for smooth operation and longevity of the rear wheel assembly.

6.2 Reinstalling the Spokes and Tightening Them Properly

Reinstalling the spokes requires careful attention to ensure even tension and proper alignment. Start by threading each spoke through the hub and rim, ensuring they are securely seated. Tighten the nipples in a star pattern to avoid warping the rim. Use a spoke wrench to achieve the recommended torque, checking tension with a truing stand if available. Properly tightened spokes ensure a stable and balanced rear wheel assembly, enhancing both performance and safety.

6.3 Mounting the Tire and Ensuring Proper Alignment

Mounting the tire requires precision to ensure proper alignment and functionality. Place the tire on the rim, aligning the valve stem with the hub. Use a truing stand to check alignment with the swingarm. Tighten the axle nuts evenly, following the recommended torque specifications. Double-check the tire pressure and ensure the wheel spins freely without wobbling. Proper alignment is crucial for balanced handling and optimal performance of the Harley rear wheel assembly.

Reassembly and Installation

Reassemble the rear wheel by aligning it with the swingarm, ensuring proper fitment. Secure the axle nuts and tighten according to specified torque values for safety and stability.

7.1 Aligning the Rear Wheel with the Swingarm

Aligning the rear wheel with the swingarm ensures proper fitment and functionality. Use the axle to guide the wheel into place, ensuring it slides smoothly into the swingarm. Check for any misalignment by visually inspecting the wheel’s position. Once aligned, secure the axle nuts and tighten them evenly to maintain balance and prevent vibration during operation. Proper alignment is crucial for safe riding and optimal performance;

7.2 Securing the Wheel with the Axle and Bolts

Securing the rear wheel involves inserting the axle through the swingarm and wheel hub, ensuring proper alignment. Tighten the axle bolts gradually in a star pattern to avoid warping the hub. Use a torque wrench to apply the recommended torque specification for the bolts; Double-check the alignment and ensure the wheel spins freely without wobbling. Properly secured bolts prevent vibration and ensure safe operation of the motorcycle.

Post-Installation Checks

After installation, test the brakes to ensure proper functionality. Check the wheel alignment and verify tire pressure matches the recommended specifications for optimal performance and safety.

8.1 Testing the Brakes and Ensuring Proper Functionality

After reinstalling the rear wheel, test the brakes thoroughly. Ensure the brake caliper is properly aligned and the pads make full contact with the rotor. Perform a slow, controlled stop to check for any sponginess or resistance in the brake lever. If the brakes feel uneven or weak, inspect for air in the lines or improperly seated pads. Proper brake functionality is crucial for safety, so any issues must be addressed immediately.

8.2 Checking the Wheel Alignment and Tire Pressure

After installation, ensure the rear wheel is properly aligned with the swingarm and frame. Check for any wobbling or misalignment by spinning the wheel. Verify tire pressure using a reliable gauge, adhering to the manufacturer’s specifications. Under-inflated tires can lead to poor handling and uneven wear. Inspect the tire for damage or wear, and ensure the valve stem is securely tightened. Proper alignment and pressure are crucial for optimal performance and safety.

Maintenance and Upkeep

Regular maintenance ensures the Harley rear wheel assembly remains in optimal condition. Clean chrome components with Harley-Davidson approved cleaners and lubricate bearings periodically. Inspect spokes and hubs for wear or damage, addressing issues promptly to prevent further deterioration and ensure safety.

9.1 Cleaning and Lubricating the Rear Wheel Components

Regular cleaning and lubrication are essential for maintaining the Harley rear wheel assembly. Use Harley-Davidson approved cleaners and brushes to remove dirt and grime, especially from heavily soiled areas like spokes and hubs. Lubricate bearings with Harley-Davidson Bearing Lubricant and ensure the sprocket is well-greased. For chains, apply Harley-Davidson Chain Lube periodically. Always follow manufacturer guidelines to prevent corrosion and ensure smooth operation. Regular maintenance preserves the wheel’s appearance and functionality, ensuring long-term reliability.

9.2 Regular Inspection of Bearings and Spokes

Regularly inspect the bearings and spokes of your Harley rear wheel assembly to ensure optimal performance and safety. Check bearings for smooth rotation and any signs of wear or play. Inspect spokes for tension and damage, tightening them if necessary. Lubricate bearings with Harley-Davidson approved grease and replace any worn or rusted components promptly. This routine maintenance helps prevent issues like wobbling or noise, ensuring a smooth and safe ride. Always refer to the exploded diagram for precise identification of parts.

Troubleshooting Common Issues

Identify and address common issues like wobbling, noise, or play in the rear wheel assembly. Inspect components, tighten loose spokes, and replace worn bearings or damaged parts.

10.1 Identifying and Fixing Wobbly Wheels

Identify a wobbly rear wheel by inspecting spokes, hub, and bearings. Check for loose spokes and visible damage to the rim or hub. Tighten loose spokes evenly using the correct torque specifications. Replace any damaged spokes or bearings to ensure stability. Refer to the exploded diagram in your manual for precise part identification and assembly guidance to fix the issue effectively.

10.2 Addressing Bearing Noise or Play

Bearing noise or play in the rear wheel assembly can indicate wear or improper installation. Inspect bearings for damage or contamination. Clean and repack them with high-quality grease if viable. Replace worn bearings entirely, following torque specifications. Refer to the exploded diagram for disassembly and reassembly steps. Ensure proper alignment and secure all components to eliminate play and restore smooth operation.

Customization and Upgrades

Customizing your Harley’s rear wheel assembly enhances aesthetics and performance. Consider upgrading to chrome components, lightweight rims, or high-performance tires for improved style and functionality.

11.1 Aesthetic Upgrades for the Rear Wheel

Aesthetic upgrades for the Harley rear wheel can transform its appearance. Chrome-plated components, such as spokes and rims, add a sleek, polished look. Custom-designed wheels, like billet or forged aluminum rims, offer unique styles. Additionally, installing LED lighting around the wheel or adding decorative hub caps can enhance visual appeal. These upgrades allow riders to personalize their bike, blending functionality with a standout aesthetic design.

11.2 Performance Enhancements for the Rear Wheel Assembly

Enhancing the rear wheel assembly can improve performance and handling. Upgrading to lightweight aluminum or forged rims reduces unsprung weight, boosting acceleration. High-performance tires with advanced tread patterns optimize traction and stability; Additionally, installing a performance sprocket or pulley can improve power delivery. Adjustable components, such as tension-adjustable spokes, ensure optimal wheel alignment and responsiveness, catering to specific riding styles and preferences for enhanced overall performance.

Warranty and Manufacturer Support

Harley-Davidson offers comprehensive warranty coverage for rear wheel assemblies, ensuring protection against defects. Manufacturer support includes access to detailed diagrams, repair resources, and expert assistance for seamless maintenance and repairs.

12.1 Understanding Harley-Davidson’s Warranty Coverage

Harley-Davidson provides a comprehensive warranty covering defects in materials and workmanship for the rear wheel assembly. This coverage ensures owners receive repairs or replacements without additional costs. The warranty period typically spans multiple years and miles, offering peace of mind. It’s essential to review specific terms and conditions to understand what is included and any potential limitations. Proper maintenance and adherence to service schedules can help maintain warranty validity.

12.2 Contacting Harley-Davidson Support for Assistance

For inquiries or issues with your Harley rear wheel assembly, contacting Harley-Davidson support is straightforward. Visit their official website for contact details, including phone numbers, email, or live chat options. Local dealerships also provide assistance, offering troubleshooting, warranty claims, and genuine part recommendations. Ensure to have your VIN and specific details ready for efficient support. Their team is equipped to address concerns, ensuring your bike performs optimally.

This manual provides a comprehensive guide to understanding and working with the Harley rear wheel assembly. Detailed explanations and diagrams ensure proper maintenance and repair practices.

13.1 Summary of Key Steps and Best Practices

Following the outlined steps ensures a successful rear wheel assembly. Referencing diagrams, using proper tools, and adhering to torque specifications are crucial. Regular maintenance, including cleaning and lubricating components, prevents wear and tear. Always inspect parts for damage before reassembly and test functionality post-installation. Safe workspace setup and adherence to safety precautions are non-negotiable. Consult Harley-Davidson resources for accurate guidance and support.

13.2 Final Tips for a Successful Rear Wheel Assembly

Always reference the exploded view diagram for clarity. Ensure all components are clean and free from damage before assembly. Tighten spokes and bolts in a star pattern to maintain even tension. Double-check torque specifications for bolts and bearings. Regularly inspect and lubricate moving parts to prevent wear. Test the brake functionality and wheel alignment post-installation. Consult Harley-Davidson manuals or support for any uncertainties. Patience and precision are key to a successful assembly.