Guide

key switch guide

A key switch is a device enabling secure control of electrical systems through a physical key, ensuring authorized access and enhanced security across various critical applications and industries effectively.

1.1 What is a Key Switch?

A key switch is a device that requires a physical key to activate or deactivate an electrical circuit. It combines a mechanical key mechanism with an electrical switching system, ensuring secure control over various systems. Unlike standard switches, key switches prevent unauthorized access by requiring a specific key to operate. They are commonly used in security systems, industrial equipment, and vehicle ignition systems to provide an additional layer of control and protection. This mechanism ensures that only authorized individuals can activate or deactivate the associated circuit, making them essential for sensitive applications.

1.2 Importance of Key Switches in Security and Control Systems

Key switches play a vital role in enhancing security and control across various systems. By requiring a physical key for activation, they prevent unauthorized access, ensuring only authorized individuals can operate critical systems. This makes them indispensable in security systems, industrial equipment, and vehicle ignition systems. Their ability to restrict control ensures operational integrity and safety, particularly in sensitive environments. As a result, key switches are widely adopted in applications where secure and reliable operation is paramount, providing an additional layer of protection against unauthorized use or tampering.

How Key Switches Work

Key switches operate by requiring a physical key to align internal contacts, completing an electrical circuit and enabling control over connected systems or devices securely and effectively.

2.1 Mechanical Operation of Key Switches

A key switch functions mechanically by requiring a physical key to activate its internal mechanism. When the correct key is inserted and turned, it rotates a spindle or lever, moving internal contacts to either connect or disconnect an electrical circuit. This mechanical process ensures secure control, as the switch cannot be operated without the proper key. The design often includes anti-pick pins or other security features to prevent unauthorized use, making it a reliable method for controlling access in various systems and devices effectively.

2.2 Electrical Circuit Activation

Key switches activate electrical circuits by aligning internal contacts when the correct key is inserted and turned. This alignment completes the circuit, allowing electrical current to flow and power connected devices or systems. The activation process ensures controlled power distribution, enabling secure and reliable operation of the connected equipment. By requiring a physical key, these switches prevent unauthorized access and accidental activation, making them essential for maintaining safety and security in various applications. The precise mechanical-to-electrical interface ensures durability and consistent performance over time.

Types of Key Switches

Key switches vary by design, including rotary, toggle, and electronic types, each offering distinct functionalities for security, control, and specialized applications like industrial equipment and keyboards effectively.

3.1 Rotary Key Switches

Rotary key switches operate by turning a key to switch between multiple positions, often used in control panels, access doors, and public transportation systems. They offer durability and resistance to tampering, making them ideal for secure applications. These switches provide clear feedback with a rotational mechanism, ensuring precise control. Commonly found in industrial settings, rotary key switches are valued for their reliability and ability to handle complex switching requirements effectively.

3.2 Toggle Key Switches

Toggle key switches are designed with a lever-style mechanism that is activated by a physical key. Unlike rotary switches, they do not require rotation but instead move in a linear or rocker motion. These switches are commonly used in control panels, industrial equipment, and security systems. Toggle key switches are known for their simplicity and reliability, offering clear on/off or multi-position functionality. They are often preferred in applications where quick, precise control is necessary, making them a versatile option for various industrial and security-based environments.

3.3 Electronic Key Switches

Electronic key switches operate using electronic or digital signals rather than a physical mechanical key. They provide advanced security features, such as encryption and programmable access control, making them ideal for high-security applications. These switches are often integrated with digital systems, allowing for remote monitoring and control. Unlike traditional mechanical switches, electronic key switches minimize wear and tear and offer greater reliability. They are commonly used in modern security systems, industrial control panels, and smart devices, where digital authentication and secure access are critical. Their programmable nature ensures flexibility and adaptability to various security requirements.

Applications of Key Switches

Key switches are essential in security systems, industrial equipment, vehicle ignition, and mechanical keyboards, ensuring secure and controlled access across diverse applications and industries effectively.

4.1 Security Systems

In security systems, key switches ensure restricted access to critical functions, such as door locks, safes, and control panels. They provide an additional layer of protection against unauthorized use, ensuring that only designated personnel can activate or deactivate sensitive systems. These switches are commonly integrated into security infrastructure to enhance safety and prevent potential breaches. Their use is particularly prevalent in high-security environments, where controlling access is paramount. By requiring a physical key, they add a robust barrier against unauthorized access, making them indispensable in modern security setups.

4.2 Industrial Equipment Control

Key switches play a vital role in industrial equipment control, offering a secure and reliable method to operate machinery and systems. They ensure that only authorized personnel can activate or adjust equipment, preventing unauthorized access and potential accidents. These switches are often integrated into control panels, enabling precise operation of industrial processes. By requiring a physical key, they provide an additional layer of safety and operational integrity. This makes them essential in industries where machinery control must be strictly regulated, ensuring efficient and secure workflow management while maintaining production consistency and safety standards. Their durability and reliability further enhance their suitability for industrial environments.

4.3 Vehicle Ignition Systems

Key switches are integral to vehicle ignition systems, ensuring secure and controlled operation. They typically feature multiple positions, such as off, accessory, on, and start, allowing precise control over the vehicle’s functions. By requiring a physical key, these switches prevent unauthorized use and enhance security. Their design ensures that only authorized individuals can start or operate the vehicle, making them a critical component in modern transportation. The ignition key switch is a fundamental element in maintaining vehicle safety and operational integrity, balancing convenience with robust security measures to protect against theft and misuse effectively.

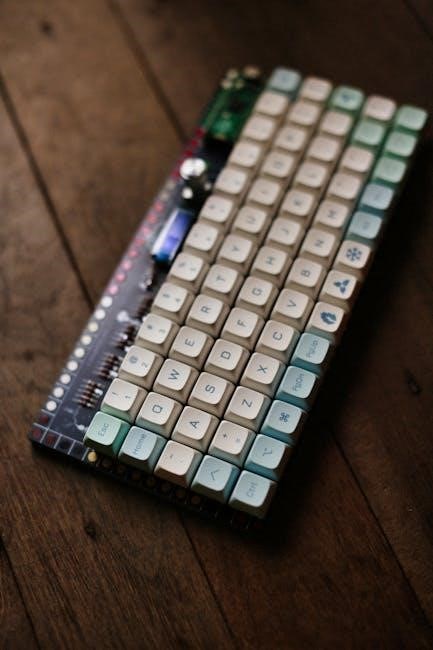
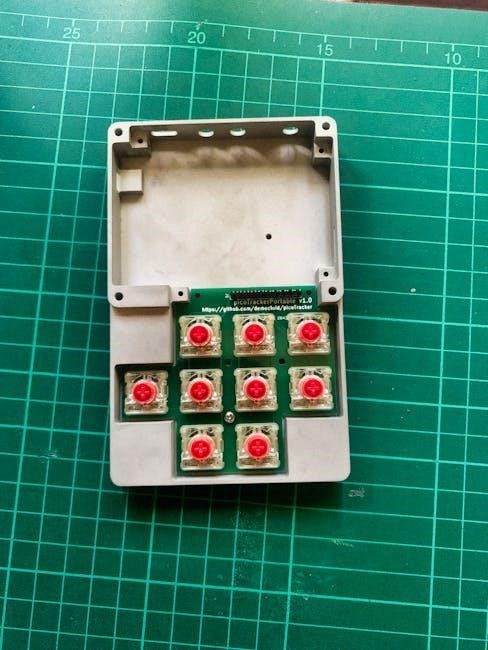
4.4 Mechanical Keyboards

Key switches are essential components in mechanical keyboards, providing the mechanism under each key that registers presses. These switches offer superior durability and tactile feedback compared to membrane keyboards, making them popular among typists and gamers. Mechanical keyboards allow users to choose from various switch types, such as linear, tactile, or clicky, each offering distinct actuation forces and sound levels. The choice of switch significantly impacts typing accuracy, comfort, and overall satisfaction. Understanding the differences in key switches helps users select the best option for their needs, enhancing productivity and personalized typing experiences.

Key Switch Types for Mechanical Keyboards

Mechanical keyboards utilize key switches offering distinct actuation forces, feels, and sounds. Common types include linear, tactile, and clicky switches, each catering to specific preferences and typing styles effectively.

5.1 Linear Switches

Linear switches are a popular choice for mechanical keyboards, offering a smooth, consistent actuation without a tactile bump. They feature a straight, uninterrupted motion from the top to the bottom of the key press. This design provides a seamless typing or gaming experience, as the user doesn’t feel a distinct feedback point. Linear switches are ideal for those who prefer a light, fluid keystroke and faster actuation. Common examples include Cherry MX Red and Kailh Red switches, which are favored by gamers and typists seeking a responsive, low-resistance input method. Their simplicity makes them durable and reliable for heavy use.

5.2 Tactile Switches

Tactile switches provide a distinct bump or feedback during key actuation, signaling to the user that the key has been pressed. This bump occurs midway through the key’s travel, allowing for precise control and reducing accidental key presses. Tactile switches, such as Cherry MX Brown or Kailh Brown, are popular among coders and typists who value the physical feedback without the audible click of clicky switches. They strike a balance between smooth actuation and noticeable resistance, making them versatile for both productivity and gaming. The tactile bump helps users know when a key is registered, promoting efficient typing and reducing typos.

5.3 Clicky Switches

Clicky switches combine tactile feedback with a distinct audible click, providing both a physical and auditory confirmation of key actuation. This makes them ideal for typists and gamers who rely on clear feedback to ensure accurate keystrokes. Clicky switches, such as Cherry MX Blue or Kailh Blue, feature a mechanism that produces a sharp, crisp sound when pressed. The sound is generated by a mechanism within the switch that creates a clicking noise as the key is actuated. These switches are often preferred by those who value both the tactile bump and the audible feedback, enhancing typing accuracy and user experience.

Choosing the Right Key Switch

Selecting the ideal key switch involves considering actuation force, travel distance, and sound preferences, ensuring optimal performance tailored to individual needs and applications effectively.

6.1 Actuation Force and Feel

Actuation force refers to the pressure needed to activate a key switch, ranging from light to heavy. Lighter switches (35g or less) suit fast typing, while heavier options (60g+) offer precise control. The “feel” depends on switch type—linear switches provide smooth actuation without tactile feedback, whereas tactile switches offer a noticeable bump, and clicky switches add audible feedback. Understanding personal preference for force and feel is crucial for selecting switches that enhance typing comfort and efficiency in mechanical keyboards or control systems. Proper selection ensures optimal performance and user satisfaction. Always consider these factors carefully.

6.2 Actuation Distance and Travel

Actuation distance is the distance a key must be pressed before it registers as an input, while total travel is the full range of key movement. Typically, actuation distance ranges from 1.5mm to 4mm, with total travel between 3mm and 5mm. Shorter actuation distances enable faster input registration, ideal for gaming and fast typing. Longer travel provides tactile feedback, reducing accidental presses. Understanding these measurements helps users choose switches that align with their preference for speed, feedback, or a balance of both, ensuring optimal performance for their specific needs and applications. Precise control is key to satisfaction.

6.3 Sound and Audible Feedback

Sound and audible feedback are critical factors in key switch selection, especially for mechanical keyboards. Clicky switches produce distinct audible clicks, providing clear confirmation of key presses, while tactile switches offer a subtle bump without noise. Linear switches are quiet, with no tactile or auditory cues. Silent switches are designed to minimize noise, ideal for shared workspaces. The choice depends on personal preference, environment, and typing style. Audible feedback can enhance typing accuracy and speed, but may be intrusive in quiet settings. Manufacturers often tailor switch designs to balance sound levels with performance, catering to diverse user needs and preferences effectively.

Installation and Wiring of Key Switches

Proper installation and wiring of key switches ensure reliable operation. Mount switches securely, connect terminals correctly, and follow circuit diagrams to avoid electrical issues and ensure safety always.

7.1 Basic Wiring Principles

Understanding basic wiring principles is crucial for installing key switches. Start by identifying the positive and negative terminals on the switch and the device it controls. Use appropriate gauge wire to ensure reliable connections and minimize resistance. Always disconnect power before wiring to avoid electrical shock. Connect the positive terminal to the power source and the negative terminal to the load, ensuring secure connections with solder or crimping. Double-check wiring diagrams specific to your key switch model to maintain proper circuit functionality and safety standards. Proper wiring ensures smooth operation and prevents damage to the system.

7.2 Mounting and Connectors

Proper mounting and connector selection are essential for key switch installation. Key switches are typically mounted using screws, clips, or adhesive, depending on the design. Ensure the switch is securely fastened to prevent movement or vibration. Connectors vary, with common types including solder terminals, screw terminals, or plug-and-play connectors. Choose connectors that match your wiring setup for reliable connections. For panel-mounted switches, ensure proper alignment and secure fastening to avoid mechanical failure. Consider using locking connectors for high-vibration applications to maintain stability. Always refer to the manufacturer’s specifications for mounting and connector compatibility to ensure optimal performance and longevity. Proper installation ensures durability and functionality.

Maintenance and Care

Regular cleaning with compressed air and lubrication of moving parts ensures optimal performance. Secure all connections and inspect periodically for wear and tear.

8.1 Cleaning Key Switches

Regular cleaning is essential to maintain the functionality and longevity of key switches. Use compressed air to remove dust and debris from the switch mechanism. For mechanical keyboards, gently pull off the keycaps and wipe the switches with a soft brush or a damp cloth. Avoid harsh chemicals or excessive moisture, as they can damage electrical components. Proper cleaning ensures smooth operation, prevents jamming, and maintains tactile feedback. Regular maintenance also helps reduce wear and tear, ensuring optimal performance over time. Always refer to the manufacturer’s guidelines for specific cleaning recommendations tailored to your key switch type.

8.2 Lubrication and Performance Optimization

Lubrication enhances the smoothness and durability of key switches by reducing friction and noise. Apply a small amount of silicone-based lubricant or dielectric grease to the switch’s moving parts. Avoid over-lubricating, as it can attract dust and degrade performance. For mechanical keyboards, focus on the stem and spring. Lubrication is particularly beneficial for switches with high usage or those in noisy environments. Regularly lubricating key switches ensures consistent actuation, reduces wear, and maintains optimal tactile feedback. This simple maintenance step can significantly extend the lifespan and improve the overall functionality of your key switches.

Common Issues and Troubleshooting

Common issues include sticky keys, intermittent contact, and worn-out components. Troubleshooting involves cleaning, inspecting wiring, and replacing faulty switches to restore functionality and reliability effectively.

9.1 Sticky or Jammed Keys

Sticky or jammed keys occur due to dirt, dust, or moisture accumulation inside the switch. This can hinder smooth operation, causing keys to get stuck or malfunction. Regular cleaning with compressed air or a soft brush is essential to remove debris. For severe cases, disassembling the switch and lubricating moving parts may be necessary. Ensuring the switch is dry and free from contaminants prevents jamming, maintaining optimal performance and longevity of the key switch. Proper maintenance is crucial to avoid such issues and ensure reliable functionality over time.

9.2 Intermittent Electrical Contact

Intermittent electrical contact occurs when the internal connections of a key switch fail to maintain consistent contact. This can result from worn-out contacts, dirt buildup, or corrosion. Symptoms include flickering lights, inconsistent operation, or complete loss of function. To resolve this, clean the contacts with a soft brush or electrical cleaner. In severe cases, replacing the switch may be necessary. Regular maintenance, such as cleaning and inspecting the contacts, can prevent intermittent issues. Ensuring a clean and dry environment for the switch also helps maintain reliable electrical contact and overall performance.

PDF

dieta dash menú semanal pdf

The DASH Diet is a well-rounded eating plan designed to lower blood pressure and improve overall health. Focused on whole, nutrient-rich foods, it emphasizes reducing sodium, increasing potassium, calcium, and magnesium intake, while promoting balanced nutrition for heart health and weight management.

What is the DASH Diet?

The DASH Diet, or Dietary Approaches to Stop Hypertension, is a balanced eating plan designed to help lower blood pressure and promote overall health. It focuses on whole, unprocessed foods like fruits, vegetables, whole grains, lean proteins, and low-fat dairy. The diet emphasizes reducing sodium intake and increasing consumption of potassium, calcium, and magnesium, which are key for heart health. It is not a quick-fix diet but a sustainable lifestyle change that supports weight management and reduces the risk of chronic diseases, making it a highly recommended choice for improving cardiovascular well-being.

Benefits of the DASH Diet

The DASH Diet offers numerous health benefits, primarily lowering blood pressure and reducing the risk of heart disease. It aids in weight loss, improves overall cardiovascular health, and helps manage blood sugar levels. By focusing on nutrient-rich foods, it promotes better digestion and energy levels. The diet also reduces the risk of chronic diseases like diabetes and stroke. Its balanced approach makes it a sustainable choice for long-term health, supported by scientific research and widely recommended by healthcare professionals for its effectiveness in improving overall well-being.

How the DASH Diet Helps with Weight Loss and Health

The DASH Diet promotes weight loss by focusing on balanced nutrition and portion control, emphasizing whole, unprocessed foods that reduce empty calorie intake. It helps maintain muscle mass while burning fat, supporting a healthy metabolism. By limiting sodium and increasing potassium, calcium, and magnesium, the diet lowers blood pressure and improves cardiovascular health. Its structured approach reduces cravings for unhealthy snacks, aiding in sustainable weight loss. Additionally, the diet’s emphasis on fiber and protein enhances satiety, making it easier to stick to a healthier lifestyle for long-term weight management and overall well-being.

Key Principles of the DASH Diet

The DASH Diet emphasizes whole, unprocessed foods, reduces sodium intake, and increases potassium, calcium, and magnesium to lower blood pressure and improve heart health naturally.

Daily Portion Recommendations

The DASH Diet recommends 4-5 daily servings of fruits and vegetables, 6-8 servings of whole grains, 2-3 servings of low-fat dairy, and up to 2 servings of lean proteins. It advises limiting sodium to 2,300 mg and emphasizes increasing potassium, calcium, and magnesium intake. This balanced approach helps lower blood pressure and supports overall health by focusing on nutrient-rich foods and portion control, making it a sustainable choice for long-term wellness.

Focus on Whole, Unprocessed Foods

The DASH Diet emphasizes whole, unprocessed foods to maximize nutrient intake and minimize harmful additives. Prioritize fruits, vegetables, whole grains, lean proteins, and low-fat dairy, avoiding processed foods high in sodium, added sugars, and unhealthy fats. These whole foods provide essential vitamins, minerals, and fiber, supporting heart health and blood pressure regulation. By focusing on natural ingredients, the diet promotes a balanced and sustainable eating pattern that fosters long-term health benefits and reduces the risk of chronic diseases.

Reducing Sodium Intake

Reducing sodium intake is a cornerstone of the DASH Diet, aiming to lower blood pressure and improve heart health. The diet recommends limiting daily sodium to 2,300 mg, with an optional 1,500 mg goal for greater benefits. Focus on fresh, unprocessed foods, and season meals with herbs and spices instead of salt. Choose low-sodium versions of packaged foods and gradually reduce sodium in your diet to adapt your taste buds. This approach helps minimize blood pressure spikes and supports overall cardiovascular well-being.

Importance of Potassium, Calcium, and Magnesium

Potassium, calcium, and magnesium are essential nutrients in the DASH Diet, playing key roles in lowering blood pressure and enhancing overall health. Potassium helps balance sodium’s effects, reducing blood pressure. Calcium supports bone health and muscle function, while magnesium aids in muscle relaxation and nerve function. These minerals work synergistically to improve cardiovascular health, reduce hypertension risk, and support the diet’s overall effectiveness. Incorporating foods rich in these nutrients, such as leafy greens, dairy, and nuts, is crucial for maximizing the DASH Diet’s benefits and promoting long-term well-being.

Weekly Meal Plan Overview

The DASH Diet’s weekly meal plan emphasizes whole, nutrient-rich foods, variety, and balanced portions. It reduces sodium and processed foods, promoting heart health and weight management.

Breakfast Options

The DASH Diet offers hearty and nutritious breakfast choices. Options include oatmeal with fresh berries and a splash of low-fat milk, whole-grain toast with avocado or peanut butter, scrambled eggs with spinach, or Greek yogurt topped with granola and sliced bananas. Smoothies made with spinach, berries, and low-fat yogurt are also a great start. These meals are rich in potassium, calcium, and magnesium, setting a healthy tone for the day while keeping sodium intake low.

  • Oatmeal with berries and low-fat milk
  • Whole-grain toast with avocado or peanut butter
  • Scrambled eggs with spinach
  • Greek yogurt with granola and banana slices
  • Green smoothies with spinach, berries, and yogurt

Lunch Ideas

The DASH Diet offers a variety of nutritious and flavorful lunch options. Grilled chicken salads with mixed greens, whole-grain wraps with lean turkey and vegetables, and vegetable-based soups are excellent choices. Quinoa salads with chickpeas, cucumbers, and lemon dressing are also popular. These meals are rich in fiber, potassium, and calcium, while keeping sodium levels low. Incorporating a mix of protein, whole grains, and vegetables ensures a balanced and satisfying lunch.

  • Grilled chicken salad with mixed greens
  • Whole-grain wraps with lean turkey and veggies
  • Vegetable-based soups
  • Quinoa salads with chickpeas and lemon dressing
  • Lentil soup with a side of whole-grain bread

Dinner Recipes

Dinner on the DASH Diet focuses on lean proteins, vegetables, and whole grains, all prepared with minimal sodium. Popular recipes include baked salmon with lemon and herbs, herb-roasted chicken with steamed vegetables, and vegetable stir-fries with tofu or lean beef. These meals are rich in potassium, calcium, and magnesium, supporting blood pressure control. Incorporating spices and herbs enhances flavor without added salt, ensuring a delicious and healthy dinner.

  • Baked salmon with lemon and herbs
  • Herb-roasted chicken with steamed vegetables
  • Vegetable stir-fries with tofu or lean beef
  • Quinoa with roasted vegetables and grilled shrimp

Snacks and Desserts

Snacks and desserts on the DASH Diet should be nutrient-dense and low in sodium and added sugars. Fresh fruits like berries, apples, and bananas are excellent choices, providing natural sweetness and fiber. Veggie sticks with hummus or guacamole offer a healthy crunch. For desserts, opt for fruit salads, low-fat yogurt with honey, or dark chocolate in moderation. Nuts and seeds, such as almonds or pumpkin seeds, are satisfying snacks when portion-controlled. These options align with the DASH principles, promoting overall health and blood pressure management.

  • Fresh fruits (berries, apples, bananas)
  • Veggie sticks with hummus or guacamole
  • Fruit salads
  • Low-fat yogurt with honey
  • Dark chocolate in moderation
  • Nuts and seeds (almonds, pumpkin seeds)

Sample Weekly Menu

A DASH Diet weekly menu offers balanced nutrition, focusing on whole foods, fruits, vegetables, lean proteins, and whole grains, with reduced sodium and added sugars.

  • Monday: Balanced Start
  • Tuesday: Fresh and Nutritious
  • Wednesday: Protein-Rich Meals
  • Thursday: Fiber-Focused Options
  • Friday: Healthy Carbohydrates
  • Saturday: Low-Sodium Choices
  • Sunday: Refreshing and Light

Monday: Balanced Start

Begin the week with a nutritious breakfast: 3/4 cup of whole-grain cereal, 8 oz of skimmed milk, a medium banana, and a slice of whole-grain toast. For lunch, enjoy grilled chicken breast with mixed vegetables and quinoa. Snack on an apple with a handful of almonds. Dinner features roasted salmon, steamed broccoli, and sweet potatoes. This balanced start ensures a variety of flavors and nutrients, aligning with the DASH Diet’s emphasis on whole foods and reduced sodium for heart health and weight management.

Tuesday: Fresh and Nutritious

Start Tuesday with a hearty bowl of oatmeal topped with fresh berries and a drizzle of honey, paired with a cup of green tea. Lunch features a grilled chicken salad with mixed greens, cherry tomatoes, and a light vinaigrette. For a mid-afternoon snack, enjoy a small apple with a tablespoon of almond butter. Dinner includes baked cod seasoned with lemon, garlic, and herbs, served alongside steamed asparagus and brown rice. This day’s meals are packed with fiber, vitamins, and lean proteins, supporting heart health and weight management.

Wednesday: Protein-Rich Meals

Wednesday focuses on protein-rich dishes to support muscle health and satisfaction. Begin with scrambled egg whites, spinach, and cherry tomatoes, served with whole-grain toast. Lunch features grilled chicken breast paired with a quinoa salad, mixed vegetables, and a light vinaigrette. A mid-afternoon snack includes a small Greek yogurt with mixed berries. Dinner highlights baked salmon with lemon and herbs, steamed green beans, and wild rice; This day emphasizes lean proteins, fiber, and heart-healthy fats, aligning with DASH principles to promote overall well-being and weight management.

Thursday: Fiber-Focused Options

Thursday’s meals emphasize high-fiber foods to support digestion and heart health. Breakfast includes oatmeal topped with berries and a drizzle of honey, paired with a side of sliced almonds. Lunch features a hearty vegetable stir-fry with broccoli, carrots, and bell peppers, served over brown rice. A mid-afternoon snack of an apple with almond butter provides additional fiber. Dinner highlights grilled lentils with spinach, cherry tomatoes, and quinoa. This day’s menu is designed to maximize fiber intake, promoting satiety and aligning with the DASH diet’s focus on nutrient-rich, balanced eating.

Friday: Healthy Carbohydrates

Friday’s meals focus on healthy carbohydrates, emphasizing whole grains, fruits, and vegetables. Breakfast includes whole-grain pancakes topped with fresh berries and a dollop of low-fat yogurt. Lunch features a quinoa salad with mixed vegetables like cherry tomatoes, cucumbers, and bell peppers, alongside grilled chicken breast. A mid-afternoon snack of mixed berries with a handful of almonds provides natural energy. Dinner highlights roasted sweet potatoes, steamed green beans, and baked salmon. This day’s menu balances complex carbs with lean proteins and fiber, supporting sustained energy and overall nutrition.

Saturday: Low-Sodium Choices

Saturday’s meals highlight low-sodium options, focusing on fresh flavors and nutrient-dense ingredients. Breakfast includes oatmeal topped with fresh berries and a drizzle of honey, paired with a slice of whole-grain toast. Lunch features a garden salad with mixed greens, cherry tomatoes, and cucumbers, topped with grilled chicken breast and a light olive oil dressing; A mid-afternoon snack of baby carrots and a small apple with almond butter provides a satisfying crunch. Dinner offers lemon garlic shrimp with herbs like parsley and dill, served with quinoa and steamed asparagus. This day emphasizes balanced, sodium-conscious meals with vibrant flavors.

Sunday: Refreshing and Light

Sunday’s menu is designed to be light and rejuvenating, focusing on fresh, seasonal ingredients. Start with Greek yogurt topped with sliced strawberries and a sprinkle of chia seeds. Lunch features a mixed green salad with grilled chicken, cherry tomatoes, and a light vinaigrette. A mid-afternoon snack of sliced cucumber and bell peppers with hummus adds crunch and hydration. Dinner includes baked salmon with lemon and herbs, paired with steamed green beans and a small portion of quinoa. This day’s meals emphasize simplicity, freshness, and balanced flavors to wrap up the week feeling refreshed.

Grocery List for the DASH Diet

A well-rounded list includes fresh fruits, vegetables, whole grains, lean proteins, low-fat dairy, nuts, seeds, and legumes, ensuring a balanced intake of essential nutrients daily.

Fruits and Vegetables

The DASH Diet emphasizes a variety of colorful fruits and vegetables to provide essential vitamins, minerals, and antioxidants. Aim for 4-5 daily servings, including leafy greens like spinach, berries, and citrus fruits. Incorporate seasonal options like apples, carrots, and broccoli to ensure diversity. Opt for fresh, frozen, or canned varieties without added sugars or salts. Portion sizes are key, with a serving size roughly 1/2 cup cooked or 1 cup raw. Avoid high-sugar or processed options to maximize nutritional benefits. Stores like bananas, oranges, and pre-washed greens are convenient for meal prep and snacks.

Whole Grains

The DASH Diet recommends 6-8 daily servings of whole grains, emphasizing their role in providing fiber, vitamins, and minerals. Choose options like oats, quinoa, brown rice, and whole-grain bread or pasta. Whole grains help regulate blood pressure and support heart health by reducing inflammation and improving digestion. Incorporate them into meals, such as whole-grain cereals for breakfast or whole-grain wraps for lunch. Opt for 100% whole-grain products by checking labels; Versatile and nutritious, whole grains are a cornerstone of the DASH Diet, offering sustained energy and long-term health benefits when consumed as part of a balanced diet.

Lean Proteins

The DASH Diet recommends incorporating lean proteins to support heart health and reduce blood pressure. Opt for poultry like chicken or turkey, fish (especially fatty fish rich in omega-3s), and plant-based options like legumes, beans, and lentils. Avoid processed meats high in sodium and saturated fats. Low-fat dairy products, such as milk and yogurt, are also excellent sources of lean protein. These choices help maintain muscle mass while aligning with the diet’s goals of lowering sodium and increasing nutrient-rich foods. Portion control is key, ensuring balanced nutrition without overconsumption of protein.

Low-Fat Dairy Products

Low-fat dairy products are a cornerstone of the DASH Diet, providing essential calcium, vitamins, and minerals while supporting heart health. Choose options like skim milk, low-fat yogurt, and reduced-fat cheeses. These foods are rich in nutrients but low in saturated fats and sodium. Incorporating 2-3 servings daily helps maintain strong bones and supports blood pressure regulation. Opt for unsweetened varieties to avoid added sugars and ensure you’re aligning with the diet’s focus on natural, nutrient-dense foods. Portion control is key to balancing these beneficial products in your weekly meal plan.

Nuts, Seeds, and Legumes

Nuts, seeds, and legumes are integral to the DASH Diet, offering protein, fiber, and essential nutrients like potassium. They help lower blood pressure, improve heart health, and support weight management. Almonds, walnuts, sunflower seeds, and legumes like lentils or chickpeas are excellent choices. Aim for 1/4 cup of nuts or seeds daily and 1/2 cup of legumes. These foods add variety and satisfaction to meals while providing healthy fats and antioxidants. Opt for unsalted, unsweetened options to keep sodium and sugar intake low, aligning with the diet’s focus on natural, nutrient-rich choices.

Benefits Beyond Weight Loss

The DASH Diet improves heart health by lowering blood pressure and cholesterol. It reduces the risk of chronic diseases like diabetes and certain cancers, enhancing overall well-being.

Lowering Blood Pressure

The DASH Diet is renowned for its ability to significantly reduce blood pressure by emphasizing nutrient-rich foods. By limiting sodium and increasing potassium, calcium, and magnesium intake, it helps relax blood vessels and improve circulation. Studies show consistent reductions in both systolic and diastolic blood pressure, particularly in individuals with hypertension. This dietary approach not only supports heart health but also reduces the risk of developing high blood pressure, making it a highly effective lifestyle intervention for long-term cardiovascular well-being.

Improving Heart Health

The DASH Diet plays a crucial role in enhancing cardiovascular health by focusing on heart-friendly foods. It reduces saturated fats, trans fats, and sodium, while promoting the intake of whole grains, fruits, vegetables, and lean proteins. This balanced approach helps lower LDL cholesterol and triglycerides, reducing the risk of heart disease. By prioritizing nutrient-rich foods, the DASH Diet supports overall cardiovascular well-being and strengthens the body’s ability to maintain a healthy heart, making it an excellent choice for long-term heart health management and disease prevention.

Reducing Risk of Chronic Diseases

The DASH Diet significantly reduces the risk of chronic diseases by emphasizing nutrient-rich foods. High in fruits, vegetables, whole grains, and low-fat dairy, it provides essential vitamins and minerals. This dietary approach is linked to a lower incidence of type 2 diabetes, heart disease, and obesity. By limiting processed foods and excessive sodium, the DASH Diet helps maintain healthy blood sugar levels and cholesterol, further protecting against chronic conditions. Its balanced structure makes it an effective choice for long-term health and disease prevention, aligning with recommendations for overall wellness.

Tips for Adhering to the DASH Diet

Plan meals weekly, read nutrition labels to monitor sodium, and cook at home using fresh ingredients to maintain consistency and adherence to the DASH guidelines effectively.

Meal Planning and Prep

Meal planning is essential for adhering to the DASH Diet. Start by creating a weekly menu with balanced meals, ensuring variety and nutrient diversity. Make a grocery list based on your plan to avoid unhealthy impulse buys. Prep ingredients like chopping vegetables or cooking proteins in advance to save time during the week. Consider batch cooking meals for convenience. This approach helps maintain consistency, reduces food waste, and ensures you stay on track with your dietary goals. A well-organized plan makes healthier eating easier and more sustainable.

Reading Nutrition Labels

Reading nutrition labels is crucial for adhering to the DASH Diet. Focus on sodium content, aiming for no more than 2,300 mg daily. Choose products low in added sugars, unhealthy fats, and artificial ingredients. Prioritize foods rich in potassium, calcium, and magnesium. Check serving sizes to manage portion control. Be mindful of hidden sodium in processed foods and opt for whole, unprocessed options when possible. Understanding labels helps make informed choices, aligning with the DASH Diet’s goals of reducing blood pressure and promoting overall health through balanced nutrition.

Cooking at Home

Cooking at home is a cornerstone of the DASH Diet, allowing you to control ingredients and portion sizes. It enables you to limit sodium, avoid processed foods, and incorporate fresh fruits, vegetables, and whole grains. By preparing meals yourself, you can ensure alignment with the diet’s guidelines, such as using herbs and spices for flavor instead of salt. Meal prepping and planning can also help maintain consistency and make healthy eating easier. Cooking at home fosters healthier habits and supports the DASH Diet’s goals of improving heart health and managing blood pressure effectively.

Common Mistakes to Avoid

Avoid excessive sodium intake, neglecting vegetable portions, and ignoring portion sizes. These errors can hinder progress and reduce the diet’s effectiveness for blood pressure control.

Overconsumption of Sodium

Excessive sodium intake is a common mistake on the DASH Diet, undermining its blood pressure-lowering benefits. The diet recommends limiting sodium to 2,300 mg daily, with an ideal goal of 1,500 mg. Many processed and packaged foods are high in sodium, making it easy to exceed these limits. To avoid this, focus on whole, unprocessed foods, read nutrition labels carefully, and season meals with herbs and spices instead of salt. Reducing sodium gradually can help your taste buds adjust and improve overall adherence to the diet.

Not Eating Enough Vegetables

One common mistake on the DASH Diet is not consuming enough vegetables, which are rich in essential nutrients, fiber, and potassium. The diet recommends 4-5 servings daily to support blood pressure reduction and overall health. Ignoring vegetables can lead to nutrient deficiencies and hinder weight loss. Incorporate a variety of colorful vegetables into meals and snacks, such as leafy greens, bell peppers, and carrots. Aim to include vegetables in every meal to meet the daily goal and maximize the diet’s benefits.

Ignoring Portion Sizes

Overlooking portion sizes is a common error on the DASH Diet, leading to excessive calorie and sodium intake. The diet emphasizes specific serving amounts for each food group to ensure balance and nutrient adequacy. Ignoring these guidelines can hinder weight loss and blood pressure goals. Pay attention to recommended portions, such as 6-8 servings of whole grains and 2-3 servings of lean proteins daily. Use measuring cups or a food scale to gauge accurate amounts. Mindful portion control helps maintain the diet’s effectiveness and supports overall health objectives.

Frequently Asked Questions

Discover answers to common queries about the DASH Diet, including dining out, results timeline, and suitability for various individuals.

Can I Eat Out on the DASH Diet?

Eating out on the DASH Diet is possible with careful planning. Choose restaurants offering fresh, unprocessed options like salads, grilled meats, and steamed vegetables. Opt for dishes prepared without added salt, and request sauces or dressings on the side to control sodium intake. Avoid fried or high-sodium foods. Don’t hesitate to ask your server about cooking methods or modifications to align with DASH guidelines. Portion control is key, and sharing meals can help maintain appropriate serving sizes. Plan ahead by reviewing menus or nutritional information to make informed choices that support your health goals while enjoying dining out.

How Quickly Will I See Results?

Results on the DASH Diet vary, but many people notice improvements within a few weeks. Blood pressure often decreases noticeably within 2-4 weeks, while weight loss may take 1-3 months to become evident. Consistency is key, as the diet’s benefits are most pronounced with long-term adherence. Some individuals may experience rapid changes, especially in blood pressure, while others may see gradual improvements. Patience and persistence are important, as the DASH Diet is a sustainable lifestyle change rather than a quick fix. Stick to the plan, and over time, you’ll likely see positive outcomes for both weight and overall health.

Is the DASH Diet Suitable for Everyone?

The DASH Diet is generally suitable for most people, including those with diabetes, obesity, or high blood pressure. It is low in sodium and rich in essential nutrients, making it a healthy choice for overall well-being. However, individuals with specific dietary needs or medical conditions, such as severe kidney issues or those on low-potassium diets, should consult a healthcare provider before starting. While it is not a quick-fix diet, the DASH plan is versatile and can be adapted to suit various lifestyles and preferences, making it a sustainable option for long-term health.

The DASH Diet is a proven, balanced approach to improving heart health and managing weight, offering long-term benefits through nutrient-rich, whole foods and reduced sodium intake.

Final Thoughts on the DASH Diet

The DASH Diet is a scientifically-backed eating plan that promotes balanced nutrition and long-term health benefits. By focusing on whole, unprocessed foods and reducing sodium, it supports heart health, weight management, and chronic disease prevention. Its structured meal plan makes it easy to follow, offering a variety of delicious and nutritious options. Whether for blood pressure control or overall wellness, the DASH Diet is a sustainable choice that aligns with healthy lifestyle goals, making it a valuable approach for anyone seeking lasting improvements in their health and well-being.

Encouragement to Start the Diet

Starting the DASH Diet is a proactive step toward improving your health and well-being. With its focus on whole, nutrient-rich foods, this plan is not only sustainable but also flavorful and satisfying. By following a structured weekly menu, you can easily incorporate healthy habits into your daily routine. Remember, small changes add up over time, and the DASH Diet offers a balanced approach to nutrition that supports heart health, weight management, and overall vitality. Take the first step today and embrace a healthier lifestyle with confidence!

Instructions

instruction manual harley rear wheel assembly diagram

Instruction manual for Harley rear wheel assembly is essential, providing step-by-step guidance, diagrams, and safety tips to ensure proper installation and maintenance;

1․1․ Importance of an Instruction Manual for Harley Rear Wheel Assembly

An instruction manual is crucial for the proper assembly and maintenance of a Harley rear wheel, ensuring safety and preventing potential mechanical failures․ It provides detailed, step-by-step guidance, diagrams, and safety precautions, helping users avoid costly mistakes․ The manual also serves as a reference for troubleshooting common issues, such as misalignment or worn bearings․ By following the instructions, riders can ensure compliance with manufacturer standards and maintain optimal performance․ Proper assembly and maintenance are vital for rider safety, and the manual acts as a comprehensive guide to achieve this․ Regular lubrication, tire pressure checks, and brake inspections are also emphasized, ensuring the rear wheel operates efficiently and reliably․ A well-crafted manual enhances the overall riding experience and prolongs the lifespan of the motorcycle’s components․

1․2․ Brief Overview of the Harley Rear Wheel Assembly Diagram

The Harley rear wheel assembly diagram serves as a visual guide, detailing the components and their relationships․ It typically includes an exploded view of the wheel, hub, axle, bearings, and brake system, along with labels for each part․ This diagram helps users identify and understand the assembly process, ensuring correct installation․ It also highlights key steps, such as bearing replacement and wheel alignment, with visual cues for proper torque specifications․ The diagram often includes annotations for critical areas, such as brake rotor installation and tire mounting; Compatible with various Harley models, the diagram aligns with official service manuals, providing a clear and concise reference for both novice and experienced mechanics․ It is an essential tool for ensuring accuracy and safety during the assembly process․

Understanding the Instruction Manual

Understanding the Harley rear wheel assembly manual is crucial for safe and effective installation․ It provides clear instructions, detailed diagrams, and essential safety tips for a successful assembly process․

2․1․ Key Components of the Harley Rear Wheel Assembly Diagram

The Harley rear wheel assembly diagram outlines essential components, including the wheel hub, axle, spacers, and bearings․ These parts ensure proper alignment and smooth operation․ The hub houses the bearings, while the axle provides structural support․ Spacers maintain correct wheel positioning, and bearings facilitate rotation․ The diagram also highlights the brake rotor and sprocket or pulley, crucial for braking and power transmission․ Understanding these components is vital for accurate assembly and troubleshooting․ Each part’s placement and function are detailed to ensure riders can perform maintenance safely and effectively․ Proper assembly of these components guarantees optimal motorcycle performance and rider safety․

2․2․ Symbols and Abbreviations Used in the Manual

The Harley rear wheel assembly diagram uses specific symbols and abbreviations to convey instructions clearly; Common symbols include warning signs for safety precautions, torque specifications, and assembly directions․ Abbreviations like TQ (torque) and psi (pounds per square inch) are frequently used․ These elements ensure consistency and reduce ambiguity in the instructions․ The manual also includes a legend or key to explain symbols, helping users interpret diagrams accurately․ Compliance with federal safety regulations, such as those outlined by the CPSC, ensures that all symbols and abbreviations are standardized for clarity and safety․ This attention to detail makes the manual user-friendly and ensures proper assembly and maintenance of the rear wheel components․

Preparing for Rear Wheel Assembly

Ensure all tools and parts are gathered, adhering to safety guidelines․ Reference the manual for specific requirements, ensuring proper preparation to avoid delays during assembly․

3․1․ Tools and Equipment Required

To successfully assemble the Harley rear wheel, gather essential tools and equipment․ A torque wrench, socket set, and tire levers are crucial for handling bolts and tires․ Use axle stands for stability and safety․ Ensure you have bearing pullers and presses for hub maintenance․ Tire pressure gauges and lubrication tools are also necessary․ Safety gear, such as gloves and goggles, is vital to prevent injuries․ Refer to the manual for specific tools recommended by Harley-Davidson․ Organize all parts and equipment before starting to ensure a smooth assembly process․ Proper preparation avoids delays and ensures compliance with safety standards․

3․2․ Safety Precautions and Guidelines

When assembling the Harley rear wheel, always follow safety guidelines to prevent accidents․ Wear protective gear, such as gloves and goggles, to safeguard against injuries․ Ensure the motorcycle is on a stable stand or lift, with the brake engaged to prevent movement․ Avoid working in a cluttered or uneven surface to minimize risks․ Use proper tools and avoid applying excessive force, which could damage components․ Keep loose clothing and long hair tied back to prevent entanglement․ Refer to the official Harley-Davidson manual for specific safety recommendations․ Always follow torque specifications to avoid over-tightening, which can lead to component failure․ Ensure the area is well-ventilated and free from flammable materials․ Dispose of waste responsibly and consult professional help if unsure about any step․

Manufacturer Guidelines

Harley-Davidson provides specific instructions and recommendations for rear wheel assembly, ensuring compliance with federal safety regulations and adherence to ASTM standards for proper installation and maintenance․

4․1․ Official Harley-Davidson Service Manual Recommendations

The Harley-Davidson Service Manual provides detailed, model-specific instructions for rear wheel assembly, ensuring safety and proper installation․ It includes step-by-step guidance, diagrams, and torque specifications to help users avoid common mistakes․ The manual emphasizes the use of genuine Harley-Davidson parts and tools to maintain quality and performance․ Additionally, it covers essential maintenance practices, such as regular lubrication of moving parts and proper tire pressure checks․ By following the official manual, riders can ensure compliance with federal safety standards and extend the lifespan of their motorcycle․ The manual is tailored to different Harley models, making it a reliable resource for both experienced mechanics and DIY enthusiasts․ Always refer to the official manual for accurate and up-to-date information․

4․2․ Specific Instructions for Different Harley Models

The Harley-Davidson Service Manual offers tailored instructions for various Harley models, ensuring compatibility and accuracy․ For instance, Touring models may require specific ABS sensor calibration, while Softail models have unique rear suspension setups․ Sportster models often involve distinct bearing replacement procedures․ Each manual includes model-specific torque specifications, lubrication points, and alignment tips․ Diagrams and part numbers are provided to simplify assembly for riders of all skill levels․ By adhering to these guidelines, owners can ensure their motorcycle operates safely and performs optimally․ Regular updates in the manual reflect advancements in design and technology, making it a indispensable resource for maintaining and upgrading Harley-Davidson motorcycles․ Always consult the manual for precise instructions tailored to your bike’s specific needs․

Step-by-Step Assembly Process

The assembly process is systematically outlined, covering removal of the old wheel, hub inspection, and precise installation of the new rear wheel and components․

5․1․ Removing the Old Rear Wheel

Removing the old rear wheel is the first step in the assembly process․ Start by loosening the rear axle nuts using a wrench, but do not remove them yet․ Lift the motorcycle using a sturdy jack stand to ensure stability․ Once raised, completely remove the nuts and washers, taking care to set them aside safely․ Gently pull the wheel straight out from the axle, ensuring it is free from any obstructions․ Inspect the hub and axle for any signs of damage or wear, addressing these before proceeding․ This step is crucial for ensuring a smooth installation of the new wheel and proper alignment of the rear wheel components․ Always refer to the official Harley-Davidson service manual for specific torque specifications and safety guidelines․

5․2․ Inspecting and Preparing the Hub and Axle

Inspecting and preparing the hub and axle is critical before installing the new rear wheel․ Start by thoroughly cleaning the hub and axle area to remove dirt, grease, or debris․ Visually inspect for signs of wear, rust, or damage, addressing any issues immediately․ Check the axle for straightness and ensure all bearings are intact and properly seated․ Lubricate the axle and hub surfaces with high-quality grease to prevent corrosion and ensure smooth operation․ Use genuine Harley-Davidson parts for any replacements to maintain compatibility and performance․ Finally, align the hub and axle correctly, ensuring all components are secure and properly seated before moving on to the next step․ Proper preparation here guarantees a safer and more efficient assembly process․

5․3․ Installing the New Rear Wheel

Installing the new rear wheel requires precision to ensure proper fitment and functionality․ Begin by aligning the wheel with the axle, ensuring the splines match correctly․ Gently slide the wheel onto the axle, making sure it seats properly․ Hand-tighten the axle nut to hold the wheel in place․ Next, use a torque wrench to tighten the axle nut to the manufacturer’s specified torque value․ Check the wheel alignment by spinning it and ensuring it rotates smoothly without wobbling․ Tighten the spacers and other retaining components securely, following the diagram for correct placement․ Finally, double-check all connections and perform a test ride to ensure stability and proper braking function․ Proper installation is vital for safety and performance․ Always refer to the diagram for exact torque specifications and assembly details․

5․4․ Tightening and Aligning the Wheel Components

Tightening and aligning the wheel components is critical for ensuring stability and safety․ Start by tightening the axle nut gradually, following the torque specifications in the manual․ Use a torque wrench to ensure accuracy․ Next, check the wheel alignment by spinning it and observing for any wobbling or misalignment․ Adjust the spacers or axle position as needed to achieve proper alignment․ Tighten all bolts and nuts in a star pattern to prevent uneven stress․ Finally, double-check all torque values and alignment using the diagram as a reference․ Proper tightening and alignment ensure smooth operation, prevent wear, and enhance overall safety․ Always refer to the manual for exact torque specifications and alignment procedures․ Avoid over-tightening, as it may damage components․ Ensure the wheel spins freely and is securely fastened before test riding․

Troubleshooting Common Issues

Troubleshooting common issues with the rear wheel assembly involves diagnosing misalignment, loose bearings, or brake incompatibilities․ Always refer to the manual for specific repair solutions and guidelines․

6․1․ Addressing Misalignment Problems

Misalignment issues with the rear wheel can lead to uneven tire wear and poor handling․ To address this, ensure the axle is properly aligned with the frame․ Check the wheel spacers and axle nut torque specifications in the manual․ If the wheel is not seated correctly, refer to the Harley rear wheel assembly diagram for proper positioning․ Use a wheel alignment gauge or jig to confirm accuracy․ Tighten all components in the specified order to avoid misalignment․ If problems persist, consult the troubleshooting section or seek professional assistance to ensure safety and optimal performance․

6․2․ Fixing Loose or Worn-Out Bearings

Loose or worn-out bearings in the Harley rear wheel assembly can cause vibration and instability․ To fix this, start by removing the wheel and inspecting the bearings․ Clean and lubricate them if they are loose but not damaged․ If bearings are worn, replace them with genuine Harley-Davidson parts․ Tighten the axle nut to the specified torque using a torque wrench․ Ensure proper alignment and seating of the bearings to maintain wheel stability․ Refer to the diagram for correct positioning and torque specifications․ Regular maintenance and lubrication can prevent premature wear․ If unsure, consult the service manual or seek professional assistance to ensure safety and optimal performance․

6․3․ Resolving Brake System Incompatibilities

Brake system incompatibilities with the rear wheel assembly can lead to safety issues․ Start by inspecting the brake rotor and caliper alignment․ Ensure the rotor is properly seated and aligned with the caliper․ If misaligned, adjust the caliper or replace worn-out brake pads․ Consult the service manual for specific torque specifications and alignment procedures․ If the brake system does not engage properly, check for worn or damaged components․ Replace any faulty parts with genuine Harley-Davidson accessories to ensure compatibility․ Lubricate moving parts and test the brakes thoroughly after reassembly․ If issues persist, refer to the troubleshooting guide or seek professional assistance to guarantee optimal braking performance and rider safety․

Maintenance and Upkeep

Regular maintenance ensures optimal performance and longevity of the Harley rear wheel․ Lubricate bearings, check tire pressure, and inspect components like brake pads and rotors․

7․1․ Regular Lubrication of Moving Parts

Regular lubrication of moving parts is crucial for maintaining the Harley rear wheel’s performance and longevity․ Use lithium-based grease to lubricate wheel bearings, axles, and pivot points․ Apply a thin, even layer to ensure smooth operation and prevent corrosion․ Refer to the owner’s manual for recommended lubrication intervals, typically every 5,000 to 10,000 miles․ Over-lubrication can attract dirt, so use the correct amount․ Always clean old grease before applying new lubricant․ Proper lubrication reduces friction, prevents overheating, and extends component life․ Inspect lubricated areas during routine maintenance to ensure optimal functionality and safety․

  • Lubricate wheel bearings and axles regularly․
  • Use lithium-based grease for durability․
  • Avoid over-lubrication to prevent contamination․
  • Check and clean before reapplying grease․

7․2․ Checking Tire Pressure and Tread Depth

Checking tire pressure and tread depth is essential for ensuring safety and optimal performance of your Harley rear wheel․ Use a high-quality tire pressure gauge to measure pressure when tires are cold․ Refer to the owner’s manual for the recommended PSI, as specified for your Harley model and load capacity․ Inspect tread depth by inserting a penny into the tire groove; if Lincoln’s head is visible, the tread is worn out․ Uneven wear may indicate misalignment or improper inflation․ Regular checks help prevent blowouts, improve handling, and enhance fuel efficiency․ Always maintain the recommended pressure to avoid under-inflation, which can lead to overheating and tire failure․

  • Use a tire pressure gauge for accurate readings․
  • Refer to the owner’s manual for specific pressure recommendations․
  • Check tread depth using a penny or depth gauge․
  • Inspect for uneven wear and address alignment issues․
  • Regular Checks prevent safety hazards and improve performance․

7․3․ Inspecting Brake Pads and Rotors

Inspecting brake pads and rotors is crucial for maintaining safety and braking performance․ Remove the wheel to access the brake components․ Check the brake pads for wear, ensuring they have at least 1/8″ of material remaining․ Look for signs of uneven wear or contamination․ Inspect the rotors for excessive scoring, warping, or rust․ Measure rotor thickness using a micrometer and compare it to the minimum specification in the service manual․ If pads or rotors are worn beyond limits, replace them immediately․ Proper inspection ensures reliable braking, prevents damage to other components, and maintains rider safety․ Always follow the manufacturer’s guidelines for inspection and replacement procedures․

  • Remove the wheel for clear access to brake components․
  • Measure brake pad thickness and check for uneven wear․
  • Inspect rotors for damage or excessive wear․
  • Replace worn or damaged parts as needed․
  • Refer to the service manual for specific specifications․

Legal and Safety Standards

Compliance with federal safety regulations and adherence to manufacturer guidelines are critical․ Ensure all components meet legal standards to guarantee rider safety and avoid potential liabilities․ Always follow official recommendations for proper assembly and maintenance․

  • Adhere to federal safety regulations like CPSIA for compliance․
  • Follow Harley-Davidson’s safety guidelines for assembly and maintenance․
  • Ensure all components meet legal and safety standards․

8․1․ Compliance with Federal Safety Regulations

Compliance with federal safety regulations is crucial for the Harley rear wheel assembly․ The Consumer Product Safety Improvement Act (CPSIA) sets strict guidelines for motorcycle components, ensuring they meet safety standards․ The Federal Communications Commission (FCC) regulates electronic components, requiring clear user instructions․ Adherence to these regulations ensures the rear wheel assembly meets legal and safety requirements, reducing the risk of accidents and recalls․ Proper documentation and labeling are essential to comply with these standards․ Always refer to official guidelines to ensure all components are installed and maintained correctly, avoiding potential legal issues and ensuring rider safety․

  • Follow CPSIA guidelines for safety compliance․
  • Ensure FCC regulations are met for electronic components․
  • Use proper documentation and labeling as required by law․

8․2․ Adherence to Manufacturer Safety Guidelines

Adhering to Harley-Davidson safety guidelines is critical for ensuring the rear wheel assembly is done correctly․ The official service manual provides detailed instructions tailored to specific models, guaranteeing compatibility and safety․ Always use genuine Harley-Davidson parts to avoid potential incompatibilities․ Follow torque specifications, bearing installation procedures, and brake system checks as outlined․ These guidelines are designed to prevent mechanical failures and ensure rider safety․ Ignoring manufacturer instructions can lead to unsafe conditions, so careful adherence is essential․ Refer to the manual for model-specific instructions and safety protocols to maintain the integrity of your motorcycle․

  • Use genuine Harley-Davidson parts for compatibility․
  • Follow torque and bearing installation specifications․
  • Adhere to brake system safety checks․

Diagrams and Visual Aids

The manual includes detailed diagrams and exploded views of the rear wheel components, along with a step-by-step visual guide to simplify the assembly process․

9․1․ Detailed Exploded View of Rear Wheel Components

The instruction manual provides a comprehensive exploded view diagram of the Harley rear wheel assembly, showcasing each component in precise detail․ This visual aid helps users identify and understand the role of every part, from the hub and axle to the bearings, sprocket, and brake rotor․ The diagram is color-coded and labeled to ensure clarity, making it easier to follow during assembly or disassembly․ By referencing this detailed view, users can ensure proper alignment and installation of each component․ The exploded view also highlights critical areas, such as bearing placement and axle alignment, reducing the risk of errors․ This section is essential for both novice and experienced mechanics, providing a clear visual guide to facilitate accurate and efficient assembly․ It complements the written instructions, ensuring a seamless process․

9․2․ Step-by-Step Visual Guide for Assembly

The instruction manual includes a step-by-step visual guide to simplify the Harley rear wheel assembly process․ This guide features high-quality images and diagrams that illustrate each stage, from preparing the hub to final tightening․ Each step is paired with clear instructions, ensuring users can follow along effortlessly․ The visuals highlight key components, such as the axle, bearings, and brake rotor, and demonstrate proper alignment and installation․ Tool requirements and torque specifications are also visually emphasized․ Safety tips and precautions are integrated into the guide to prevent errors․ By following this guide, users can assemble the rear wheel with confidence, ensuring accuracy and safety․ The visual nature of this section makes it accessible to both experienced mechanics and DIY enthusiasts, reducing confusion and streamlining the process․

Resources and References

Find genuine Harley-Davidson parts and manuals through authorized dealers or online platforms․ Consult OEM diagrams and visual guides for accurate assembly instructions and support․

10․1․ Where to Find Genuine Harley Parts and Manuals

To ensure authenticity and safety, purchase Harley-Davidson parts and manuals from authorized dealers or the official Harley-Davidson website․ These sources provide OEM-certified components and detailed diagrams․ Additionally, reputable online retailers specializing in motorcycle parts often carry genuine Harley components․ Always verify the seller’s credibility to avoid counterfeit products․ For digital manuals, look for secure download options from trusted platforms․ Consulting these resources guarantees compliance with safety standards and manufacturer guidelines, reducing the risk of incorrect assembly or component incompatibility․ Proper documentation is crucial for maintaining your motorcycle’s performance and longevity․

10․2․ Online Communities and Forums for Support

Online communities and forums provide invaluable support for Harley-Davidson enthusiasts․ Platforms like Harley-Davidson Forums, Reddit’s r/harleydavidson, and specialized motorcycle groups offer troubleshooting tips, step-by-step guides, and real-world advice from experienced riders․ These forums are excellent for addressing specific issues or clarifying instructions from the manual․ Many users share their assembly experiences, including photos and videos, which can supplement the official documentation․ Additionally, these communities often discuss common mistakes to avoid and recommend tools or techniques for a smoother assembly process․ Engaging with these forums can enhance your understanding and confidence when working on your Harley rear wheel assembly, ensuring a safe and successful project․

The Harley-Davidson rear wheel assembly diagram and its accompanying instruction manual are indispensable resources for ensuring a safe and successful assembly process․ By following the detailed steps, safety guidelines, and manufacturer recommendations, enthusiasts can achieve professional-level results․ Proper assembly not only enhances performance but also guarantees rider safety․ The manual’s clarity and visual aids make complex tasks manageable, while online communities offer additional support․ Whether you’re a seasoned mechanic or a DIY novice, adhering to the instructions ensures a flawless assembly․ Completing the project fosters a sense of accomplishment and confidence in maintaining your Harley․ Always prioritize safety and seek professional help if unsure․ A well-assembled rear wheel is key to optimal motorcycle performance and reliability․

Guide

ac odyssey guided vs exploration

Assassin’s Creed Odyssey offers two distinct modes: Guided and Exploration. Guided Mode provides clear waypoints, while Exploration Mode emphasizes discovery. Choose your preferred journey through Ancient Greece.

Overview of AC Odyssey Gameplay Modes

Assassin’s Creed Odyssey introduces two gameplay modes: Guided and Exploration. Guided Mode offers a traditional experience with clear waypoints and markers, guiding players through quests and objectives. Exploration Mode, on the other hand, removes these markers, encouraging players to use clues and explore the world to uncover their next steps. This mode emphasizes immersion and discovery, making the game feel more open and interactive. Both modes allow players to engage with the game’s rich narrative and expansive world but cater to different playstyles. Guided Mode is ideal for those who prefer a more linear, story-driven experience, while Exploration Mode appeals to players seeking a deeper connection with the environment and a sense of adventure.

Importance of Choosing the Right Mode

Selecting between Guided and Exploration Mode in Assassin’s Creed Odyssey significantly impacts your gaming experience. Guided Mode streamlines navigation, making it easier to follow objectives and focus on combat and story. This mode is perfect for players seeking a straightforward, action-oriented journey. Conversely, Exploration Mode enhances immersion by removing waypoints, encouraging players to engage deeply with the environment and quests. It suits those who enjoy discovery and a more authentic, open-world feel. Choosing the right mode ensures you maximize your enjoyment of Ancient Greece’s rich narrative and dynamic gameplay, tailoring the experience to your preferred playstyle and expectations.

Understanding Guided Mode

Guided Mode simplifies navigation with clear waypoints and markers, guiding players through objectives. It streamlines the experience, making it easier to follow quests and enjoy the story seamlessly.

What is Guided Mode?

Guided Mode in Assassin’s Creed Odyssey is a gameplay option that provides clear waypoints and markers for objectives, similar to previous Assassin’s Creed titles. This mode is designed for players who prefer a more structured experience, offering direct guidance throughout quests. It ensures that players never lose track of their goals, with the map highlighting specific locations and tasks. This mode is ideal for those who want to focus on the story and combat without the need for extensive exploration or navigation challenges. By simplifying the navigation process, Guided Mode allows players to enjoy the game’s narrative and action seamlessly, making it accessible for both new and experienced players alike.

Key Features of Guided Mode

Guided Mode in Assassin’s Creed Odyssey features clear waypoints and markers for objectives, ensuring players are always directed toward their goals. The map highlights specific locations, making navigation straightforward. This mode simplifies quest progression by reducing the need for exploration or puzzle-solving to find targets. It also focuses on a linear gameplay experience, guiding players through the story and side quests with minimal deviation. Additionally, the HUD displays explicit instructions and pointers, allowing players to concentrate on combat and narrative without getting lost. These features cater to those who prefer a more streamlined and directed approach, enhancing accessibility for new players while maintaining the game’s core action and storytelling elements.

Pros of Guided Mode

Guided Mode offers a streamlined experience, ideal for players seeking clarity and direction. Clear waypoints and markers ensure objectives are easily identifiable, reducing confusion and frustration. This mode is particularly beneficial for newcomers, as it simplifies navigation and quest progression. By focusing on a linear path, players can immerse themselves in the story and action without the need for extensive exploration. Guided Mode also caters to those who prefer a more relaxed gameplay experience, allowing them to enjoy the narrative and combat without feeling overwhelmed. Its accessibility and straightforward design make it a great choice for casual players or those looking to follow the main story without deviations.

Cons of Guided Mode

Guided Mode can feel restrictive for players who enjoy open-world exploration and discovery. The constant presence of waypoints and markers may reduce the sense of adventure and immersion. Players who prefer a more authentic, self-directed experience might find this mode less engaging. Additionally, the reliance on guided navigation can limit opportunities for spontaneous discoveries, making the world feel less alive. For experienced players or those seeking a challenge, Guided Mode might feel too simplistic. The lack of freedom to explore without constant direction can make the game feel predictable, potentially diminishing the overall sense of accomplishment and connection to the game’s world. This mode is less suited for players who value exploration and autonomy in their gaming experience.

Understanding Exploration Mode

Exploration Mode offers a more immersive experience by removing waypoints, encouraging players to discover locations and complete quests using clues and environmental hints, enhancing the game’s adventure and challenge.

What is Exploration Mode?

Exploration Mode in Assassin’s Creed Odyssey is a gameplay style that removes explicit waypoints and markers, encouraging players to navigate the world using context clues and environmental hints. Instead of being directly told where to go, players must engage with NPCs, read descriptions, and explore the environment to uncover objectives. This mode emphasizes immersion and discovery, making the experience feel more authentic and adventurous. It challenges players to think critically and actively participate in uncovering the game’s world and quests. Exploration Mode is ideal for those who prefer a more organic and immersive journey through Ancient Greece, rather than following a guided path. It adds a layer of realism and depth to the gameplay experience.

Key Features of Exploration Mode

Exploration Mode in Assassin’s Creed Odyssey eliminates waypoints and objective markers, encouraging players to rely on context clues and environmental hints. Instead of being guided, players must interact with NPCs, decipher quest descriptions, and explore the world to uncover locations and objectives. This mode emphasizes organic discovery, making the game feel more immersive and realistic. It removes hand-holding, allowing players to engage deeply with the environment and story. Clues from dialogue, landmarks, and in-game hints help navigate the world, fostering a sense of adventure and curiosity. Exploration Mode is designed for players who enjoy a more challenging and authentic experience, where the journey of discovery is as rewarding as the destination.

Pros of Exploration Mode

Exploration Mode offers a more immersive and engaging experience, fostering a sense of discovery and adventure. By removing waypoints, players must engage deeply with the environment, NPCs, and quest descriptions, making the game feel more authentic and realistic. This mode encourages active problem-solving and exploration, which can be highly rewarding. It also allows players to fully appreciate the game’s world and story without being guided, enhancing immersion. For those who enjoy open-world exploration and a challenge, Exploration Mode provides a more satisfying and memorable experience. It caters to players seeking a deeper connection to the game’s design and narrative, making it ideal for those who value exploration and discovery over streamlined progression.

Cons of Exploration Mode

Exploration Mode can be challenging for some players, as it removes waypoints and objective markers, requiring more time and effort to navigate. Without clear guidance, players may feel lost or frustrated, especially in the game’s vast open world. The lack of direct instructions can lead to confusion, particularly for newcomers unfamiliar with the game’s mechanics. Additionally, the absence of markers means players must rely on quest descriptions and environmental clues, which can be time-consuming. This mode may not suit those who prefer a more streamlined or directed experience. However, for experienced players seeking a greater challenge and immersion, Exploration Mode offers a unique and rewarding way to play.

Guided Mode vs. Exploration Mode: Direct Comparison

Guided Mode offers clear markers for navigation, ensuring players stay on track, while Exploration Mode provides freedom but requires more effort to find objectives.

Navigation and Objectives

In Guided Mode, players are provided with clear waypoints and markers, making it easier to follow objectives and navigate the world. This mode is ideal for those who prefer a more linear experience, as it ensures they stay on track with quests. Exploration Mode, however, removes these markers, encouraging players to use environmental clues, NPC directions, and their own intuition to locate objectives. This approach mimics a more traditional open-world exploration experience, where the journey is as important as the destination; The absence of direct guidance in Exploration Mode adds a layer of challenge and immersion, as players must actively engage with the world to uncover their next steps. This fundamental difference in navigation and objective tracking defines the distinct gameplay styles of each mode.

Player Freedom and Immersion

Exploration Mode enhances player freedom by removing waypoints, encouraging immersion through environmental clues and NPC interactions. This fosters a deeper connection to the game world, as players must actively engage with their surroundings to uncover objectives. In contrast, Guided Mode offers a more structured experience, with clear markers that guide players directly to their goals, potentially limiting the sense of discovery. Exploration Mode allows for a more organic and immersive journey, making the world feel alive and dynamic. This difference significantly impacts the player’s experience, with Exploration Mode catering to those seeking adventure and exploration, while Guided Mode appeals to those preferring a more directed narrative flow.

Learning Curve and Difficulty

Exploration Mode presents a steeper learning curve, as players must interpret clues and navigate without direct guidance, enhancing problem-solving skills. Guided Mode simplifies navigation with clear markers, reducing initial complexity and making it more accessible. Exploration Mode’s lack of waypoints challenges players to think critically, while Guided Mode ensures objectives are straightforward. The difficulty in Exploration Mode lies in self-reliance, whereas Guided Mode focuses on streamlined progression. Choosing between modes depends on desired challenge level and preferred gameplay style, with Exploration Mode suited for experienced players seeking depth and Guided Mode ideal for those prioritizing ease and narrative flow. This distinction impacts overall gameplay experience and player satisfaction.

Gameplay Experience in Each Mode

Assassin’s Creed Odyssey’s Guided Mode offers a linear, action-packed journey with clear objectives, while Exploration Mode provides an immersive, open-world experience focused on discovery and authenticity.

Guided Mode: Linear and Directed

Guided Mode in Assassin’s Creed Odyssey mirrors traditional Ubisoft gameplay, offering clear waypoints and markers for objectives. This linear approach simplifies navigation, ensuring players stay on track with main quests and side missions. The mode is ideal for those who prefer a more structured experience, allowing them to focus on the story and action without the need for exploration. By providing direct guidance, Guided Mode streamlines the journey, making it easier for newcomers or fans of earlier Assassin’s Creed titles to immerse themselves in the game’s narrative and combat. The Directed experience ensures a smooth progression through Ancient Greece, catering to players who value clarity and efficiency in their gameplay.

Exploration Mode: Open and Immersive

Exploration Mode in Assassin’s Creed Odyssey delivers a more immersive and open-world experience, encouraging players to navigate Ancient Greece without explicit waypoints. Instead of markers, the game provides contextual clues and hints from NPCs, requiring players to actively search for objectives. This mode enhances the sense of adventure and discovery, making each quest feel more rewarding. By removing hand-holding, Exploration Mode fosters a deeper connection to the environment and story, allowing players to truly embrace the role of Alexios or Kassandra. It’s perfect for those seeking a more authentic and engaging experience, where the journey is as meaningful as the destination. This mode highlights the game’s world design, making exploration feel natural and intuitive.

Impact on Story and Quests

Guided Mode streamlines the narrative with clear objectives, while Exploration Mode deepens immersion by uncovering the story through environmental clues and NPC interactions, enhancing player engagement organically.

How Guided Mode Affects Story Engagement

Guided Mode enhances story engagement by providing clear waypoints and markers, ensuring players remain focused on the main narrative and key objectives. This streamlined approach minimizes distractions, allowing for a more directed and immersive storytelling experience. By reducing the need to explore or search for clues, players can concentrate on character development and plot progression. However, this mode may feel less engaging for those who enjoy discovery, as the constant guidance can make the game feel more linear and less open-world. Overall, Guided Mode caters to players seeking a structured, story-driven experience without the need for extensive exploration or puzzle-solving.

How Exploration Mode Enhances Quest Completion

Exploration Mode significantly enhances quest completion by fostering a deeper connection with the game’s world and mechanics. Without the reliance on waypoints, players are encouraged to actively engage with the environment, NPCs, and in-game clues. This approach not only immerses players more fully in the narrative but also makes the process of discovering objectives feel more rewarding. The absence of direct guidance prompts players to explore and interact with the world, potentially uncovering additional content and enhancing overall satisfaction. While it may require more time and effort, Exploration Mode offers a more authentic and engaging journey through Ancient Greece, making quest completion feel like a true adventure rather than a series of directed tasks.

Player Preferences and Playstyles

Player preferences dictate mode choice, with Guided Mode suiting those who prefer direction, while Exploration Mode appeals to immersive, discovery-driven playstyles in AC Odyssey.

Who Should Choose Guided Mode?

Guided Mode is ideal for players who prefer clear direction and minimal navigation challenges. It suits newcomers to the series or those who want a more streamlined experience. The mode is perfect for individuals who value story immersion without the hassle of exploring vast territories. Additionally, players who enjoy traditional Assassin’s Creed gameplay, with visible waypoints and objectives, will find Guided Mode familiar and comfortable. It’s also a great choice for those who want to focus on combat and character development without getting lost in the open world. Ultimately, Guided Mode caters to those seeking a more guided and linear adventure in Ancient Greece.

Who Should Choose Exploration Mode?

Exploration Mode is perfect for players seeking a more immersive and authentic experience. It’s ideal for those who enjoy discovering locations and objectives through clues and environmental hints. This mode appeals to experienced gamers or fans of open-world exploration who want to engage deeply with the game’s world. Players who value freedom and the thrill of the hunt will find Exploration Mode rewarding. It’s also suitable for those who want to enhance their problem-solving skills and appreciate the satisfaction of uncovering quest locations independently. Exploration Mode offers a more dynamic and interactive journey, making it a great choice for players looking to truly immerse themselves in Ancient Greece.

Tips for Playing in Each Mode

Experiment with both modes to find your preference. Use the map thoroughly in Guided Mode, while in Exploration, embrace discovery and engage with the environment. Adjust settings to enhance your experience and enjoy the journey through Ancient Greece.

Mastering Guided Mode: Tips and Tricks

For a seamless experience in Guided Mode, rely on the map markers and waypoints to navigate quests efficiently. Focus on following the story and completing main objectives first, as the guided approach simplifies progression. Regularly check your quest log to track your progress and ensure no tasks are missed. Utilize the mini-map to locate nearby points of interest and enemies, which helps in managing combat situations. Additionally, keep your gear and abilities upgraded, as the linear nature of Guided Mode allows for a more straightforward approach to combat and exploration. By following these tips, you can fully immerse yourself in the story and action without the need for constant navigation adjustments.

Thriving in Exploration Mode: Strategies

Exploration Mode rewards curiosity and active engagement. To thrive, pay close attention to in-game clues from dialogue and environmental hints to locate objectives. Use your surroundings, landmarks, and NPC interactions to guide your journey. Regularly consult the map to identify unexplored regions and potential quest areas. Manage your resources wisely, as exploration can be time-consuming. Save frequently to avoid losing progress in case of unexpected challenges. Upgrade your gear and abilities to enhance survivability during prolonged adventures. By embracing the immersive nature of Exploration Mode, you’ll discover a more satisfying and rewarding experience, as finding locations on your own creates a deeper connection to the world of Ancient Greece.

Assassin’s Creed Odyssey’s Guided and Exploration modes cater to different playstyles. Guided offers a directed experience, while Exploration fosters immersion and discovery, letting players choose their ideal adventure.

Which Mode is Right for You?

Your choice between Guided and Exploration modes in Assassin’s Creed Odyssey depends on your playstyle and preferences. If you prefer a more structured experience with clear objectives and waypoints, Guided Mode is ideal. It allows you to focus on the story and gameplay without getting lost in navigation. On the other hand, Exploration Mode is perfect for those who enjoy discovery and immersion. It challenges you to use clues and explore the world, making quest completion feel more rewarding. Consider whether you want a directed journey or the freedom to forge your own path. Ultimately, both modes offer unique experiences, so choose the one that aligns with how you want to engage with Ancient Greece.

Final Recommendations

Based on your playstyle, here’s how to decide: opt for Guided Mode if you prefer a straightforward, directed experience with clear waypoints, making it easier to follow quests and enjoy the story. This mode is perfect for those new to the series or seeking a more relaxed journey. Exploration Mode, however, is ideal for veteran players or those who crave immersion and discovery. It challenges you to engage deeply with the world, making achievements feel more rewarding. Both modes offer unique experiences, so choose the one that aligns with your preferences. Whichever you pick, Assassin’s Creed Odyssey promises an unforgettable adventure through Ancient Greece.