bread machine manual
Welcome to your bread machine manual, your essential guide to baking delicious homemade bread effortlessly. Discover tips, recipes, and maintenance advice to get the most out of your appliance.
1.1 What is a Bread Machine?
A bread machine is an essential kitchen appliance designed to simplify the bread-making process. It automates the entire cycle, from mixing and kneading the dough to allowing it to rise and bake to perfection; This convenient device eliminates the need for manual labor, making it easy for anyone to create fresh, homemade bread. Perfect for both novice bakers and experienced cooks, the machine offers customizable settings to accommodate various recipes and preferences. With its user-friendly interface and efficient operation, a bread machine is a valuable addition to any home, ensuring perfectly baked loaves every time, effortlessly.
1.2 Benefits of Using a Bread Machine
Using a bread machine offers numerous advantages for home bakers. It saves time by automating the entire bread-making process, from mixing to baking, allowing you to focus on other tasks. The machine ensures consistency, producing perfectly baked loaves every time. It also provides customization options, enabling you to experiment with various recipes and ingredients. Additionally, it eliminates the need for manual kneading, making it ideal for those with limited mobility or busy schedules. Fresh, homemade bread is just a few button presses away, offering a cost-effective and healthier alternative to store-bought options. This appliance is a practical and efficient addition to any kitchen.

Safety Precautions

Always read instructions carefully, avoid touching hot surfaces, and keep children away. Ensure the bread pan is properly placed before operation to prevent accidents and ensure safe baking.
2.1 Essential Safety Tips
Always read the manual thoroughly before using your bread machine. Ensure the appliance is placed on a stable, heat-resistant surface. Never touch hot surfaces or moving parts during operation. Keep children away from the machine while it is in use. Avoid overloading the bread pan, as this can cause imbalance. Regularly inspect the power cord and plug for damage. Never immerse the machine in water or expose it to excessive moisture. Use oven mitts when handling the bread pan or baked bread. Follow all safety guidelines to prevent accidents and ensure safe, efficient baking. Proper maintenance and adherence to these tips will extend the life of your machine.
2.2 Common Mistakes to Avoid
One of the most common mistakes is not reading the manual thoroughly, leading to improper use. Overloading the bread pan with too many ingredients can cause uneven mixing and machine imbalance. Forgetting to place the bread pan correctly before starting the machine is another frequent error. Using expired yeast or incorrect measurements can result in poor rise or dense bread. Neglecting to clean the machine regularly can lead to mold growth and affect future bakes. Additionally, ignoring altitude adjustments for recipes can cause undercooked or overcooked bread. Avoid these mistakes by following guidelines carefully to ensure optimal performance and delicious results.

Understanding Your Bread Machine
Familiarize yourself with the machine’s components, including the bread pan, paddles, and control panel. Understanding these parts and their functions ensures proper operation and consistent results.
3.1 Key Components of the Machine
Your bread machine features essential components designed for efficient bread making. The bread pan holds the dough and is equipped with a non-stick coating for easy removal. The paddles (or kneading blades) mix and knead the dough. The control panel allows you to select settings and monitor progress. A heating element ensures even baking, while a viewing window lets you observe the process. Familiarizing yourself with these parts is crucial for optimal performance and maintenance. Regular cleaning and proper handling of these components will extend the machine’s lifespan and ensure consistent results.
3.2 Control Panel and Settings
The control panel is the brain of your bread machine, offering a variety of settings to customize your baking experience. Key features include mode selection (e.g., basic, whole wheat, rapid, or sourdough) and crust color options (light, medium, or dark). The delay start timer allows you to schedule baking up to 24 hours in advance. Additional settings may include loaf size (1-2 lbs) and customizable programs for specialized recipes. The LCD display shows the selected settings and progress. Understanding these features ensures you can tailor your bread to your preferences. Always refer to the manual for specific button functions and operation guidelines.
Basic Operations
Mastering basic operations ensures smooth bread-making. Measure ingredients, load the bread pan, select settings, and start the machine. Follow manual guidelines for optimal results every time.
4.1 Preparing Ingredients
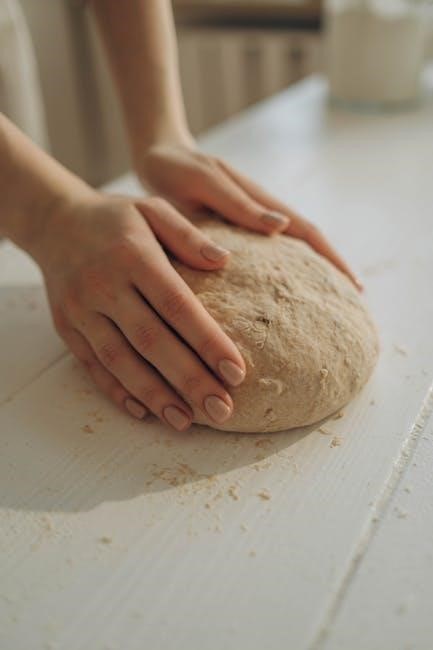
Accurate measurement of ingredients is crucial for perfect bread. Use a digital scale for flour, yeast, and salt. Ensure liquids are at room temperature (80°F–90°F) for optimal yeast activation. Measure yeast precisely, as excess can over-ferment dough. Use fresh, high-quality ingredients for best results. Store flour in a cool, dry place to maintain freshness. Always sift flour before measuring to avoid compacting. For recipes requiring sugar or additives, mix them evenly with dry ingredients. Optional ingredients like herbs or nuts should be added during the mix cycle. Refer to your manual for specific ingredient ratios and guidelines for your machine.
4.2 Loading the Bread Pan
Properly loading the bread pan ensures even mixing and baking. Align the pan with the machine’s guides and secure it firmly. Add ingredients in the recommended order: liquids first, followed by dry ingredients, with yeast on top. Ensure the pan is evenly filled to avoid overflow. Lightly grease the pan with cooking spray for easy bread removal. Place the paddle in the center before adding ingredients. For optional add-ins like nuts or herbs, use the machine’s signal or add them during the mix cycle. Always refer to your manual for specific loading instructions tailored to your machine’s design.
4.3 Setting the Machine
Setting your bread machine correctly ensures perfect results. Start by selecting the desired loaf size and crust color using the control panel. Choose from options like basic, whole wheat, or rapid bake. Use the delay timer to schedule baking up to 24 hours in advance. Custom settings allow you to adjust kneading, rising, and baking times. Enter the correct temperature and ensure the machine is set to the right mode for your recipe. Double-check all settings before starting. For advanced features, refer to your manual for guidance on customizable options. Proper settings guarantee a perfectly baked loaf every time.
4.4 Starting the Baking Process
Once your ingredients are loaded and settings are configured, press the Start button to begin the baking process. The machine will initiate the kneading cycle, mixing and working the dough thoroughly. You may hear noises as the paddles move and the machine operates. The display will show the progress, guiding you through each stage. Depending on your settings, the machine will transition from kneading to rising and finally to baking. Allow the machine to complete the full cycle without interruption. Once done, the machine will signal with a beep or chime, indicating your fresh loaf is ready to be removed and cooled.
Recipes for Your Bread Machine
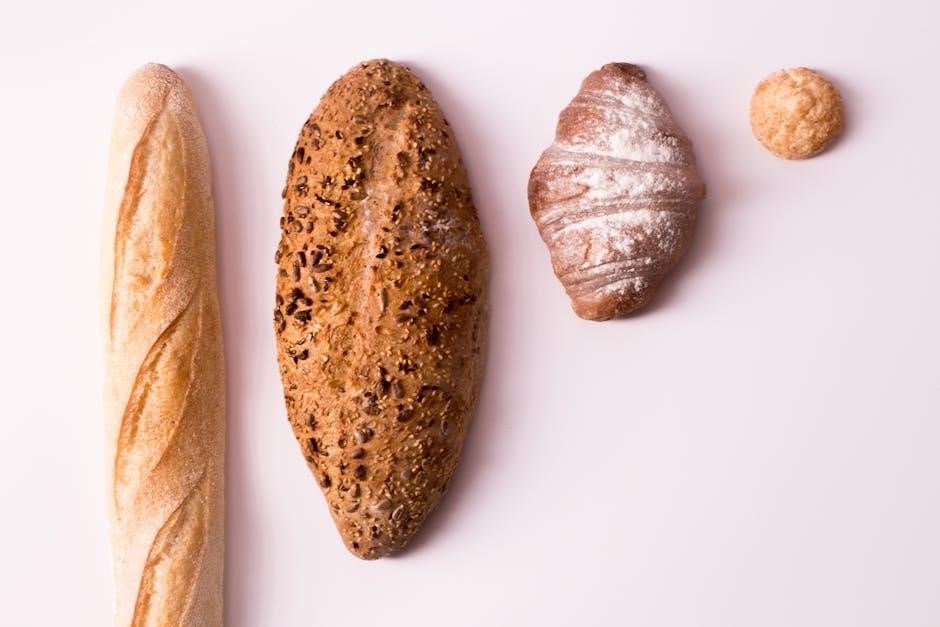
Explore a variety of delicious recipes for your bread machine, from classic white bread to whole wheat and specialized options like gluten-free and sourdough. Easy to use and perfect for any occasion.
5.1 Classic White Bread Recipe
Start your bread-making journey with a simple yet delicious classic white bread recipe. Combine 3 cups of all-purpose flour, 1 teaspoon of salt, 1 tablespoon of sugar, and 1 packet of active dry yeast in the bread pan. Add 1 cup of warm water and 2 tablespoons of unsalted butter. Select the basic bread setting on your machine, choose your preferred crust color, and press start. Let the machine handle the mixing, kneading, rising, and baking. Once done, remove the loaf, let it cool, and enjoy fresh homemade bread. Perfect for sandwiches or toast, this recipe is a timeless favorite.
5.2 Whole Wheat Bread Recipe
Create a healthier and more nutritious loaf with this whole wheat bread recipe. In the bread pan, combine 2 cups of whole wheat flour, 1 cup of all-purpose flour, 1 teaspoon of salt, 1 tablespoon of sugar, and 1 packet of active dry yeast. Add 1 cup of warm water and 2 tablespoons of unsalted butter. Select the whole wheat or basic bread setting on your machine. Choose your preferred crust color and press start. The machine will handle the rest, resulting in a hearty, wholesome loaf. Perfect for sandwiches or toast, this recipe offers a delicious way to incorporate more whole grains into your diet.
5.3 Specialized Recipes (e.g., Gluten-Free, Sourdough)
Explore beyond traditional bread with specialized recipes tailored for your bread machine. For gluten-free bread, use a 1:1 gluten-free flour blend, adding xanthan gum for structure. Sourdough recipes require a longer rise time, so select the sourdough setting or adjust the timer manually. Combine 1 cup of sourdough starter with 3 cups of bread flour, 1 teaspoon of salt, and 1 tablespoon of sugar. These recipes cater to dietary needs and preferences, offering unique flavors and textures. Experiment with ratios and settings to perfect your loaves. Whether gluten-free or sourdough, your bread machine can handle it, ensuring fresh, homemade bread for everyone.
Maintenance and Cleaning
Regularly clean your bread machine by removing crumbs and washing the bread pan with warm, soapy water. Dry thoroughly to prevent rust and maintain performance.
6.1 Cleaning the Machine
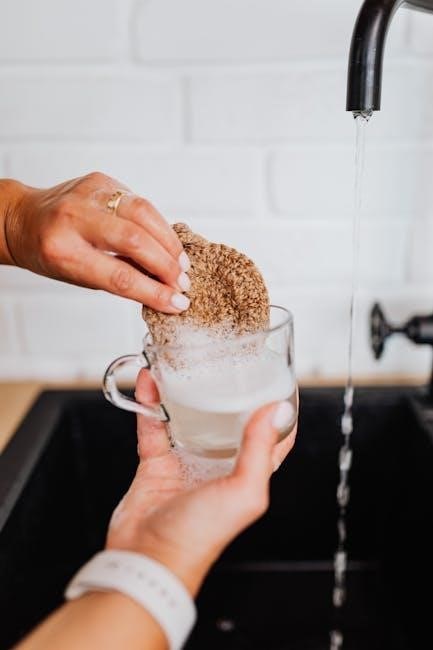
Regular cleaning is essential to maintain your bread machine’s performance and longevity. After each use, unplug the machine and let it cool. Remove the bread pan and paddle, washing them with warm, soapy water. Wipe the exterior with a damp cloth, avoiding harsh chemicals. For tough crumbs, mix baking soda and water to create a paste, apply it to the interior, and let it sit before scrubbing gently. Dry all parts thoroughly to prevent rust. Regular cleaning prevents mold growth and ensures fresh-tasting bread. Refer to your manual for specific cleaning instructions tailored to your model.
6.2 Maintaining the Bread Pan and Paddle
Proper maintenance of the bread pan and paddle ensures optimal performance and longevity. After each use, wash the pan and paddle with mild soap and warm water. Avoid using abrasive cleaners or scourers, as they may damage the non-stick coating. Dry thoroughly to prevent rust. For stubborn dough residue, soak the parts in warm water before cleaning. Regularly inspect the paddle for wear and tear, replacing it if necessary. Lubricate the hinge pins occasionally to ensure smooth operation. Always refer to your manual for specific care instructions, as different models may have unique requirements. Proper maintenance guarantees consistent baking results.
Troubleshooting Common Issues
Identify and resolve common bread machine issues like uneven mixing or overcooked bread. Check power supply, ingredient measurements, and settings. Refer to your manual for specific solutions.
7.1 Common Errors and Solutions
Addressing common issues with your bread machine ensures optimal performance. If the machine doesn’t start, check the power supply and ensure the bread pan is properly placed. For uneven mixing, verify ingredient order and paddle functionality. Overcooked bread may result from incorrect timer settings or crust color selection. If dough isn’t forming, review ingredient measurements and yeast activation. Regularly clean the machine to prevent residue buildup. Refer to your manual for specific troubleshooting guides tailored to your model. By identifying and resolving these issues, you can achieve consistent, high-quality bread every time.
7.2 Dealing with Undercooked or Overcooked Bread
Undercooked or overcooked bread can be frustrating, but there are simple solutions. If bread is undercooked, check if the baking time was insufficient or the machine’s temperature settings were too low. Ensure the yeast is active and ingredients are at room temperature. For overcooked bread, verify the crust color setting and timer accuracy. Adjusting the machine’s settings or recipe proportions can resolve these issues. Regularly cleaning and maintaining your machine ensures consistent results. Always refer to your manual for model-specific guidance. By tweaking settings and monitoring cycles, you can achieve perfectly baked bread every time.

Advanced Features
Explore advanced features like delay start timers and customizable settings, allowing you to tailor baking cycles to your preferences. Smart technology ensures precise control for perfect results.
8.1 Delay Start Timer

The delay start timer is a convenient feature that allows you to set your bread machine to begin baking at a specific time. This advanced function enables you to prepare ingredients, load the machine, and schedule the baking process hours in advance. Simply input your desired start time, and the machine will automatically begin mixing, kneading, and baking at the programmed hour. This feature is ideal for busy households, ensuring freshly baked bread is ready when you need it. Whether you want bread for breakfast or dinner, the delay start timer offers flexibility and saves valuable time in your daily routine.
8.2 Customizable Settings
Customizable settings on your bread machine allow you to tailor the baking process to your preferences. Adjust crust color, loaf size, and yeast type to suit various recipes. Many machines offer pre-programmed settings for different bread types, such as whole wheat, sourdough, or gluten-free. Advanced models may include customizable timers and temperature controls, giving you precise control over the baking process. These settings ensure your bread turns out exactly as you like it, whether you prefer a crispy crust or a soft interior. Experiment with different configurations to discover your ideal bread-making experience and enjoy perfectly baked loaves every time.
Tips for Perfect Loaves
Ensure perfect loaves by measuring ingredients accurately, using the right yeast, and placing the bread pan correctly. Avoid overmixing dough and adjust recipes for altitude if needed.
9.1 Measuring Ingredients Accurately
Accurate measurement of ingredients is crucial for perfect bread. Use a digital scale for flour and liquids to ensure precision. Too much flour can make bread dense, while too little may result in a soggy texture. Measure yeast separately, as incorrect amounts can affect rise. Always use the type of flour specified in the recipe. For liquids, avoid overfilling to maintain the right consistency. Proper measurement ensures the machine works efficiently, delivering a well-textured loaf. Small adjustments, like altitude corrections, can also impact results. Take your time to measure carefully for consistent, high-quality bread every time.
9.2 Adjusting Recipes for Altitude
Altitude affects bread making due to lower air pressure and humidity. At high altitudes, yeast ferments faster, causing dough to rise too quickly. To adjust, reduce yeast by 1/4 teaspoon for every 1,000 feet above sea level. Increase liquid by 1-2 tablespoons to compensate for dryness. Lower the machine’s temperature setting slightly to slow down fermentation. Monitor the dough’s consistency and adjust as needed. At lower altitudes, minimal changes are required, but ensure ingredients are measured accurately. Experiment with small batches to perfect your adjustments, as altitude variations can significantly impact bread texture and rise. Proper adjustments ensure a perfect loaf every time.
Comparing Bread Machine vs. Handmade Bread
Bread machines offer convenience and consistency, while handmade bread provides creative control and a personal touch. Both methods yield delicious results, catering to different preferences and lifestyles.
10.1 Time Efficiency
Bread machines significantly save time compared to handmade bread, automating the entire process from mixing to baking. With a bread machine, you simply add ingredients and let the machine handle the rest, eliminating manual labor. This convenience allows for fresh bread without constant supervision. Handmade bread requires active involvement, including kneading and monitoring, which can be time-consuming. The machine’s ability to work unattended makes it ideal for busy schedules. Additionally, features like delayed start timers enable you to prepare dough or bread in advance, ensuring it’s ready when you need it. This time-saving aspect makes bread machines a practical choice for modern lifestyles.
10.2 Texture and Flavor Differences
Bread machines produce consistent results, but texture and flavor may differ from handmade bread. Machine-made bread often has a softer, fluffier texture due to automated kneading and rising processes. Handmade bread allows for more control over ingredients and techniques, resulting in a wider variety of textures and flavors. The machine’s uniform process can lack the unique, personal touch of handmade bread. However, both methods yield delicious results, with the machine offering convenience and consistency, while handmade bread provides customization and traditional charm; The choice ultimately depends on personal preference and the desired outcome for your loaf.
Mastering your bread machine opens a world of fresh, homemade bread. Experiment with recipes, enjoy the process, and savor the delicious results. Happy baking!
11.1 Final Thoughts on Using a Bread Machine
Using a bread machine is a rewarding experience that combines convenience with creativity. It allows you to enjoy freshly baked bread without the hassle of traditional baking. By following the manual’s guidelines, you can experiment with various recipes, from classic white bread to specialized options like gluten-free or sourdough. Remember, accurate measurements and proper machine maintenance are key to consistent results. Don’t hesitate to troubleshoot common issues, as they are often easy to resolve. With practice, you’ll master the art of bread-making and enjoy the satisfaction of sharing homemade loaves with family and friends. Happy baking!
11.2 Encouragement to Experiment and Enjoy
Owning a bread machine opens a world of culinary possibilities. Don’t be afraid to explore beyond basic recipes—try new ingredients, flavors, and settings to create unique breads. Experiment with gluten-free, sourdough, or herb-infused loaves to discover your favorites. The machine’s versatility allows for endless creativity, so feel free to tweak recipes to suit your taste. Remember, baking is a journey, and every loaf is a chance to learn and improve. Enjoy the satisfaction of homemade bread and share the joy with family and friends. Happy experimenting, and let your bread machine become your new kitchen companion!