cruxgg coffee maker manual
Welcome to the CRUXGG Coffee Maker Manual! This guide provides essential information to help you get the most out of your programmable coffee maker․
1․1 Overview of the CRUXGG Coffee Maker
The CRUXGG Coffee Maker is a programmable brewing device designed for home use․ Available in 12-cup and 14-cup models, it offers customizable brew strength and a user-friendly touchscreen interface․ Its pause-and-serve feature allows users to pour a cup mid-brew․ With sleek design and advanced features, it combines convenience and quality, making it ideal for coffee enthusiasts seeking a versatile and efficient brewing experience․
1․2 Importance of the Manual for Optimal Usage
The manual is crucial for understanding and utilizing your CRUXGG Coffee Maker effectively․ It provides step-by-step instructions for assembly, operation, and maintenance․ By following the guide, users can ensure proper setup, customize brewing settings, and troubleshoot common issues․ The manual also highlights safety precautions and warranty details, helping you maintain the longevity and performance of your coffee maker․ Referencing it regularly ensures you get the best out of your brewing experience consistently․
Product Specifications and Features
The CRUXGG Coffee Maker offers programmable 12-cup and 14-cup options, customizable brew strength, and a touchscreen interface with a convenient pause-and-serve feature for enhanced brewing control․
2․1 12-Cup and 14-Cup Programmable Options
The CRUXGG Coffee Maker is available in 12-cup and 14-cup programmable models, offering flexibility for different household needs․ Both options allow users to set brewing times in advance, ensuring fresh coffee whenever you want․ The programmable feature enables customization of brew strength and scheduling, making it easy to tailor your coffee experience․ With these options, you can enjoy the perfect cup every time, whether you’re brewing for one or a group․
2․2 Customizable Brew Strength
The CRUXGG Coffee Maker offers customizable brew strength, allowing users to adjust the intensity of their coffee․ Choose from strong, medium, or light settings to suit your preference․ This feature ensures that every cup is tailored to your taste, whether you prefer a bold morning brew or a lighter afternoon pick-me-up․ The intuitive controls make it easy to select your desired strength, while the programmable options maintain consistency in every brew․
2․3 Touchscreen and Pause-and-Serve Feature
The CRUXGG Coffee Maker features an innovative touchscreen interface, making it easy to navigate and customize your brewing experience․ The pause-and-serve feature allows you to pour a cup mid-brew, ensuring you never have to wait for the entire pot to finish․ This combination of modern technology and practical design enhances convenience, giving you a seamless and enjoyable coffee-making process tailored to your lifestyle and preferences․
Assembly and First-Time Setup
Unbox and inventory all components, ensuring nothing is missing․ Follow step-by-step instructions for assembly, then configure initial settings like time and brew preferences for a seamless start․
3․1 Unboxing and Inventory of Components
Begin by carefully unboxing the CRUXGG Coffee Maker, ensuring all components are included․ Inside, you’ll find the main coffee maker unit, a power cord, a filter basket, a water reservoir, and a user manual․ Check each item for any visible damage or defects․ Verify that all parts are present to avoid missing pieces․ This step ensures you’re fully prepared for assembly and initial setup, providing a smooth start to your coffee-making journey․
3․2 Step-by-Step Assembly Instructions
Start by plugging in the power cord and placing the coffee maker on a flat surface․ Next, attach the filter basket to the machine’s designated area․ Align the water reservoir with the base and secure it by gently pushing until it clicks․ Ensure all parts are properly locked in place for safe operation․ Finally, run a test cycle without coffee grounds to verify the machine is functioning correctly․ This ensures a smooth and error-free setup process․
3․3 Initial Setup and Configuration
After assembly, set the clock by pressing the “HOUR” and “MINUTE” buttons․ Choose your preferred brew strength using the strength selector․ Select the number of cups using the “CUP” button․ Ensure the water reservoir is filled and the filter is in place․ Program your desired brewing time if needed․ Finally, run a test cycle without coffee grounds to ensure proper function․ This setup ensures your CRUXGG Coffee Maker is ready for optimal performance and tailored to your preferences․
Brewing Instructions
Start by adding coffee grounds and water․ Select brew strength and cup size․ Let the machine do the rest․ Enjoy your perfectly brewed coffee in minutes․
4․1 Basic Brewing Guide
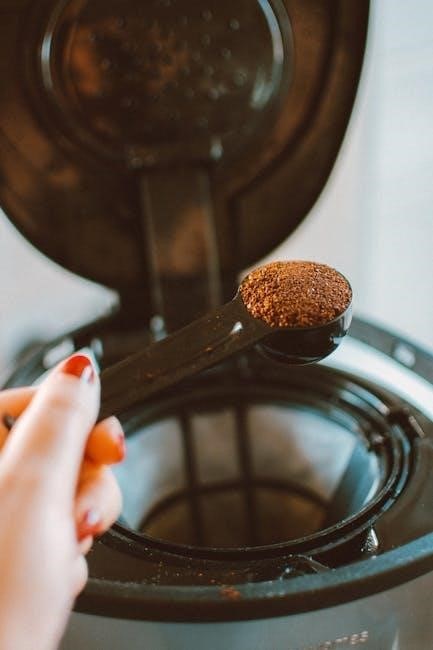
To brew coffee, start by filling the water reservoir and adding coffee grounds to the filter․ Choose your desired brew strength and cup size using the touchscreen․ Press the BREW button to begin․ The machine will automatically heat the water and distribute it evenly over the grounds․ Depending on your settings, the process typically takes 5-10 minutes․ Once complete, your coffee is ready to enjoy․ For a quicker start, use the pause-and-serve feature to pour a cup mid-brew․
4․2 Customizing Brew Strength and Flavor
Adjust the brew strength to suit your taste by selecting from strong, medium, or light options on the touchscreen․ For enhanced flavor, experiment with coffee-to-water ratios and use freshly ground beans․ The customizable settings allow you to tailor each brew to your preference․ Use the pause-and-serve feature to pour a cup early without interrupting the brewing process․ Explore different roast levels and brewing times to find your perfect cup of coffee every time․
4․3 Using the Pause-and-Serve Feature
The pause-and-serve feature allows you to pour a cup of coffee before brewing is complete․ Simply press the “Pause” button on the touchscreen during the brewing cycle․ The machine will temporarily stop, enabling you to serve a cup immediately․ Once you’ve poured, press “Resume” to continue brewing the remaining coffee․ This feature is perfect for those who can’t wait for their morning cup․ Ensure the carafe is properly placed to avoid spills when resuming․

Maintenance and Cleaning
Regular maintenance ensures optimal performance and longevity․ Clean the brew basket and carafe daily, descale every 3-6 months, and replace the water filter every 2 months․
5․1 Daily Cleaning Routine
Regular cleaning is essential for maintaining your CRUXGG Coffee Maker’s performance․ After each use, empty the coffee grounds, rinse the brew basket, and wipe down surfaces with a damp cloth․ Clean the carafe and lid thoroughly․ For deeper maintenance, run a vinegar and water solution through the machine periodically to remove mineral buildup․ Always unplug the device before cleaning to ensure safety and longevity․
5․2 Descaling and Water Hardness Adjustment
Descaling your CRUXGG Coffee Maker is crucial to remove mineral buildup that can affect performance and flavor․ Depending on water usage, descale every 3 to 6 months․ Adjust water hardness settings to match your local water supply for optimal brewing․ Use a descaling solution, run it through the machine, then rinse thoroughly with water․ This ensures longevity, maintains taste, and prevents scaling issues․ Always refer to the manual for specific instructions tailored to your model․
5․3 Replacing the Water Filter
Regularly replacing the water filter in your CRUXGG Coffee Maker ensures clean water and optimal flavor․ Replace the filter every 2-3 months or as indicated by the machine․ Turn off the power, locate the filter in the water reservoir, and remove it․ Insert a new compatible filter, ensuring it’s properly seated․ Flush the system by running a few cycles with fresh water․ This maintains water quality and prevents any taste impurities․ Always use a filter recommended by the manufacturer to avoid warranty issues․
Troubleshooting Common Issues
Identify and resolve common issues like brew interruptions or error codes by referring to the manual’s troubleshooting guide for detailed solutions and maintenance tips․
6․1 Common Problems and Solutions
Address common issues like brew interruptions or error codes by checking water levels, ensuring proper coffee ground placement, and descaling regularly․ Refer to the manual for specific solutions and troubleshooting steps to maintain optimal performance․ Resetting the machine or adjusting water hardness settings can often resolve operational hiccups․ Always consult the error code guide for precise diagnostics and quick fixes to ensure your CRUXGG coffee maker continues to function smoothly․
6․2 Resetting the Coffee Maker
To reset your CRUXGG Coffee Maker, unplug it from the power source, wait for 30 seconds, and plug it back in․ This process often resolves issues like error codes or interrupted brewing cycles․ For more complex problems, refer to the manual for specific reset instructions or press and hold the BREW button for 5 seconds․ If issues persist, contact customer support at (866) 832-4843 for further assistance or troubleshooting guidance․
6․3 Error Codes and Their Meanings
The CRUXGG Coffee Maker displays error codes like E1, E2, or E3 to indicate specific issues․ E1 typically signifies a heating element problem, while E2 may point to a sensor malfunction․ E3 often relates to water flow issues․ Refer to the manual for detailed explanations of each code․ To resolve most errors, unplug the machine, wait 30 seconds, and plug it back in․ If the issue persists, contact customer support for further assistance or repair options․

Warranty and Customer Support
Your CRUXGG Coffee Maker is backed by a comprehensive warranty․ For inquiries or issues, contact customer support at (866) 832-4843 or via email․ Visit the official website for detailed warranty terms, FAQs, and additional support resources to ensure optimal performance and resolution of any concerns․
7․1 Warranty Information and Coverage
The CRUXGG Coffee Maker is covered by a 1-year limited warranty, protecting against manufacturing defects in materials and workmanship․ This warranty ensures repairs or replacements at the manufacturer’s discretion․ Coverage extends to parts and labor for defects arising under normal use․ Misuse, accidental damage, or wear and tear are excluded․ For detailed terms and conditions, refer to the official warranty document provided with your purchase or available on the CRUX website․
7․2 Contacting Customer Support
For assistance with your CRUXGG Coffee Maker, contact customer support at (866) 832-4843 or via email․ The support team is available to address queries, provide troubleshooting guidance, and assist with warranty-related matters․ Additionally, you can visit the official CRUX website for online resources, FAQs, and detailed support information to help resolve common issues or answer questions about your coffee maker․
7․3 Online Resources and FAQs
Visit the official CRUX website for comprehensive online resources, including FAQs, troubleshooting guides, and detailed manuals․ The CRUXGG Coffee Maker manual is available for free, offering step-by-step instructions and tips for optimal use․ With a 9․5 average rating, it’s a trusted source for resolving common issues․ Additionally, you’ll find guides for features like customizable brew strength and the pause-and-serve function, ensuring you make the most of your coffee maker․
Where to Buy and Accessories
The CRUXGG Coffee Maker is available at authorized retailers and online stores like Amazon․ Explore compatible accessories, such as water filters and replacement carafes, to enhance your brewing experience․
8․1 Authorized Retailers and Online Stores
The CRUXGG Coffee Maker is available for purchase at various authorized retailers and online stores․ Popular options include Amazon, Walmart, and Best Buy, ensuring convenience for customers․ Additionally, the official CRUX website offers direct purchases, often with exclusive deals․ When shopping, verify the seller’s authenticity to avoid counterfeit products․ Online marketplaces like eBay also carry this model, but buyers should check seller ratings․ Smoke & Snow is another trusted retailer listed on the product’s support page․ For the best experience, always buy from reputable sources to ensure warranty validity and genuine product quality․
8․2 Compatible Accessories
The CRUXGG Coffee Maker supports various accessories to enhance your brewing experience․ These include a replacement water filter, which ensures optimal water quality, and compatible travel mugs for convenient serving․ Additionally, cleaning brushes and descaling solutions are available to maintain your machine’s performance․ These accessories can be purchased from authorized retailers like Amazon, Walmart, and Best Buy, or directly from the official CRUX website․ Always check compatibility with the CRUXGG model before purchasing․ For more details, refer to the product’s customer reviews and official accessory pages․
8․3 Customer Reviews and Ratings
Customers have shared positive feedback about the CRUXGG Coffee Maker, praising its customizable brew strength and user-friendly touchscreen․ Many reviewers highlight the pause-and-serve feature as a convenient addition․ With an average rating of 4․5 stars, users appreciate its sleek design and programmable options․ Some note minor issues with brewing consistency, but overall, the product is well-received․ Check platforms like Amazon or Best Buy for detailed reviews to make an informed decision․
The CRUXGG Coffee Maker Manual has guided you through setup, brewing, maintenance, and troubleshooting․ With its customizable features and user-friendly design, this coffee maker enhances your daily coffee experience․ By following the manual, you can ensure optimal performance and longevity․ For any further assistance, refer to the warranty and customer support details․ Enjoy crafting perfect cups with your CRUXGG Coffee Maker!