
instruction manual harley rear wheel assembly diagram
The Harley rear wheel assembly is a critical component, essential for both functionality and safety. Understanding its structure and components is vital for proper maintenance and repairs.
1.1 Importance of Proper Assembly and Maintenance
Proper assembly and maintenance of the Harley rear wheel are crucial for ensuring safety, performance, and longevity. Improper installation or neglect can lead to wobbling, reduced braking efficiency, or even structural failure. Regular cleaning and lubrication of components like spokes, bearings, and hubs are essential to prevent corrosion and wear. Adhering to the diagram and manufacturer guidelines ensures optimal functionality and rider safety, making maintenance a priority for every Harley owner.
1.2 Overview of the Rear Wheel Assembly Components
The Harley rear wheel assembly comprises several key components, including the rim, spokes, hub, bearings, sprocket, brake caliper, and tire. The rim provides structural support, while spokes connect it to the hub, ensuring durability. Bearings within the hub facilitate smooth rotation, and the sprocket engages with the drive belt. The brake caliper and rotor are integral for stopping power. Each part must be properly aligned and secured to ensure optimal performance and safety.
Understanding the Rear Wheel Assembly Diagram
The rear wheel assembly diagram provides a detailed visual guide, illustrating components like the hub, spokes, rim, bearings, and sprocket. It aids in identifying parts and their relationships, essential for maintenance and repairs.
2.1 Key Components Illustrated in the Diagram
The diagram highlights essential parts such as the hub, which houses the bearings, the rim that holds the tire, and the spokes that connect the hub to the rim. Additionally, it showcases the sprocket for power transmission, the brake caliper for stopping power, and the tire for traction. These components are intricately detailed to ensure clarity and ease of identification during maintenance or repairs.
2;2 How to Interpret the Exploded View Diagram
The exploded view diagram provides a detailed visual breakdown of the rear wheel assembly, showcasing how components like the hub, spokes, rim, and bearings fit together. It illustrates the assembly sequence, making it easier to understand disassembly and reassembly processes. By referencing the diagram, users can identify each part’s location and relationship to others, ensuring proper alignment and torque specifications during maintenance or repairs.

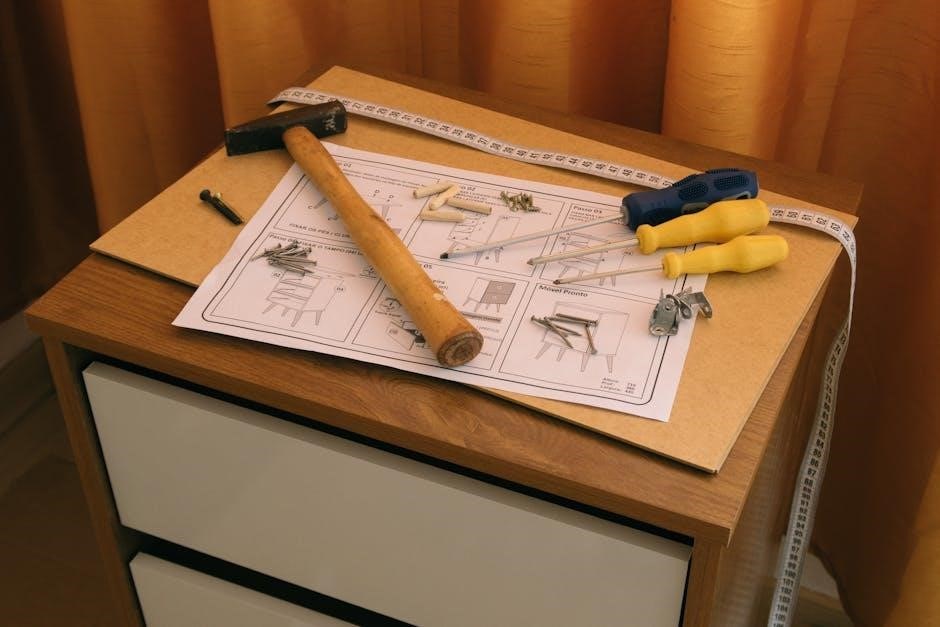
Tools and Materials Required
Essential tools include a torque wrench, impact gun, pliers, punches, and socket sets. Materials needed are lubricants, cleaning agents, and protective coatings for optimal assembly and maintenance.
3.1 Essential Tools for Assembly and Disassembly
The process requires specific tools like a torque wrench, impact gun, socket set, and pliers. A wheel chock and jack are necessary for safe lifting. Use punches and drifts for bearing removal. Ensure all tools are compatible with Harley-Davidson specifications to avoid damage. Proper lubrication tools and cleaning supplies are also essential. Having the right tools ensures efficient disassembly and assembly, preventing damage and ensuring safety throughout the process.
3.2 Recommended Materials for Lubrication and Protection
Use Harley-Davidson-approved lubricants for bearings and moving parts to ensure durability. Apply rust-inhibiting coatings to protect metal components. Clean chrome surfaces with specialized Harley-Davidson wheel cleaners and brushes. Regularly grease axle and bearing assemblies to prevent wear. Silicone-based sprays can protect rubber and plastic parts from cracking. Always follow manufacturer guidelines for lubrication and protection to maintain the integrity and longevity of the rear wheel assembly components.

Pre-Assembly Preparation
Ensure a clean, well-lit workspace and wear appropriate safety gear. Inspect all components for damage or wear. Organize tools and materials for efficient assembly.
4.1 Safety Precautions and Workspace Setup
Always wear protective gear, including gloves and safety glasses. Ensure the motorcycle is on a stable stand with the brake engaged to prevent movement. Clear the workspace of clutter and flammable materials. Use jack stands for added stability when lifting. Proper ventilation is essential, especially when using chemicals. Keep a fire extinguisher nearby. Ensure all tools are within reach to avoid distractions during assembly.
4.2 Inspecting the Components for Damage or Wear
Inspect all components for visible damage, rust, or excessive wear. Check bearings for smooth operation and any signs of play. Examine spokes for tension and damage, ensuring none are loose or bent. Inspect the rim for dents or warping and the tire for uneven wear or cracks. Clean the hub thoroughly and verify its alignment. Use a torque wrench to ensure proper tightening of bolts and nuts. Refer to the diagram for correct part identification and ensure all components are free from debris.

Step-by-Step Disassembly Process
Begin by removing the rear wheel from the motorcycle, then disassemble the components, such as the tire, rim, spokes, and hub, using appropriate tools and diagrams.
5.1 Removing the Rear Wheel from the Motorcycle
Begin by safely lifting the motorcycle using a jack or stand to access the rear wheel; Remove the axle nut and washer, then gently pull the wheel straight back. Ensure the bike is stabilized to prevent accidents. Use a wrench to loosen any additional bolts or components securing the wheel. Carefully lower the wheel to the ground, taking note of its weight. This step requires precision and caution to avoid damage or injury.
5.2 Disassembling the Wheel Components (Tire, Rim, Spokes, Hub)
Start by removing the tire from the rim using tire levers, ensuring not to damage the inner tube. Next, detach the spokes from the hub, carefully organizing them for reassembly. Remove the hub from the rim, taking note of the bearings and spacers. Use a hub puller if necessary, avoiding excessive force. Finally, separate all components, labeling each for easy identification during reassembly.

Assembly Process
Rebuild the hub with new bearings, ensuring proper grease application. Reattach spokes, tightening evenly. Mount the tire, aligning it perfectly with the rim for a secure fit.
6.1 Rebuilding the Hub and Bearing Assembly
Rebuilding the hub requires precision to ensure proper functionality. Start by thoroughly cleaning the hub and inspecting for wear. Replace worn or damaged bearings, applying a high-quality grease like Harley-Davidson’s Wheel Bearing Grease. Reassemble the hub, making sure the bearings are securely seated and aligned. Tighten all components according to the torque specifications provided in the service manual. Proper lubrication and alignment are crucial for smooth operation and longevity of the rear wheel assembly.
6.2 Reinstalling the Spokes and Tightening Them Properly
Reinstalling the spokes requires careful attention to ensure even tension and proper alignment. Start by threading each spoke through the hub and rim, ensuring they are securely seated. Tighten the nipples in a star pattern to avoid warping the rim. Use a spoke wrench to achieve the recommended torque, checking tension with a truing stand if available. Properly tightened spokes ensure a stable and balanced rear wheel assembly, enhancing both performance and safety.
6.3 Mounting the Tire and Ensuring Proper Alignment
Mounting the tire requires precision to ensure proper alignment and functionality. Place the tire on the rim, aligning the valve stem with the hub. Use a truing stand to check alignment with the swingarm. Tighten the axle nuts evenly, following the recommended torque specifications. Double-check the tire pressure and ensure the wheel spins freely without wobbling. Proper alignment is crucial for balanced handling and optimal performance of the Harley rear wheel assembly.

Reassembly and Installation
Reassemble the rear wheel by aligning it with the swingarm, ensuring proper fitment. Secure the axle nuts and tighten according to specified torque values for safety and stability.
7.1 Aligning the Rear Wheel with the Swingarm
Aligning the rear wheel with the swingarm ensures proper fitment and functionality. Use the axle to guide the wheel into place, ensuring it slides smoothly into the swingarm. Check for any misalignment by visually inspecting the wheel’s position. Once aligned, secure the axle nuts and tighten them evenly to maintain balance and prevent vibration during operation. Proper alignment is crucial for safe riding and optimal performance;
7.2 Securing the Wheel with the Axle and Bolts
Securing the rear wheel involves inserting the axle through the swingarm and wheel hub, ensuring proper alignment. Tighten the axle bolts gradually in a star pattern to avoid warping the hub. Use a torque wrench to apply the recommended torque specification for the bolts; Double-check the alignment and ensure the wheel spins freely without wobbling. Properly secured bolts prevent vibration and ensure safe operation of the motorcycle.
Post-Installation Checks
After installation, test the brakes to ensure proper functionality. Check the wheel alignment and verify tire pressure matches the recommended specifications for optimal performance and safety.
8.1 Testing the Brakes and Ensuring Proper Functionality
After reinstalling the rear wheel, test the brakes thoroughly. Ensure the brake caliper is properly aligned and the pads make full contact with the rotor. Perform a slow, controlled stop to check for any sponginess or resistance in the brake lever. If the brakes feel uneven or weak, inspect for air in the lines or improperly seated pads. Proper brake functionality is crucial for safety, so any issues must be addressed immediately.
8.2 Checking the Wheel Alignment and Tire Pressure
After installation, ensure the rear wheel is properly aligned with the swingarm and frame. Check for any wobbling or misalignment by spinning the wheel. Verify tire pressure using a reliable gauge, adhering to the manufacturer’s specifications. Under-inflated tires can lead to poor handling and uneven wear. Inspect the tire for damage or wear, and ensure the valve stem is securely tightened. Proper alignment and pressure are crucial for optimal performance and safety.

Maintenance and Upkeep
Regular maintenance ensures the Harley rear wheel assembly remains in optimal condition. Clean chrome components with Harley-Davidson approved cleaners and lubricate bearings periodically. Inspect spokes and hubs for wear or damage, addressing issues promptly to prevent further deterioration and ensure safety.
9.1 Cleaning and Lubricating the Rear Wheel Components
Regular cleaning and lubrication are essential for maintaining the Harley rear wheel assembly. Use Harley-Davidson approved cleaners and brushes to remove dirt and grime, especially from heavily soiled areas like spokes and hubs. Lubricate bearings with Harley-Davidson Bearing Lubricant and ensure the sprocket is well-greased. For chains, apply Harley-Davidson Chain Lube periodically. Always follow manufacturer guidelines to prevent corrosion and ensure smooth operation. Regular maintenance preserves the wheel’s appearance and functionality, ensuring long-term reliability.
9.2 Regular Inspection of Bearings and Spokes
Regularly inspect the bearings and spokes of your Harley rear wheel assembly to ensure optimal performance and safety. Check bearings for smooth rotation and any signs of wear or play. Inspect spokes for tension and damage, tightening them if necessary. Lubricate bearings with Harley-Davidson approved grease and replace any worn or rusted components promptly. This routine maintenance helps prevent issues like wobbling or noise, ensuring a smooth and safe ride. Always refer to the exploded diagram for precise identification of parts.
Troubleshooting Common Issues
Identify and address common issues like wobbling, noise, or play in the rear wheel assembly. Inspect components, tighten loose spokes, and replace worn bearings or damaged parts.
10.1 Identifying and Fixing Wobbly Wheels
Identify a wobbly rear wheel by inspecting spokes, hub, and bearings. Check for loose spokes and visible damage to the rim or hub. Tighten loose spokes evenly using the correct torque specifications. Replace any damaged spokes or bearings to ensure stability. Refer to the exploded diagram in your manual for precise part identification and assembly guidance to fix the issue effectively.
10.2 Addressing Bearing Noise or Play
Bearing noise or play in the rear wheel assembly can indicate wear or improper installation. Inspect bearings for damage or contamination. Clean and repack them with high-quality grease if viable. Replace worn bearings entirely, following torque specifications. Refer to the exploded diagram for disassembly and reassembly steps. Ensure proper alignment and secure all components to eliminate play and restore smooth operation.

Customization and Upgrades
Customizing your Harley’s rear wheel assembly enhances aesthetics and performance. Consider upgrading to chrome components, lightweight rims, or high-performance tires for improved style and functionality.
11.1 Aesthetic Upgrades for the Rear Wheel
Aesthetic upgrades for the Harley rear wheel can transform its appearance. Chrome-plated components, such as spokes and rims, add a sleek, polished look. Custom-designed wheels, like billet or forged aluminum rims, offer unique styles. Additionally, installing LED lighting around the wheel or adding decorative hub caps can enhance visual appeal. These upgrades allow riders to personalize their bike, blending functionality with a standout aesthetic design.
11.2 Performance Enhancements for the Rear Wheel Assembly
Enhancing the rear wheel assembly can improve performance and handling. Upgrading to lightweight aluminum or forged rims reduces unsprung weight, boosting acceleration. High-performance tires with advanced tread patterns optimize traction and stability; Additionally, installing a performance sprocket or pulley can improve power delivery. Adjustable components, such as tension-adjustable spokes, ensure optimal wheel alignment and responsiveness, catering to specific riding styles and preferences for enhanced overall performance.

Warranty and Manufacturer Support
Harley-Davidson offers comprehensive warranty coverage for rear wheel assemblies, ensuring protection against defects. Manufacturer support includes access to detailed diagrams, repair resources, and expert assistance for seamless maintenance and repairs.
12.1 Understanding Harley-Davidson’s Warranty Coverage
Harley-Davidson provides a comprehensive warranty covering defects in materials and workmanship for the rear wheel assembly. This coverage ensures owners receive repairs or replacements without additional costs. The warranty period typically spans multiple years and miles, offering peace of mind. It’s essential to review specific terms and conditions to understand what is included and any potential limitations. Proper maintenance and adherence to service schedules can help maintain warranty validity.
12.2 Contacting Harley-Davidson Support for Assistance
For inquiries or issues with your Harley rear wheel assembly, contacting Harley-Davidson support is straightforward. Visit their official website for contact details, including phone numbers, email, or live chat options. Local dealerships also provide assistance, offering troubleshooting, warranty claims, and genuine part recommendations. Ensure to have your VIN and specific details ready for efficient support. Their team is equipped to address concerns, ensuring your bike performs optimally.
This manual provides a comprehensive guide to understanding and working with the Harley rear wheel assembly. Detailed explanations and diagrams ensure proper maintenance and repair practices.
13.1 Summary of Key Steps and Best Practices
Following the outlined steps ensures a successful rear wheel assembly. Referencing diagrams, using proper tools, and adhering to torque specifications are crucial. Regular maintenance, including cleaning and lubricating components, prevents wear and tear. Always inspect parts for damage before reassembly and test functionality post-installation. Safe workspace setup and adherence to safety precautions are non-negotiable. Consult Harley-Davidson resources for accurate guidance and support.
13.2 Final Tips for a Successful Rear Wheel Assembly
Always reference the exploded view diagram for clarity. Ensure all components are clean and free from damage before assembly. Tighten spokes and bolts in a star pattern to maintain even tension. Double-check torque specifications for bolts and bearings. Regularly inspect and lubricate moving parts to prevent wear. Test the brake functionality and wheel alignment post-installation. Consult Harley-Davidson manuals or support for any uncertainties. Patience and precision are key to a successful assembly.