new home sewing machine manual
Welcome! This guide assists navigating your sewing machine’s features. Explore manuals, instructions, and user guides for ease, covering various models and techniques.
Understanding the Manual’s Purpose
Your sewing machine manual is the cornerstone of successful operation and maintenance. It’s designed to unlock the full potential of your specific model, offering detailed instructions beyond basic operation. This guide, as seen with Viking and Singer manuals, provides crucial information on threading, stitch selection, and troubleshooting common issues like uneven seams or collar skew.
Understanding the manual ensures safe usage, preventing needle injuries and maximizing the machine’s lifespan. It details specific features – decorative stitching, alphabet options – and explains how to utilize presser feet effectively. Resources like online collections (manuals_singer, ) emphasize the importance of referencing the correct manual for your machine, ensuring optimal performance and avoiding potential damage.
Key Features and Components
Modern home sewing machines boast a range of features, detailed within your manual. Core components include the power switch, handwheel, stitch selector, bobbin winder, and presser foot. Understanding these is vital. Manuals highlight stitch options – straight, zigzag, and decorative – alongside adjustments for length and width.
Advanced machines, utilizing “SMART SEWING” technology, may feature automated functions for weight reduction and seam sealing. The manual will illustrate presser feet variations for specialized tasks. It also details safety mechanisms and explains how to identify parts for maintenance, like the needle. Referencing diagrams within the manual (Singer 257, Fashionmate) aids in quick component identification and proper usage.

Getting Started: Initial Setup

Begin by carefully unboxing your new machine and referencing the manual. Proper setup, as detailed in guides, ensures optimal performance and longevity.
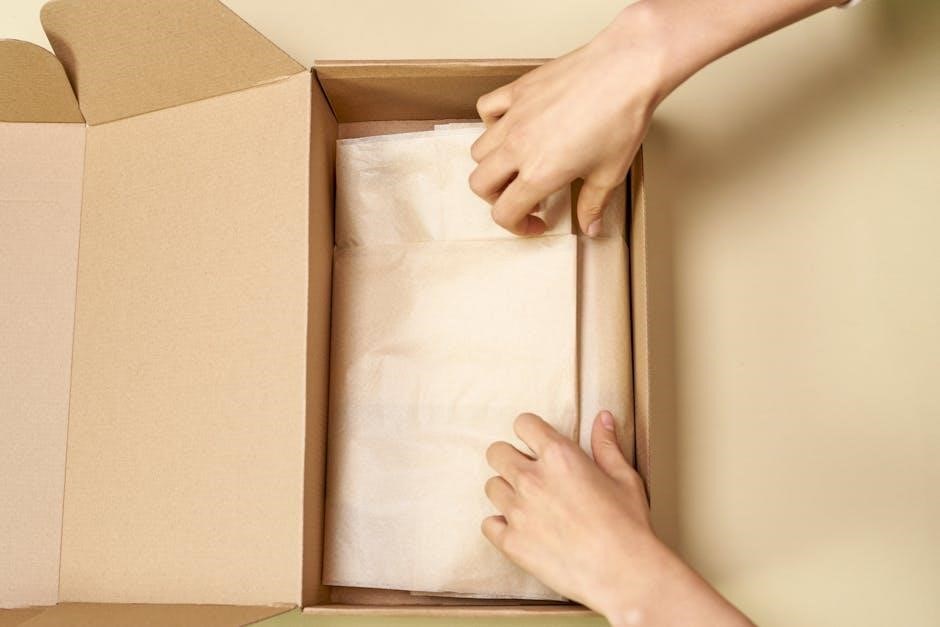
Unboxing and Parts Identification
Carefully unpack your sewing machine, retaining the box for potential future transport or storage. The manual is your primary guide! Identify all included components: the machine itself, power cord, foot pedal, various presser feet (zigzag, straight stitch, etc.), bobbins, needle set, screwdriver, seam ripper, and potentially a dust cover.
Compare these items against the parts list in your manual to ensure everything is present. Note the locations of key features like the bobbin winder, tension dials, stitch selection panel, and needle clamp. Familiarizing yourself with these parts before threading or sewing will streamline the process and prevent frustration. Refer to diagrams within the manual for clear visual identification.
Threading the Machine: A Step-by-Step Guide
Consult your manual’s threading diagram – it’s crucial! Begin by raising the presser foot; this opens the tension discs. Guide the thread from the spool pin, through the first tension disc, and then around the bobbin winder. Next, lead the thread through the take-up lever and back down to the needle clamp.
Ensure the thread is securely seated in the needle. Incorrect threading is a common issue, so double-check each step. A thread guide is often present to help maintain proper tension. Refer to the manual’s illustrations for clarity. Proper threading ensures even stitch formation and prevents machine malfunctions. Practice makes perfect!
Winding the Bobbin
Begin by placing the spool of thread onto the spool pin. Next, guide the thread through the designated thread guides leading to the bobbin winder. Secure the thread end onto the bobbin – many machines have a small hole for this. Engage the bobbin winder by sliding it into position, as shown in your manual.
Hold the thread tail firmly for the first few rotations to prevent slipping. Press the foot pedal gently to start winding. Most machines automatically stop when the bobbin is full. Disengage the bobbin winder and remove the filled bobbin. Consistent, even winding is vital for smooth sewing; refer to your manual for specific instructions.

Basic Sewing Techniques
Master fundamental stitches like straight and zigzag, adjusting length and width for diverse fabrics. Practice creates proficiency; consult your manual for guidance!
Straight Stitching: Mastering the Fundamentals
The straight stitch is the cornerstone of sewing, utilized for seams, basting, and quilting. Begin by threading your machine correctly, referencing your manual for specific instructions. Practice on scrap fabric to establish consistent stitch length – typically around 2.5mm is ideal for general sewing.
Ensure even fabric feeding by guiding the material gently; avoid pulling or pushing. Maintain a consistent seam allowance using the markings on your needle plate. Uneven stitching can indicate tension issues, so consult the manual’s troubleshooting section. Mastering this basic stitch unlocks a world of sewing possibilities, forming the foundation for more complex projects. Remember to always prioritize safety!

Zigzag Stitching: Versatility and Applications
The zigzag stitch offers remarkable versatility beyond simple seams. Refer to your machine’s manual to select the zigzag setting and adjust stitch width and length. This stitch excels at finishing raw edges, preventing fabric fraying, and creating decorative elements. It’s also crucial for sewing stretch fabrics, allowing the seam to expand with the material.
Experiment with varying stitch widths and lengths to achieve different effects. A narrow zigzag is ideal for reinforcing buttonholes, while a wider zigzag creates decorative embellishments. Mastering zigzag stitching expands your project possibilities, enabling you to tackle diverse fabrics and designs. Always test on scrap fabric first!
Adjusting Stitch Length and Width
Precise stitch control is key to quality sewing. Your machine’s manual details how to adjust both stitch length and width using dedicated dials or electronic controls. Shorter stitch lengths are ideal for delicate fabrics and curves, providing greater stability. Longer stitch lengths are suitable for basting or heavier materials, increasing sewing speed.
Stitch width primarily affects zigzag stitches, determining the breadth of the zig pattern. Wider widths create bolder designs, while narrower widths offer subtle reinforcement. Always test adjustments on scrap fabric before applying them to your project. Understanding these controls unlocks creative potential and ensures professional-looking results.

Advanced Sewing Techniques
Explore beyond basics! Master diverse fabrics, presser feet, and troubleshoot common issues. Unlock your machine’s full potential for complex projects.
Sewing Different Fabric Types
Navigating fabric diversity is key to successful sewing. Your new machine can handle a wide range, but adjustments are crucial. Lightweight fabrics like chiffon require finer needles and delicate stitch settings to prevent puckering. For heavier materials – denim or canvas – a stronger needle and increased stitch length are essential.
Always test on a scrap piece first! Consider using a walking foot for slippery or multiple layers, ensuring even feeding. Understanding fabric grain and stretch is also vital for achieving professional results. Refer to your manual for specific recommendations based on your machine’s capabilities and the fabric’s composition. Experimentation and practice will build your confidence!
Using Presser Feet: A Comprehensive Overview
Presser feet are vital for specialized sewing tasks; Your machine likely came with a standard zig-zag foot, ideal for everyday stitching. However, a variety of optional feet unlock greater potential! A satin stitch foot provides a smoother finish for decorative stitches. A zipper foot allows precise stitching close to zipper teeth.
For buttonholes, a buttonhole foot is essential. A walking foot aids in handling slippery or layered fabrics, preventing shifting. Explore options like a blind hem foot or a quilting foot. Your manual details each foot’s function and proper attachment. Mastering these tools expands your sewing capabilities significantly!
Troubleshooting Common Sewing Problems
Encountering issues is normal! Thread bunching often indicates incorrect threading or tension. Refer to your manual’s threading diagram and adjust the tension dial. Skipped stitches can stem from a dull or incorrectly inserted needle – replace it! Fabric puckering suggests incorrect stitch length or fabric feed issues; adjust accordingly.
If the machine jams, stop immediately and carefully remove the fabric. Never force it! Uneven stitching might signal an unbalanced presser foot pressure. Consult your manual for troubleshooting specific error codes. Regular cleaning and lubrication, as detailed within, prevent many problems.

Maintenance and Care
Keep your machine pristine! Regular cleaning, lubrication, and needle replacement—detailed in your manual—ensure optimal performance and longevity for years of sewing.
Cleaning Your Sewing Machine
Regular cleaning is vital for maintaining your sewing machine’s performance. Always disconnect the power before starting! Use a soft brush to remove lint and dust from the bobbin area, feed dogs, and around the needle plate. A small vacuum cleaner with a brush attachment can also be helpful.
For tougher buildup, a slightly dampened (not wet!) cloth can be used. Avoid harsh chemicals or abrasive cleaners, as these can damage the machine’s components. Refer to your manual for specific cleaning recommendations, as different models may require different approaches. Cleaning after each use prevents issues and extends the machine’s lifespan. Don’t forget to wipe down the exterior casing!
Lubrication: Keeping Things Running Smoothly
Proper lubrication ensures your sewing machine operates quietly and efficiently. However, modern machines often require minimal oiling – always consult your manual first! Over-oiling can attract dust and create more problems than it solves.
If lubrication is recommended, use only sewing machine oil, specifically designed for this purpose. Apply a small drop to the designated oiling points, typically around the bobbin area and the motor shaft. Avoid getting oil on the feed dogs or other areas that fabric passes through. Wipe away any excess oil with a clean cloth. Regular, careful lubrication extends your machine’s life.
Replacing the Needle
A dull or damaged needle can cause skipped stitches, fabric puckering, and even machine damage. Regularly inspect your needle for bends, burrs, or a blunt tip. Replacing it is a simple process, but crucial for optimal sewing.
Always power off and unplug the machine before changing the needle. Loosen the needle clamp screw, remove the old needle, and insert a new one with the flat side facing the back. Ensure the needle is fully inserted and tighten the screw securely. Use the correct needle type and size for your fabric – your manual will provide guidance. Dispose of used needles safely!

Safety Precautions
Prioritize safety! Always unplug the machine before maintenance. Avoid needle injuries and keep fingers clear of the needle area during operation.
General Safety Guidelines
Before you begin, always read the entire manual to understand your sewing machine’s operation and safety features. Ensure the machine is placed on a stable, level surface during use. Never operate the machine if it’s damaged or malfunctioning. Keep children away from the sewing area and the machine itself.
Always unplug the machine when not in use, before cleaning, or when changing parts like the needle. Never pull or push the fabric while sewing; let the machine feed the fabric naturally. Be mindful of moving parts, especially the needle and presser foot, to avoid injuries. Avoid using excessive force, which could damage the machine or cause accidents. Regularly inspect the power cord for damage and replace if necessary.
Avoiding Needle Injuries
Needle safety is paramount. Always use the correct needle type and size for your fabric. A dull or bent needle increases the risk of breakage and injury. When changing the needle, ensure the presser foot is raised and the machine is unplugged. Dispose of used needles responsibly – never throw them loose in the trash; use a needle disposal container.
Never sew over pins or attempt to sew through thick materials that could bend or break the needle. Keep your fingers a safe distance from the needle while the machine is running. If a needle breaks, immediately stop the machine, unplug it, and carefully remove the broken pieces. Regularly inspect the needle for any signs of damage before each use.

Understanding Stitch Patterns
Explore diverse stitches! From decorative options to alphabet and number stitching, your manual details each pattern’s purpose and optimal settings for creative projects.
Decorative Stitching Options
Unleash your creativity! Your sewing machine manual showcases a wide array of decorative stitch patterns beyond basic straight and zigzag stitches. These options include floral motifs, geometric designs, and shell patterns, perfect for embellishing garments, creating heirloom quilts, or personalizing home décor projects.
The manual will guide you through selecting the appropriate stitch, adjusting its length and width, and testing it on scrap fabric before applying it to your final project. Experiment with different thread colors and fabric combinations to achieve unique and stunning effects. Remember to consult the manual for specific foot recommendations to ensure optimal stitch formation and prevent fabric damage. Decorative stitching truly elevates your sewing endeavors!

Alphabet and Number Stitching
Personalize with precision! Many modern sewing machines, as detailed in your manual, feature alphabet and number stitching capabilities. This allows for direct embroidery of names, dates, or monograms onto fabric projects. The manual will illustrate how to select the desired character, adjust spacing, and ensure consistent stitch quality.
Typically, these stitches utilize a special foot designed for alphabets. Practice on scrap fabric is crucial to master alignment and prevent errors. Explore options for creating custom labels, dating quilts, or adding a unique touch to gifts. Refer to your manual for troubleshooting tips regarding thread tension and stitch density for optimal results. It’s a fantastic way to add a personal, handcrafted element!