drive hospital bed instruction manual
Drive Hospital Bed Instruction Manual: A Comprehensive Guide
This manual provides essential guidance for the safe operation‚ maintenance‚ and troubleshooting of your Drive hospital bed‚ ensuring optimal patient comfort and caregiver support․
Drive Medical is a leading manufacturer committed to providing reliable and innovative hospital beds designed to enhance patient care and promote recovery․ These beds cater to diverse needs‚ ranging from acute care facilities to comfortable home healthcare settings․ Understanding your Drive hospital bed is crucial for ensuring both patient safety and optimal functionality․
This instruction manual serves as a comprehensive resource‚ detailing everything from initial setup and operation to routine maintenance and safety precautions․ Whether you have a manual or full-electric model‚ this guide will equip you with the knowledge to confidently utilize all features․ Proper use and adherence to these instructions are paramount for preventing entrapment and maximizing the bed’s benefits․ Remember‚ the initial setup must be performed by a qualified technician to guarantee correct assembly and operation․
Understanding Bed Styles: Manual vs․ Electric
Drive hospital beds are available in both manual and electric configurations‚ each offering distinct advantages․ Manual hospital beds rely on a hand crank‚ typically inserted at the foot end of the bed‚ to adjust the head and foot sections․ This provides a cost-effective solution‚ ideal for situations where electricity isn’t readily available or preferred․
Electric beds‚ conversely‚ utilize powered controls to adjust bed positions‚ height‚ and features like Trendelenburg and reverse Trendelenburg․ These controls offer greater convenience and ease of use‚ particularly for patients with limited mobility or caregivers․ Full-electric models provide the most comprehensive adjustability․ Regardless of the style‚ always ensure the bed is locked in place after adjustments․ Older models specifically utilize a manual crank for operation‚ requiring physical exertion for adjustments․
Safety Precautions Before Use
Prior to operating a Drive hospital bed‚ several safety precautions are crucial․ Always verify the bed is stable and the locking levers are securely engaged before transferring a patient or making adjustments․ Regularly inspect all bed components – side rails‚ cranks (if applicable)‚ and electrical connections – for damage or wear․
Ensure the mattress is properly centered on the bed frame to prevent entrapment․ Never place objects under the bed that could create a hazard․ Familiarize yourself with the side rail operation‚ confirming they lock securely in both up and down positions․ Always test the side rails before each use․ If using an electric bed‚ inspect the power cord for fraying or damage․ Report any concerns to a qualified technician immediately․
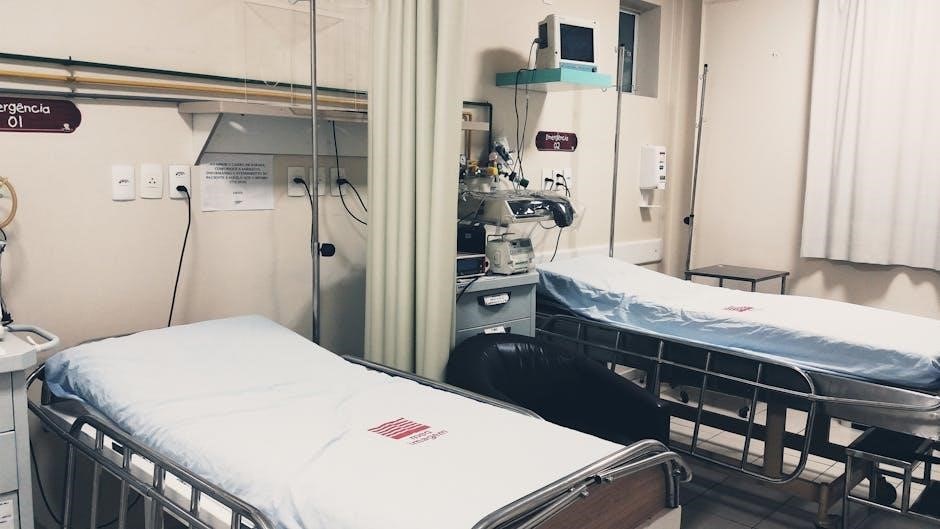
Bed Parts Diagram & Identification
Understanding the components of your Drive hospital bed is essential for safe and effective operation․ A detailed bed parts diagram‚ typically found within the full owner’s manual (like the PBFEB3M model)‚ illustrates key features․ These include the head and foot sections‚ side rails‚ the bed frame itself‚ and the control mechanism – whether manual cranks or electric controls․
Identify the locking levers‚ crucial for securing the bed’s position․ Locate the crank insertion point (on manual models) at the foot end of the bed․ For electric beds‚ familiarize yourself with the control box and its various function buttons․ Refer to the diagram to pinpoint the location of each part‚ aiding in assembly‚ maintenance‚ and troubleshooting․ Proper identification ensures correct usage and prevents accidental damage․

Setting Up Your Drive Hospital Bed
Initial setup requires a qualified technician for proper functionality and safety‚ followed by securing the bed in a stable‚ desired location for patient use․

Assembly Instructions (If Required)
Please note that not all Drive hospital bed models require assembly; some arrive fully pre-assembled․ However‚ if assembly is necessary‚ detailed instructions are located at the rear of the dealer manual․ It is crucial that a qualified technician performs the assembly process to guarantee structural integrity and operational safety․
The assembly typically involves attaching side rails‚ the head and foot boards‚ and any necessary support structures․ Ensure all bolts and fasteners are securely tightened according to the provided diagrams․ Carefully review the parts list to confirm all components are present before beginning․ Improper assembly can compromise the bed’s stability and potentially lead to patient injury․
For dealers‚ the complete set-up and assembly instructions are specifically detailed in the rear section of the dealer’s manual․ Always prioritize safety and adherence to the manufacturer’s guidelines during the assembly procedure․
Initial Setup by a Qualified Technician
The initial setup of your Drive hospital bed must be performed by a qualified technician to ensure correct functionality and patient safety․ This crucial step involves verifying all components are properly assembled – if assembly was required – and that all mechanical and electrical systems are operating as intended․
The technician will thoroughly inspect the bed’s structure‚ checking for any loose parts or potential hazards․ They will also test the operation of all controls‚ including height adjustment‚ positioning features‚ and side rail mechanisms․ Proper calibration of the electric functions is essential for smooth and reliable performance․
This initial setup also includes educating caregivers on the bed’s proper operation and safety features; A qualified technician’s expertise guarantees the bed is ready for safe and effective use‚ minimizing the risk of malfunction or injury․
Locking the Bed in a Desired Location
Ensuring the bed remains stationary is paramount for patient safety․ Drive hospital beds are equipped with locking mechanisms‚ typically levers‚ to secure the bed in a chosen position․ To activate these locks‚ firmly depress the levers located on the bed’s frame – often found on the page 1 of 4 hospital bed instructions․
Confirm that all locking levers are fully engaged before allowing a patient to occupy the bed․ Regularly check the locks‚ especially after moving or adjusting the bed’s position; A properly locked bed prevents accidental rolling and minimizes the risk of falls or injuries․
It’s vital to understand your specific bed model’s locking system‚ as designs may vary․ Always test the bed’s stability after locking to verify its secureness․ Prioritize safety by consistently utilizing the locking features․

Operating Your Drive Hospital Bed
Understanding your bed’s controls – manual cranks or electric functions – is crucial for safe and effective adjustments to height‚ position‚ and side rails․
Manual Bed Operation: Using the Crank
For Drive hospital beds utilizing a manual crank system‚ operation requires understanding the crank’s insertion point‚ typically located at the foot end of the bed․ Insert the crank handle firmly into the designated socket․ Turning the handle will initiate the bed’s movement – up or down‚ depending on the direction of rotation․

Always ensure a smooth‚ controlled motion while operating the crank‚ avoiding abrupt or forceful turns․ Regularly check the locking mechanisms to confirm they are securely engaged after each adjustment․ It’s vital to verify side rail functionality; always test to ensure they are properly and securely in place before patient use․ Remember‚ consistent and careful operation extends the bed’s lifespan and maintains patient safety․
Proper mattress centering is also essential for balanced weight distribution and optimal functionality of the manual adjustment system․ If encountering resistance‚ do not force the crank; inspect for obstructions or consult the troubleshooting section․
Electric Bed Controls: Understanding Functions
Drive’s full-electric hospital beds feature intuitive controls designed for ease of use by both patients and caregivers․ Familiarize yourself with the handheld control box‚ identifying buttons for head and foot section adjustments‚ bed height modification‚ and potentially‚ Trendelenburg/reverse Trendelenburg positioning․
Each button clearly indicates its function; however‚ always test each control before full patient reliance․ Understand the limitations of each adjustment – maximum and minimum height‚ angle ranges for head and foot sections․ Pay attention to safety features like emergency stop buttons‚ if equipped․
Regularly inspect the control box and wiring for damage․ If any malfunctions occur‚ discontinue use and contact Drive for assistance․ Proper understanding of these functions ensures safe and effective bed operation‚ maximizing patient comfort and independence․
Adjusting Bed Height and Position
Proper bed height is crucial for patient safety and caregiver comfort․ Utilize the electric controls to raise or lower the bed to a height allowing easy patient transfer and minimizing strain on caregivers․ Ensure sufficient clearance beneath the bed for necessary equipment‚ like lifts or wheelchairs․
Adjusting the head and foot positions promotes patient comfort and aids in various medical needs․ Elevating the head of the bed can assist with breathing or feeding‚ while raising the foot can alleviate pressure on heels․ Always ensure the patient is properly supported and comfortable during these adjustments․
Remember to lock the bed’s wheels after achieving the desired height and position for stability․ Regularly check the locking mechanism’s functionality․
Side Rail Operation: Securing and Releasing
Drive hospital bed side rails are designed to enhance patient safety‚ preventing falls and assisting with repositioning․ Always verify that side rails are fully secured and locked in the upright position before leaving the patient unattended․ Regularly test the rails to confirm proper functionality and stability․
To release the side rails‚ locate the designated release mechanism – typically a button or lever – and depress or manipulate it according to the bed’s model․ Lower the rails smoothly and carefully‚ ensuring no obstructions are present․

Maintenance and Cleaning
Regular cleaning with a common household cleaner and consistent inspection of bed components are crucial for maintaining functionality and ensuring longevity․
Cleaning Procedures: Recommended Cleaners
Maintaining a hygienic hospital bed is paramount for patient well-being․ A common household cleaner is generally suitable for routine cleaning of the bed frame and side rails․ However‚ always test the cleaner on an inconspicuous area first to ensure it doesn’t damage the finish․ Avoid abrasive cleaners‚ solvents‚ or harsh chemicals‚ as these can compromise the bed’s integrity and void the warranty․
For more stubborn stains or spills‚ a mild soap and water solution is recommended․ Ensure the bed is thoroughly dried after cleaning to prevent rust or corrosion․ Pay particular attention to areas frequently touched‚ such as the side rails and control panels․ Disinfectant wipes can also be used‚ but follow the manufacturer’s instructions carefully․ Always unplug electric beds before cleaning‚ and avoid getting moisture near electrical components․ Regular cleaning contributes significantly to the bed’s lifespan and promotes a safe‚ healthy environment․

Regular Inspection of Bed Components
Consistent inspection is crucial for ensuring the continued safe and reliable operation of your Drive hospital bed․ Regularly check all bed components for signs of wear‚ damage‚ or looseness․ This includes the frame‚ side rails‚ wheels‚ and any electric components․ Pay close attention to the locking mechanisms on the wheels‚ ensuring they engage securely to prevent accidental movement․

Inspect the side rails frequently‚ verifying they operate smoothly and lock firmly into position․ Examine the crank mechanism (on manual beds) for proper function and lubrication․ For electric beds‚ check the cords and plugs for damage‚ and ensure the controls respond correctly․ Address any issues promptly – do not continue using a bed with damaged or malfunctioning parts․ Document all inspections and any maintenance performed․ A proactive approach to inspection extends the bed’s life and safeguards patient safety․
Troubleshooting Common Issues
Encountering minor issues with your Drive hospital bed is possible; here’s guidance for resolving them․ If the bed doesn’t adjust‚ first check the power cord (for electric models) and ensure it’s securely plugged in․ For manual beds‚ verify the crank is properly inserted․ If side rails aren’t locking‚ inspect for obstructions or damage to the locking mechanism․ Wheels failing to lock should be addressed immediately – do not use the bed until repaired․
If electric functions are unresponsive‚ try resetting the bed by disconnecting and reconnecting the power․ Never attempt to repair electrical components yourself; contact a qualified technician․ A squeaking sound may indicate a need for lubrication․ If problems persist‚ or if you notice any unusual noises or behaviors‚ discontinue use and contact Drive for assistance․ Prioritize safety and professional repair․

Entrapment Prevention
Prioritize patient safety by understanding potential entrapment hazards‚ ensuring proper mattress centering‚ and consistently verifying secure side rail operation for optimal protection․
Entrapment Guide: Awareness and Safety
Understanding entrapment risks is crucial for patient well-being when using a Drive hospital bed․ Entrapment occurs when a patient’s body gets caught in spaces within or between bed components‚ potentially leading to serious injury or even death․ Awareness of these hazards is the first line of defense․
Specifically‚ pay close attention to the areas between the bed frame and side rails‚ and around the head and foot boards․ Regularly inspect these areas to ensure there are no gaps large enough for a body part to become lodged․ Always ensure the mattress is properly centered on the bed frame to minimize these spaces․
Side rails should be fully extended and securely locked in place‚ especially for patients at risk of falling or those with limited mobility․ Never operate the bed with missing or damaged side rails․ Caregivers should be thoroughly trained on proper side rail operation and entrapment prevention techniques․ Consistent vigilance and adherence to these guidelines are essential for maintaining a safe patient environment․
Mattress Centering and Proper Placement
Correct mattress positioning is paramount for both patient safety and comfort when utilizing a Drive hospital bed․ A properly centered mattress minimizes the risk of entrapment within the bed frame and ensures even weight distribution‚ reducing pressure points․ The mattress should fully cover the bed frame‚ leaving no gaps along the sides‚ head‚ or foot․
Mattress should be centered on the bed frame; regularly check and readjust as needed‚ particularly after adjustments to the bed’s height or position․ Ensure the mattress fits snugly and doesn’t slide or shift during use․
Using an ill-fitting or improperly placed mattress can create dangerous voids where a patient could become stuck․ Inspect the mattress regularly for damage or wear‚ and replace it if necessary․ Prioritize a secure and flush fit to maximize patient safety and promote a comfortable healing environment․

Contacting Drive for Assistance
For warranty claims‚ technical support‚ or any bed-related concerns‚ please reach out to Drive directly or your authorized Drive product dealer for prompt assistance․
Warranty Information
Drive Medical warrants this hospital bed against defects in materials and workmanship for a specified period‚ typically beginning from the date of original purchase․ The warranty duration varies depending on the specific bed model and components; please retain your proof of purchase for verification․
This warranty covers repair or replacement of defective parts‚ at Drive’s discretion․ It does not cover damage resulting from misuse‚ abuse‚ improper assembly‚ unauthorized modifications‚ or normal wear and tear․ Damage caused by using non-approved accessories or cleaning agents also voids the warranty․
To initiate a warranty claim‚ contact Drive Medical customer service or your authorized dealer․ You may be required to provide photos or return the defective part for inspection․ Drive reserves the right to inspect any claimed defect before approving a repair or replacement․ This warranty is non-transferable and applies only to the original purchaser․
Dealer Information and Support
Your authorized Drive Medical dealer is a valuable resource for assistance with your hospital bed․ They can provide expert advice on bed selection‚ assembly‚ and operation‚ as well as offer local service and support․ Dealers often stock replacement parts and accessories‚ ensuring quick access to what you need․
To locate the nearest authorized Drive Medical dealer‚ visit the Drive Medical website and utilize their dealer locator tool․ You can search by zip code or city to find a convenient location․ Dealers can also assist with warranty claims and provide information on extended service plans․
Don’t hesitate to contact your dealer with any questions or concerns you may have regarding your hospital bed․ They are trained to provide prompt and professional support‚ ensuring your satisfaction and peace of mind․ Remember‚ the initial setup must be performed by a qualified technician‚ often arranged through your dealer․